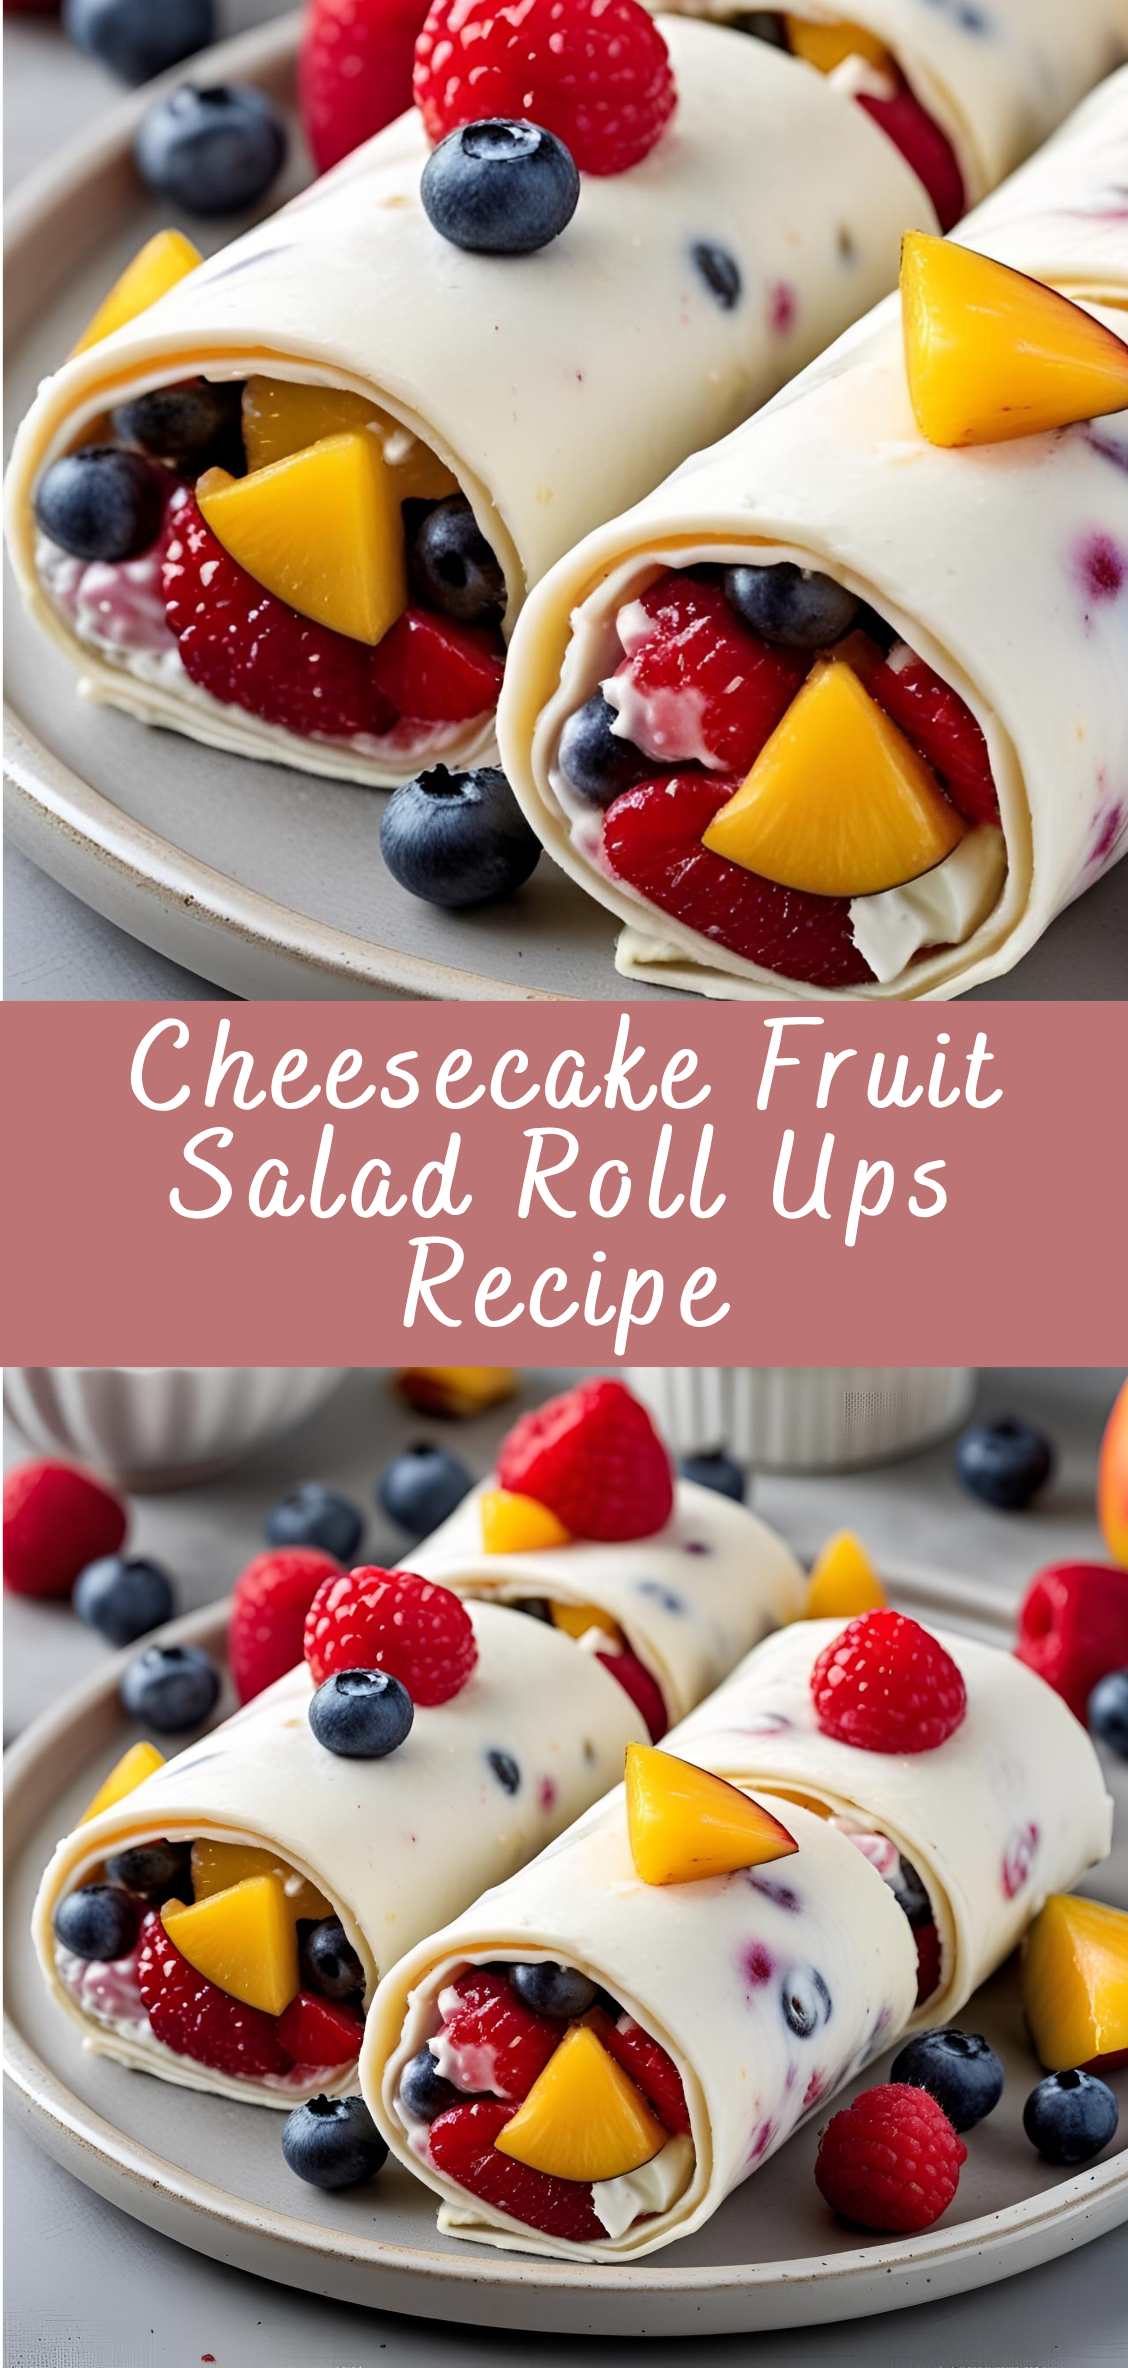
Cheesecake Fruit Salad Roll Ups Recipe
In the world of snacks and desserts, few treats manage to be as visually appealing, refreshingly light, and satisfyingly indulgent all at once as Cheesecake Fruit Salad Roll Ups. These delightful handheld bites combine the creamy, tangy richness of cheesecake flavor with the vibrant freshness of assorted fruits, all wrapped neatly into a fun, portable roll. Perfect for parties, lunchboxes, or anytime you crave a sweet treat that feels a little special, these roll ups strike the perfect balance between healthful and indulgent.

The idea behind Cheesecake Fruit Salad Roll Ups is simple yet inspired: a smooth cheesecake-flavored base spread over a soft tortilla or flatbread, layered with a colorful mix of fresh fruit salad, then rolled up tightly for easy eating. The creamy base acts like a luscious canvas, enhancing the natural sweetness and texture of the fruit, while the roll format makes it incredibly convenient and mess-free.
Why Cheesecake Fruit Salad Roll Ups?
Cheesecake is beloved worldwide for its creamy texture and rich flavor, but it’s often a heavy dessert reserved for special occasions. By reimagining cheesecake as a spread instead of a dense cake, and pairing it with fresh fruit, this recipe offers a lighter, fresher way to enjoy those classic flavors. The roll-up format is not only playful and portable but also highly customizable—you can tailor it to your favorite fruits, experiment with different bases, or add nuts and seeds for extra crunch.
Whether you’re looking for a nutritious breakfast alternative, a wholesome snack for kids, or a crowd-pleasing dessert for summer gatherings, Cheesecake Fruit Salad Roll Ups deliver on all fronts. They’re easy to prepare, visually appealing, and bursting with flavor, making them a favorite for all ages.
The Perfect Balance of Flavor and Texture
The success of Cheesecake Fruit Salad Roll Ups lies in the harmony of contrasting elements. The creamy, slightly tangy cheesecake spread complements the juicy, sweet, and sometimes tart fruits, while the soft tortilla adds a gentle chewiness that holds everything together. Each bite offers a satisfying mix of creaminess, freshness, and subtle crunch (especially if you add nuts or seeds), resulting in a delightful texture experience.
The versatility of this recipe is another key reason for its popularity. From strawberries and kiwi to mango and blueberries, the fruit choices are endless. You can also play with the base—using whole wheat tortillas for extra fiber, or gluten-free wraps for dietary preferences.
What You Will Learn in This Guide
In this comprehensive guide, we will walk through everything you need to know to make perfect Cheesecake Fruit Salad Roll Ups every time. You’ll find detailed ingredient explanations, step-by-step preparation instructions, creative variations, storage tips, and troubleshooting advice.
Whether you’re a seasoned home cook or new to making creative snacks, this article will equip you with the knowledge and inspiration to craft beautiful, delicious, and wholesome Cheesecake Fruit Salad Roll Ups that everyone will love.
Step 1: Gather and Prepare Your Ingredients
Begin by assembling all the ingredients. For the cheesecake base, you’ll need cream cheese (softened for easy spreading), powdered sugar for sweetness, and vanilla extract to enhance flavor. Greek yogurt or sour cream can be added for extra creaminess and a slight tang, depending on your preference.
Next, select a variety of fresh fruits. Some excellent options include:
-
Strawberries, sliced thinly
-
Blueberries, whole or halved
-
Kiwi, peeled and sliced
-
Mango, diced small
-
Pineapple, diced
-
Grapes, halved
Make sure the fruits are ripe but firm enough to hold their shape inside the roll. Wash and dry the fruit thoroughly, then prepare by slicing or dicing as needed.
Finally, choose your wrap. Flour tortillas are classic and soft, but you can use whole wheat, spinach, or gluten-free wraps to suit dietary needs or add extra flavor.
Step 2: Prepare the Cheesecake Spread
In a medium mixing bowl, combine softened cream cheese and powdered sugar. Use an electric mixer or a sturdy spoon to blend until smooth and creamy, ensuring there are no lumps.
If desired, add 2 to 3 tablespoons of Greek yogurt or sour cream to the mixture. This addition gives the spread a lighter texture and tangy flavor reminiscent of classic cheesecake.
Finish by stirring in 1 teaspoon of vanilla extract to round out the flavors. Taste the mixture and adjust sweetness with more powdered sugar if needed.
Step 3: Lay Out the Tortillas
Place your chosen tortilla or wrap flat on a clean cutting board or work surface. If the tortillas are a bit stiff, you can warm them slightly in a microwave for 10-15 seconds or on a dry skillet for a few seconds each side to make rolling easier and prevent cracking.
Step 4: Spread the Cheesecake Mixture Evenly
Using a butter knife or an offset spatula, spread a generous layer of the cheesecake mixture over the entire surface of the tortilla, leaving about a half-inch border around the edges. The spread should be even but not too thick—it needs to be creamy enough to hold the fruit in place without making the roll soggy.
Step 5: Add the Fresh Fruit Salad Layer
Next, evenly distribute your prepared fruit salad over the cheesecake spread. Aim for a colorful, balanced mix across the tortilla so each bite has a variety of flavors and textures.
Be careful not to overload the tortilla; too much fruit can make rolling difficult and cause the roll ups to fall apart.
Step 6: Roll Up the Tortilla Tightly
Starting from one edge, gently but firmly roll the tortilla over the fruit and cream cheese mixture. Use your fingers to keep the fruit tucked inside as you roll. Roll until the entire tortilla is wrapped tightly into a log shape.
If desired, wrap the roll in plastic wrap and chill for 15-30 minutes before slicing. Chilling helps the roll hold its shape and makes slicing easier.
Step 7: Slice and Serve
After chilling, use a sharp serrated knife to slice the roll into 1 to 1.5-inch pieces. The cross-section will reveal beautiful swirls of creamy cheesecake and vibrant fruit.
Arrange the roll ups on a serving platter. For an added touch, you can drizzle with honey, sprinkle with chopped nuts, or dust lightly with powdered sugar.
Cheesecake Fruit Salad Roll Ups Recipe
Ingredients
- 8 large flour tortillas (8-inch size)
- 8 oz cream cheese, softened
- ½ cup powdered sugar
- 1 tsp vanilla extract
- 1 cup mixed fresh fruit, finely chopped (strawberries, kiwi, blueberries, mango, apples, grapes, etc.)
- Optional: 2 tbsp honey or maple syrup (for extra sweetness)
- Optional garnish: shredded coconut, mini chocolate chips, or crushed graham crackers
Instructions
1. Prepare the Cheesecake Spread:
- In a medium bowl, beat softened cream cheese until smooth.
- Add powdered sugar and vanilla extract; beat until creamy and fully combined.
- If you want it sweeter, mix in honey or maple syrup.
2. Prepare the Fruit:
- Wash and finely chop your choice of fresh fruit.
- Pat dry if fruits are very juicy to prevent soggy roll ups.
3. Assemble the Roll Ups:
- Lay one tortilla flat on a clean surface.
- Spread a thin, even layer of the cheesecake cream cheese mixture over the tortilla, leaving a small border around the edges.
- Sprinkle a generous layer of chopped fruit evenly on top.
4. Roll and Chill:
- Carefully roll the tortilla up tightly from one edge to the other.
- Wrap each roll tightly in plastic wrap.
- Refrigerate for at least 1 hour to firm up.
5. Slice and Serve:
- Remove plastic wrap.
- Using a sharp knife, slice each roll into 1-inch pinwheels.
- Garnish with shredded coconut, mini chocolate chips, or crushed graham crackers if desired.
Notes
- Tortilla Options: Use whole wheat, spinach, or gluten-free tortillas for variety.
- Fruit Ideas: Try seasonal fruits or canned fruit drained well.
- Serving Tip: Great for lunchboxes, picnics, or as a light dessert.


