Creamy Garlic Herb Chicken Crescent Rolls: A Flaky, Flavor-Packed Twist on Classic Comfort
There’s something irresistibly comforting about warm, buttery crescent rolls — golden, flaky, and fresh from the oven. Add to that a creamy, herb-infused chicken filling kissed with garlic and a hint of tang, and you have a dish that’s not just satisfying, but unforgettable.
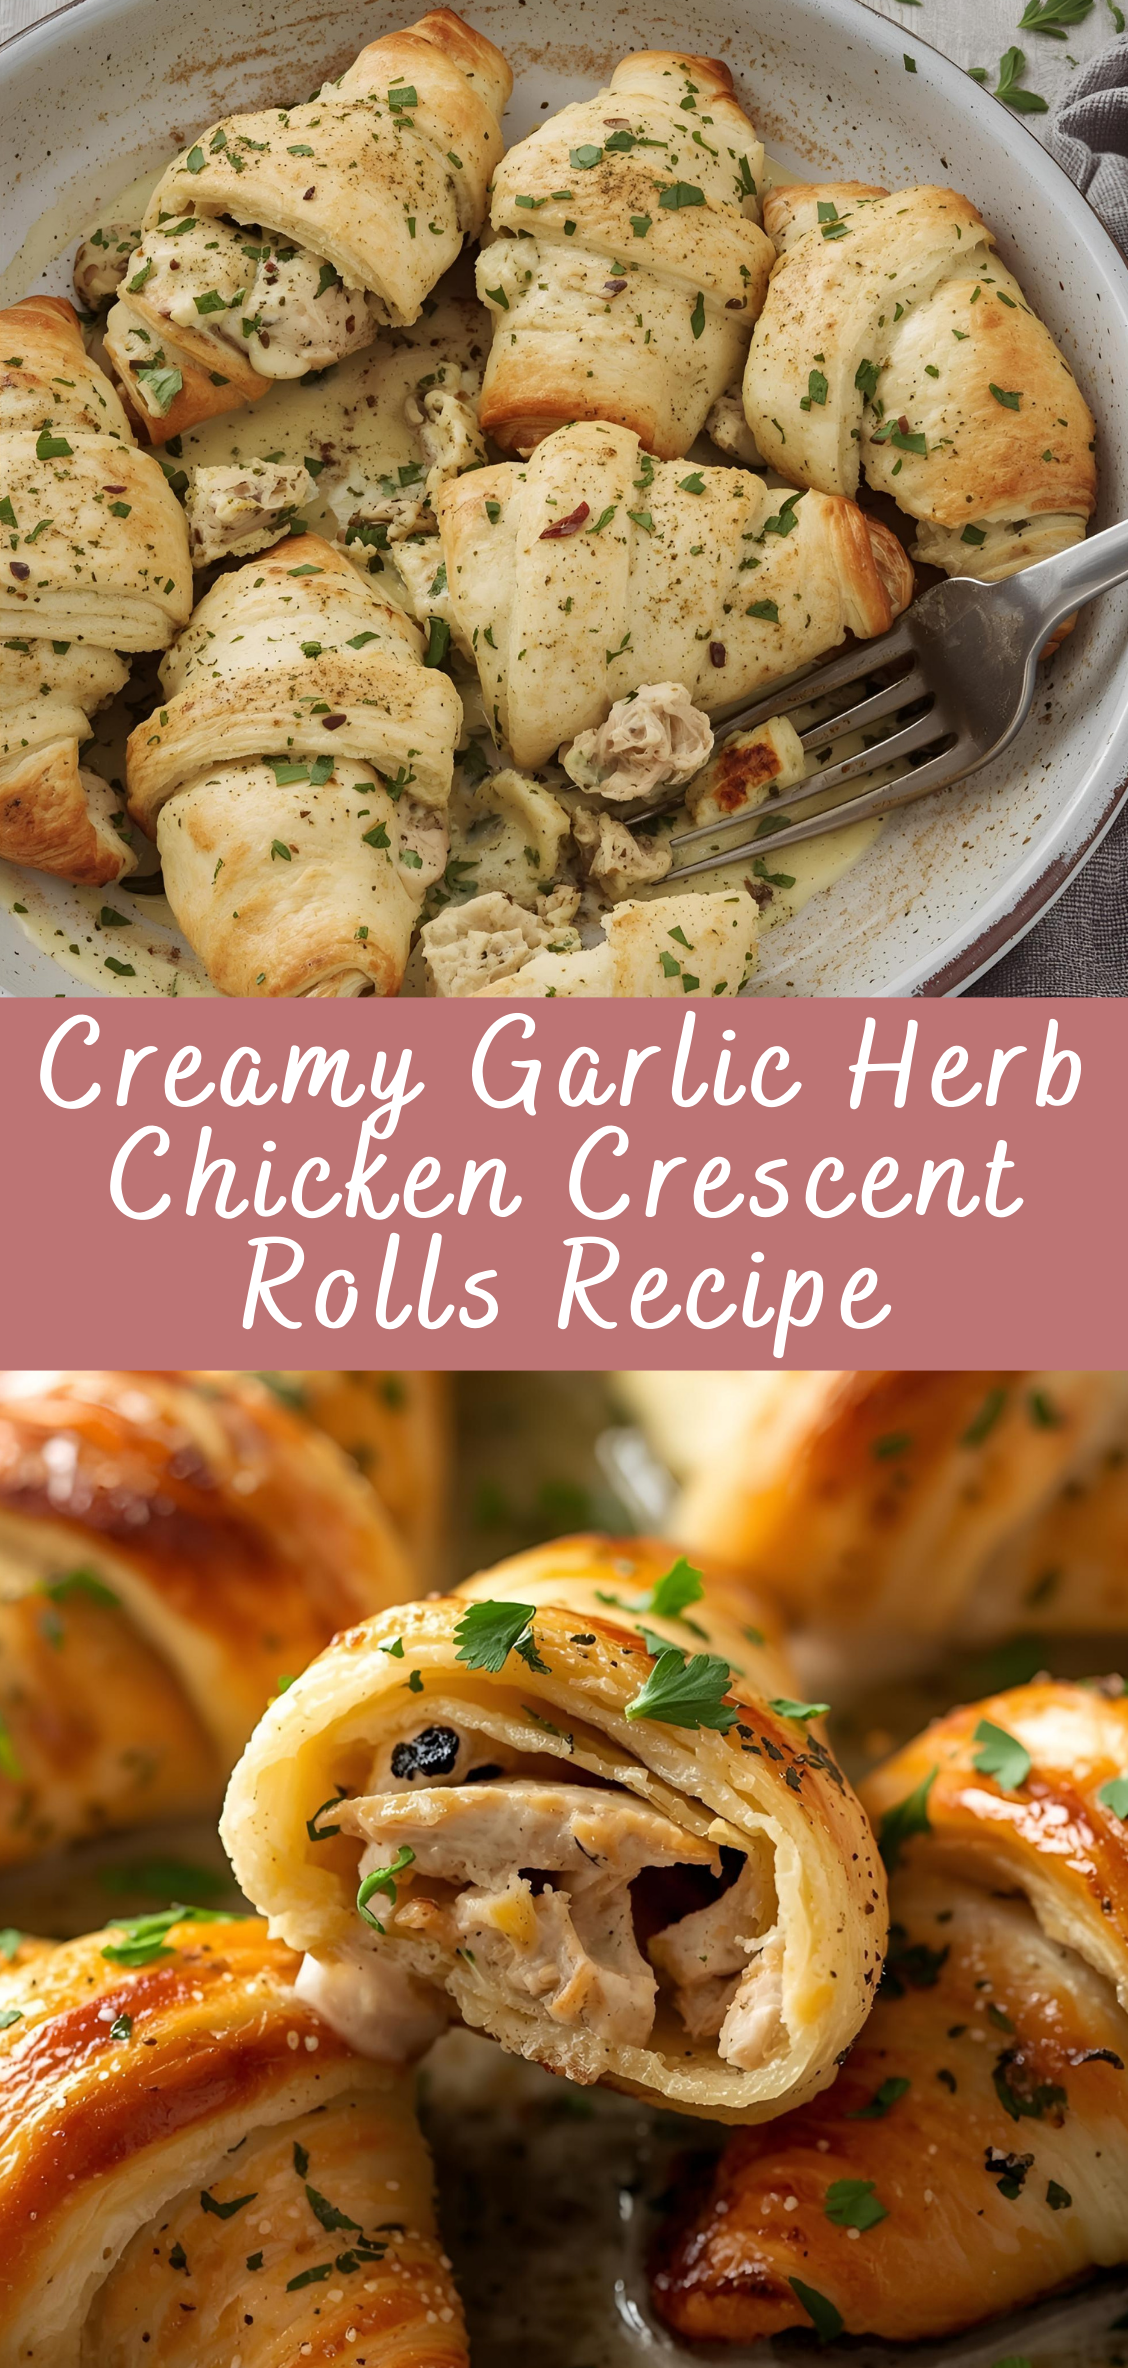
This is Creamy Garlic Herb Chicken Crescent Rolls, a recipe that brings together everything we love about comforting home-cooked meals and transforms it into something effortlessly elegant. It’s the kind of recipe that feels at home at a Sunday family dinner, but equally suitable for a brunch buffet, potluck table, or casual weeknight indulgence.
At its core, this dish is about balance and contrast. Tender, seasoned chicken is shredded and folded into a luscious, garlic-forward cream cheese base, brightened with fresh herbs and lightly seasoned with cracked black pepper, a dash of onion, and a pinch of tangy parmesan. This decadent filling is then wrapped in soft, buttery crescent dough and baked until puffed and golden — each bite delivering a satisfying crunch followed by a creamy, savory center.
But it’s not just flavor that makes this dish a standout — it’s versatility. These rolls can be the centerpiece of your dinner, a satisfying lunch, or a bite-sized party appetizer. You can serve them with a green salad and roasted vegetables for a full meal, or plate them next to a dipping sauce like garlic aioli, marinara, or herbed yogurt for a shared platter.
As we move through this guide, you’ll learn not only how to make these irresistible rolls step by step, but how to customize them, how to batch-prep for freezing, and how to elevate the flavor using simple techniques and pantry-friendly ingredients. You’ll discover variations for different dietary needs — such as low-carb, gluten-free, or vegetarian versions — along with clever ideas for turning leftovers into next-day masterpieces.
This isn’t just a recipe. It’s a gateway into a style of cooking that combines comfort with creativity, and convenience with real flavor.
Whether you’re feeding picky eaters, entertaining friends, or just in need of a warm bite of joy after a long day, these Creamy Garlic Herb Chicken Crescent Rolls deliver.
Get ready to preheat your oven, roll up your sleeves, and fill your kitchen with the rich, buttery aroma of something truly special.
Detailed Instructions: How to Make Creamy Garlic Herb Chicken Crescent Rolls
Step 1: Gather Your Ingredients
Before you begin, take a few minutes to measure, chop, and prepare all of your ingredients. A well-organized kitchen makes for a more enjoyable and stress-free cooking experience.
Essential Ingredients:
-
Cooked chicken, shredded or diced – 2 cups (breast or thigh, rotisserie works great)
-
Cream cheese – 8 oz (softened to room temperature)
-
Garlic cloves – 2 to 3, minced or grated
-
Fresh parsley – 2 tablespoons, chopped
-
Fresh thyme or dill (optional) – 1 tablespoon, chopped
-
Grated Parmesan cheese – ¼ cup
-
Salt – ½ teaspoon (adjust to taste)
-
Cracked black pepper – ½ teaspoon
-
Onion powder – ½ teaspoon
-
Optional: crushed red pepper flakes – a pinch for heat
-
Refrigerated crescent roll dough – 2 cans (8 rolls per can)
-
Egg (for egg wash) – 1, beaten with 1 tablespoon water
-
Butter (optional garlic butter glaze) – 2 tablespoons, melted
-
Optional toppings: more herbs, extra Parmesan, garlic powder
Step 2: Preheat the Oven and Prepare Your Baking Sheet
Set your oven to 375°F (190°C). This is the ideal temperature to get the crescent rolls golden and crispy on the outside while the creamy filling inside becomes warm and melty.
Prepare the pan:
-
Line a large baking sheet with parchment paper or a silicone baking mat. This prevents sticking and makes cleanup a breeze.
-
If you’re using a nonstick pan, you can lightly spray it with oil.
Step 3: Sauté the Garlic (Optional but Recommended)
While the recipe uses garlic, taking the time to quickly sauté it adds depth and removes any harsh raw flavor.
Instructions:
-
Heat 1 teaspoon olive oil or butter in a small skillet over medium heat.
-
Add minced garlic and sauté for about 30 seconds, or until just fragrant.
-
Remove from heat and let cool for a few minutes before mixing into the filling.
Pro Tip: If you’re in a rush, raw garlic works, but sautéing softens the sharpness and gives a mellow, savory base to your filling.
Step 4: Make the Creamy Chicken Herb Filling
In a medium mixing bowl, combine the following:
-
Softened cream cheese
-
Cooked chicken (shredded or finely chopped)
-
Sautéed garlic
-
Chopped parsley and any other herbs
-
Parmesan cheese
-
Salt, pepper, onion powder, red pepper flakes (if using)
Technique:
-
Use a spatula or fork to mix everything until fully incorporated. The mixture should be thick, creamy, and easily scoopable.
-
Taste the mixture and adjust seasoning as needed. You want a balance of saltiness from the Parmesan, freshness from the herbs, and warmth from the garlic.
Optional Add-Ins:
-
Chopped spinach (fresh or frozen and squeezed dry) for color and nutrients.
-
Chopped mushrooms sautéed and cooled.
-
A squeeze of lemon juice for brightness.
Step 5: Open and Separate the Crescent Dough
Unroll the crescent dough from the cans and gently separate along the perforated lines. You should have 16 individual triangle pieces (8 per can).
Work Carefully:
-
Place the triangles on a lightly floured surface or directly on the parchment-lined baking sheet for easier handling.
-
If the dough tears, press it back together with your fingers.
Tip for Flaky Texture: Keep the dough chilled until you’re ready to fill and roll. Warm dough becomes sticky and harder to work with.
Step 6: Fill and Roll the Crescents
Now for the fun part—assembling your garlic herb chicken crescent rolls.
How to Fill:
-
Place 1 to 1½ tablespoons of the chicken filling onto the wider end of each crescent triangle.
-
Carefully roll each one up, starting from the wide end and moving toward the point.
-
Tuck in the sides slightly to enclose the filling as you roll, like a little bundle.
Don’t overstuff — too much filling can cause the rolls to burst open during baking. Use just enough to give a generous bite without overwhelming the dough.
Step 7: Apply Egg Wash (for Golden Brown Perfection)
Brush the tops of the crescent rolls with the egg wash (1 beaten egg + 1 tablespoon water).
Why Egg Wash?
It gives the rolls a shiny, golden crust and helps any toppings stick. It’s especially effective when you want your baked goods to look bakery-quality.
Optional Toppings:
-
Sprinkle with extra Parmesan, dried herbs, or a pinch of garlic powder for added visual appeal and flavor.
Step 8: Bake Until Golden and Crispy
Place the baking sheet into the preheated oven and bake for 14–17 minutes, or until the rolls are puffed and deeply golden.
Baking Tips:
-
Check them at 12 minutes. Some ovens run hot, and crescent dough can darken quickly.
-
If you’re baking two trays, rotate them halfway through for even browning.
Test for Doneness: The edges should be golden, and the bottoms firm and fully cooked. Undercooked rolls will feel doughy in the center.
Step 9: Optional Garlic Butter Glaze
As soon as the rolls come out of the oven, you can elevate them even further with a quick garlic herb butter glaze.
To Make:
-
Melt 2 tablespoons of butter and stir in:
-
½ teaspoon garlic powder
-
1 tablespoon chopped fresh parsley (or ½ teaspoon dried)
-
-
Brush this over the warm crescent rolls for added richness and visual appeal.
Pro Tip: This small step adds restaurant-level flavor. Use it especially when serving these for guests or a special occasion.
Step 10: Let Cool Slightly and Serve
Let the rolls rest for 5 minutes before serving. This allows the filling to set slightly and prevents burnt tongues from hot cream cheese centers.
Serving Suggestions:
-
Pair with a green salad or roasted vegetables for a complete meal.
-
Serve alongside a bowl of soup like tomato basil, chicken noodle, or creamy mushroom.
-
Plate them with a dipping sauce:
-
Garlic aioli
-
Ranch dressing
-
Marinara
-
Herbed Greek yogurt dip
-
Serving Temperature: These are best served warm, but they’re still delicious at room temperature and perfect for lunchboxes or potlucks.
Creamy Garlic Herb Chicken Crescent Rolls Recipe
There’s something irresistibly comforting about warm, buttery crescent rolls — golden, flaky, and fresh from the oven. Add to that a creamy, herb-infused chicken filling kissed with garlic and a hint of tang, and you have a dish that’s not just satisfying, but unforgettable.
Ingredients
- For the Filling:
- 1 ½ cups cooked shredded chicken (rotisserie works great)
- 4 oz cream cheese, softened
- ¼ cup sour cream or plain Greek yogurt
- 1 clove garlic, minced
- ½ tsp dried parsley
- ½ tsp dried basil
- ½ tsp onion powder
- Salt & pepper to taste
- ¼ cup shredded mozzarella or cheddar cheese (optional)
- For Assembly:
- 1 (8-count) can refrigerated crescent roll dough
- 1 tbsp melted butter
- ½ tsp garlic powder
- 1 tsp dried parsley (or Italian seasoning)
- Grated Parmesan (optional, for topping)
Instructions
1. Preheat Oven:
Preheat your oven to 375°F (190°C) and line a baking sheet with parchment paper.
2. Make the Creamy Filling:
In a bowl, mix together:
Shredded chicken
Cream cheese
Sour cream or yogurt
Minced garlic
Dried herbs (parsley, basil, onion powder)
Salt & pepper
Cheese (if using)
Mix until smooth and well combined.
3. Assemble the Rolls:
Unroll the crescent dough and separate into 8 triangles.
Place about 1½ to 2 tablespoons of the chicken mixture on the wide end of each triangle.
Roll up the dough from the wide end to the tip, tucking in sides if needed to hold the filling.
Place on prepared baking sheet, seam side down.
4. Top with Garlic Butter:
Mix melted butter with garlic powder and dried parsley.
Brush each roll with the garlic butter mixture.
Optional: Sprinkle a little grated Parmesan on top for extra flavor and crunch.
5. Bake:
Bake for 15–18 minutes, or until golden brown and flaky.
6. Serve:
Let cool slightly before serving. These are great on their own or with a side of marinara or ranch for dipping.
Notes
- Add-ins: Chopped spinach, bacon bits, or green onions make great additions to the filling.
- Reheat: Reheat in a toaster oven or air fryer to keep them crispy.

