There is something timeless and universally comforting about a slice of chocolate cake. Its rich flavor, moist texture, and indulgent aroma evoke a sense of celebration, nostalgia, and simple pleasure. From elaborate layered creations to rustic homemade versions, chocolate cake has taken countless forms across cultures and generations. Yet, in a world where complexity often dominates baking, there is an increasing desire for simplicity—a wish to create something delicious without a long list of ingredients or complicated steps. Enter the 3-Ingredient Chocolate Cake, a recipe that embodies minimalism at its finest.
At first glance, the idea of making a cake with just three ingredients may sound almost impossible. Baking, after all, is often associated with precision and variety—flour, sugar, butter, eggs, leavening agents, and flavorings working together in delicate balance. However, this minimalist dessert challenges that notion entirely. By relying on the chemistry of a few carefully chosen components, the 3-Ingredient Chocolate Cake manages to deliver all the qualities people love about traditional cakes: a tender crumb, deep chocolate flavor, and a luscious, melt-in-your-mouth consistency. It proves that you don’t need a pantry full of items to create something remarkable; you only need a good understanding of the ingredients you do have.
This recipe has gained immense popularity in recent years, especially through social media platforms and minimalist cooking movements. The reasons are easy to understand. In a fast-paced world, people are drawn to recipes that are quick, affordable, and forgiving—yet still feel indulgent. The 3-Ingredient Chocolate Cake caters to all these desires. It is ideal for beginners who may feel intimidated by baking, for seasoned bakers who appreciate the beauty of simplicity, and for anyone who wants to make a dessert on short notice without sacrificing quality. It also fits beautifully into modern dietary and lifestyle preferences, as it can be adapted to be gluten-free, dairy-free, or high-protein depending on the chosen ingredients.
The beauty of this cake lies not only in its simplicity but also in its versatility. Depending on which three ingredients you choose, the result can range from a dense, fudgy brownie-like texture to a light, airy sponge. Some versions rely on eggs, chocolate, and butter to create a classic, rich flavor reminiscent of a flourless chocolate cake. Others might use chocolate, eggs, and crushed biscuits to achieve a soft yet structured base. There are even dairy-free or vegan variations that replace eggs with alternative binders like banana, yogurt, or condensed milk. Each version tells a slightly different story while staying true to the same minimalist philosophy.
The concept of minimal-ingredient baking is not entirely new. Historically, many traditional recipes evolved from limited access to ingredients, relying on simple, accessible components to create comforting foods. During times of scarcity or economic challenge, home bakers learned to innovate with what they had. The 3-Ingredient Chocolate Cake is a modern reflection of that same resourcefulness. It shows that creativity in the kitchen often thrives under constraint—that when we strip a recipe down to its essentials, we uncover its true essence.
Moreover, this recipe invites an appreciation for the science behind baking. With so few ingredients to work with, each one plays a critical role. The chocolate contributes not just flavor but also fat, sugar, and texture. Eggs serve as both a leavening and binding agent, giving the cake structure and lift. Depending on the chosen third ingredient—perhaps butter, biscuits, or cream—the overall mouthfeel and density of the cake shift dramatically. Understanding these interactions helps bakers not only perfect this recipe but also gain insight into how all cakes work on a molecular level. It becomes both a culinary experiment and an act of creative expression.
For those who love baking but dislike unnecessary complication, the 3-Ingredient Chocolate Cake feels like a revelation. It eliminates the need for measuring cups full of flour and sugar, it reduces cleanup, and it invites spontaneous baking moments. Imagine discovering a bar of chocolate in your pantry and realizing that, with just two more items, you could have a freshly baked cake within the hour. This spontaneity, combined with the satisfaction of creating something so luxurious from so little, is part of what makes this recipe so beloved.
Beyond its practicality, the 3-Ingredient Chocolate Cake embodies an emotional appeal. It’s a dessert that feels personal—something you can bake on a quiet evening, share with family, or make as a thoughtful gesture for someone you care about. Its simplicity makes it approachable to children and adults alike, offering a hands-on, enjoyable experience that results in something truly rewarding. The process itself—melting chocolate, whisking eggs, folding ingredients together—has a soothing, meditative rhythm that reminds us of the joy of homemade food.
This cake also represents the evolving landscape of modern baking, where creativity often intersects with constraint. In an era of excess, the minimalist movement encourages us to rethink what we truly need. The 3-Ingredient Chocolate Cake fits beautifully within this philosophy. It’s not about deprivation or cutting corners; it’s about celebrating how much can be achieved with less. Each bite becomes a reminder that simplicity can be deeply satisfying—and sometimes, the fewer the ingredients, the more their qualities shine.
In the following sections, we will explore everything there is to know about this remarkable dessert. We will break down the essential components, discuss the science that makes it work, and provide step-by-step instructions to ensure perfect results every time. We will also look at variations that suit different tastes and dietary needs, storage and serving tips, and even a few creative ways to elevate the presentation. By the end, you will not only have a foolproof recipe but also a deeper understanding of how simplicity can lead to extraordinary flavor.
The 3-Ingredient Chocolate Cake is more than just a recipe—it’s a statement about what makes food meaningful. It teaches us that great cooking doesn’t always require complexity, and that sometimes, the most delightful things in life come from the simplest combinations. Whether you are baking it for the first time or refining your favorite version, this cake invites you to rediscover the joy of minimalism in the kitchen—one rich, chocolatey slice at a time.
Detailed Instructions for Making a 3-Ingredient Chocolate Cake
Before we dive into the actual process, it is essential to understand that baking, though often associated with precision, is also about intuition and awareness. The 3-Ingredient Chocolate Cake simplifies the technical side of baking, but success still depends on careful attention to detail. Every step—from melting the chocolate to folding the batter—has an impact on texture, flavor, and appearance. Below is a comprehensive guide to making the perfect version of this cake, followed by deeper explanations of each stage.
Step 1: Prepare Your Ingredients and Tools
Ingredients:
-
Chocolate – 200 g (7 oz). Use good-quality dark or semi-sweet chocolate, around 60–70% cocoa solids.
-
Eggs – 3 large (room temperature).
-
Butter (or substitute) – 100 g (3.5 oz), unsalted.
That’s all you need for the classic version. Variations may use different third ingredients (for example, crushed biscuits or condensed milk), but for the basic and most balanced form, butter is ideal.
Tools:
-
Heatproof mixing bowls (at least two)
-
Rubber spatula or wooden spoon
-
Electric mixer or whisk
-
7- or 8-inch round baking pan
-
Baking parchment
-
Oven thermometer (optional but recommended)
Preparation:
-
Preheat your oven to 170°C (340°F).
-
Line your baking pan with parchment paper, leaving a little overhang so you can lift the cake easily after baking.
-
Lightly grease the sides and bottom with butter or neutral oil.
Why this matters:
Preheating ensures that your cake begins baking immediately at a consistent temperature. Lining the pan helps prevent sticking, especially since this cake has no flour and can be more fragile than traditional ones.
Step 2: Melt the Chocolate and Butter
-
Break the chocolate into small, even pieces and place them in a heatproof bowl.
-
Add the butter, cut into cubes.
-
Set the bowl over a pot of simmering water (the water should not touch the bottom of the bowl).
-
Stir occasionally until the mixture is completely melted and smooth.
-
Remove from heat and let it cool slightly for 5–7 minutes.
Alternative method:
If you prefer, you can melt the chocolate and butter in a microwave, heating in 20–30 second bursts and stirring between each round. Stop when about two-thirds of the chocolate is melted; residual heat will finish the process.
What’s happening here:
Melting chocolate gently allows its cocoa butter to liquefy without seizing. If overheated, chocolate can separate into a grainy mess, which can ruin the cake’s texture. Butter adds richness and smoothness, while also helping the melted chocolate remain fluid. Cooling it slightly before adding eggs prevents the eggs from scrambling when mixed in.
Step 3: Separate and Prepare the Eggs
-
Crack the eggs and separate the yolks from the whites.
-
Place yolks in one bowl and whites in another clean, grease-free bowl.
-
Using an electric mixer, beat the egg whites until soft peaks form. Continue beating until stiff peaks form—when you lift the whisk, the whites should stand tall without collapsing.
-
Beat the egg yolks lightly until smooth.
Why it matters:
Beaten egg whites are the main leavening agent in this recipe. They trap air, which expands during baking, giving the cake a light and airy texture despite the absence of flour or baking powder. Any grease or yolk in the whites can prevent them from foaming properly, so ensure your bowl and utensils are spotless. Meanwhile, beating the yolks ensures they combine smoothly with the chocolate mixture.
Step 4: Combine the Chocolate and Egg Yolks
-
Slowly pour the slightly cooled chocolate-butter mixture into the bowl with egg yolks.
-
Stir gently using a rubber spatula or whisk until fully combined and smooth.
-
The mixture should appear glossy, thick, and uniform.
Tip:
If the chocolate mixture is still warm, pour a little at a time into the yolks while stirring constantly to avoid curdling the eggs. The gradual blending helps stabilize the mixture and maintain a silky consistency.
Science behind it:
Egg yolks contain natural emulsifiers (like lecithin), which help bind fats and liquids together. When mixed with chocolate and butter, they create a stable, rich base that becomes the foundation of the cake’s structure and flavor.
Step 5: Fold in the Egg Whites
-
Add one-third of the beaten egg whites to the chocolate mixture. Stir gently to lighten the batter.
-
Add the remaining egg whites in two batches, folding carefully with a spatula in a figure-eight motion.
-
Stop mixing as soon as the batter looks uniform—overmixing can deflate the air bubbles.
Visual cue:
The finished batter should be smooth, airy, and pourable, with no visible streaks of egg white.
The importance of folding:
This is the most critical stage. Folding allows you to integrate the whipped egg whites without knocking out the air you’ve worked to create. Those trapped air pockets are what give the cake its delicate lift during baking. Overmixing at this point would make the final cake dense and heavy.
Step 6: Pour and Bake
-
Pour the batter into the prepared pan, smoothing the top gently.
-
Tap the pan lightly on the counter to release any large air bubbles.
-
Bake on the middle rack of the preheated oven for 25–30 minutes.
Baking cues:
-
The cake will puff slightly during baking and may crack a little on top (this is normal).
-
The surface should look set but still soft in the center.
-
Insert a toothpick about 2 cm from the edge—it should come out clean, while the center may remain slightly moist.
Temperature and timing:
Every oven behaves differently, so rely on visual and tactile cues as much as the clock. A slight jiggle in the center means the cake will stay moist and fudgy after cooling.
Scientific process:
As the cake bakes, the air trapped in the egg whites expands, lifting the structure. Meanwhile, proteins in the eggs coagulate, setting the form, while fats from the chocolate and butter keep the crumb tender. The sugar and cocoa solids undergo mild caramelization, enriching the flavor.
Step 7: Cooling and Setting
-
Remove the pan from the oven and place it on a wire rack.
-
Let the cake cool in the pan for 10–15 minutes.
-
Carefully lift it out using the parchment overhang and allow it to cool completely before slicing.
Why patience matters:
Flourless cakes continue to set as they cool. Cutting too early can cause the delicate structure to collapse or smear. Once cooled, the texture firms up into a luscious, truffle-like consistency.
Optional step:
For a mousse-like texture, refrigerate the cake for several hours or overnight. The chill deepens the chocolate flavor and gives the cake a denser mouthfeel, similar to a rich chocolate torte.
Step 8: Serving and Presentation
This simple cake pairs beautifully with a variety of accompaniments:
-
A light dusting of cocoa powder or powdered sugar
-
Fresh berries such as raspberries or strawberries
-
A dollop of whipped cream or a drizzle of ganache
-
A scoop of vanilla ice cream for contrast in temperature and texture
For an elegant touch, slice the cake with a warm knife (dip it in hot water and wipe dry) to achieve clean, professional edges.
Serving temperature tips:
-
Room temperature highlights the soft, moist crumb and rich cocoa flavor.
-
Chilled servings emphasize the dense, almost brownie-like texture.
Both are delightful—it depends on your personal preference.
Step 9: Storage and Shelf Life
-
Room Temperature: Store the cake in an airtight container for up to 2 days.
-
Refrigerated: Keeps well for 4–5 days; serve after letting it sit at room temperature for about 15 minutes.
-
Frozen: Wrap tightly in plastic wrap and foil, and freeze for up to 2 months. Thaw overnight in the refrigerator.
Proper storage preserves moisture and prevents the cake from absorbing other odors.
Step 10: Troubleshooting Common Issues
-
Cake collapsed after baking:
Likely overmixed batter or underbaked center. Use gentle folding and ensure the oven temperature is steady. -
Grainy texture:
The chocolate may have seized or overcooked during melting. Melt slowly over low heat. -
Egg whites didn’t rise:
The bowl or whisk might have had grease or yolk residue. Always ensure they are perfectly clean and dry. -
Cake too dense:
Could result from deflated egg whites or excessive folding. Handle batter gently. -
Cake too dry:
Overbaking is the main cause. Check doneness earlier next time and remember the cake continues to firm as it cools.
Step 11: Understanding the Texture Variations
Depending on your technique and baking time, the final texture of the cake can fall into three general categories:
-
Fudgy and Dense (like a flourless torte):
Shorter baking time (around 25 minutes). Perfect for serving chilled. -
Moist and Soft (classic version):
Around 30 minutes baking time. A tender, melt-in-your-mouth texture. -
Light and Airy (soufflé-like):
Slightly longer whipping of egg whites and gentler folding, plus a slightly longer bake (32–35 minutes).
Understanding these variations lets you customize the outcome to your taste.
Step 12: A Final Word on Simplicity
What makes this 3-Ingredient Chocolate Cake so appealing is that it embodies efficiency without compromise. Each step, though seemingly minimal, plays an essential role in building structure, flavor, and balance. By focusing on quality and technique rather than quantity, this cake transforms the humble act of baking into a celebration of precision and simplicity.
Even with only three ingredients, you engage nearly every core principle of baking: emulsification, aeration, heat transfer, and protein coagulation. In mastering this minimalist recipe, you gain a foundation that enhances your understanding of more complex desserts in the future.
3 Ingredient Chocolate Cake
There is something timeless and universally comforting about a slice of chocolate cake. Its rich flavor, moist texture, and indulgent aroma evoke a sense of celebration, nostalgia, and simple pleasure. From elaborate layered creations to rustic homemade versions, chocolate cake has taken countless forms across cultures and generations. Yet, in a world where complexity often dominates baking, there is an increasing desire for simplicity—a wish to create something delicious without a long list of ingredients or complicated steps. Enter the 3-Ingredient Chocolate Cake, a recipe that embodies minimalism at its finest.
Ingredients
- 4 large eggs
- 8 oz (225 g) semisweet or dark chocolate (chopped or chocolate chips)
- 2 tbsp unsalted butter (optional but recommended for extra richness)
- Optional Toppings: Powdered sugar, cocoa powder, whipped cream, or berries.
Instructions
- Preheat oven to 350°F (175°C). Grease and line a 7-inch (18 cm) round cake pan with parchment paper.
- Melt the chocolate and butter together using a double boiler or microwave in 20–30 second intervals. Stir until smooth and glossy. Let it cool slightly.
- Whisk the eggs in a separate bowl until light and frothy (about 2–3 minutes with a hand mixer).
- Combine the melted chocolate mixture with the eggs in three parts, folding gently until smooth and fully incorporated.
- Pour the batter into the prepared pan and smooth the top.
- Bake for 30–35 minutes, or until the center is just set and a toothpick comes out with a few moist crumbs.
- Cool completely before removing from the pan. The cake will deflate slightly—this is normal and gives it a dense, truffle-like texture.
Notes
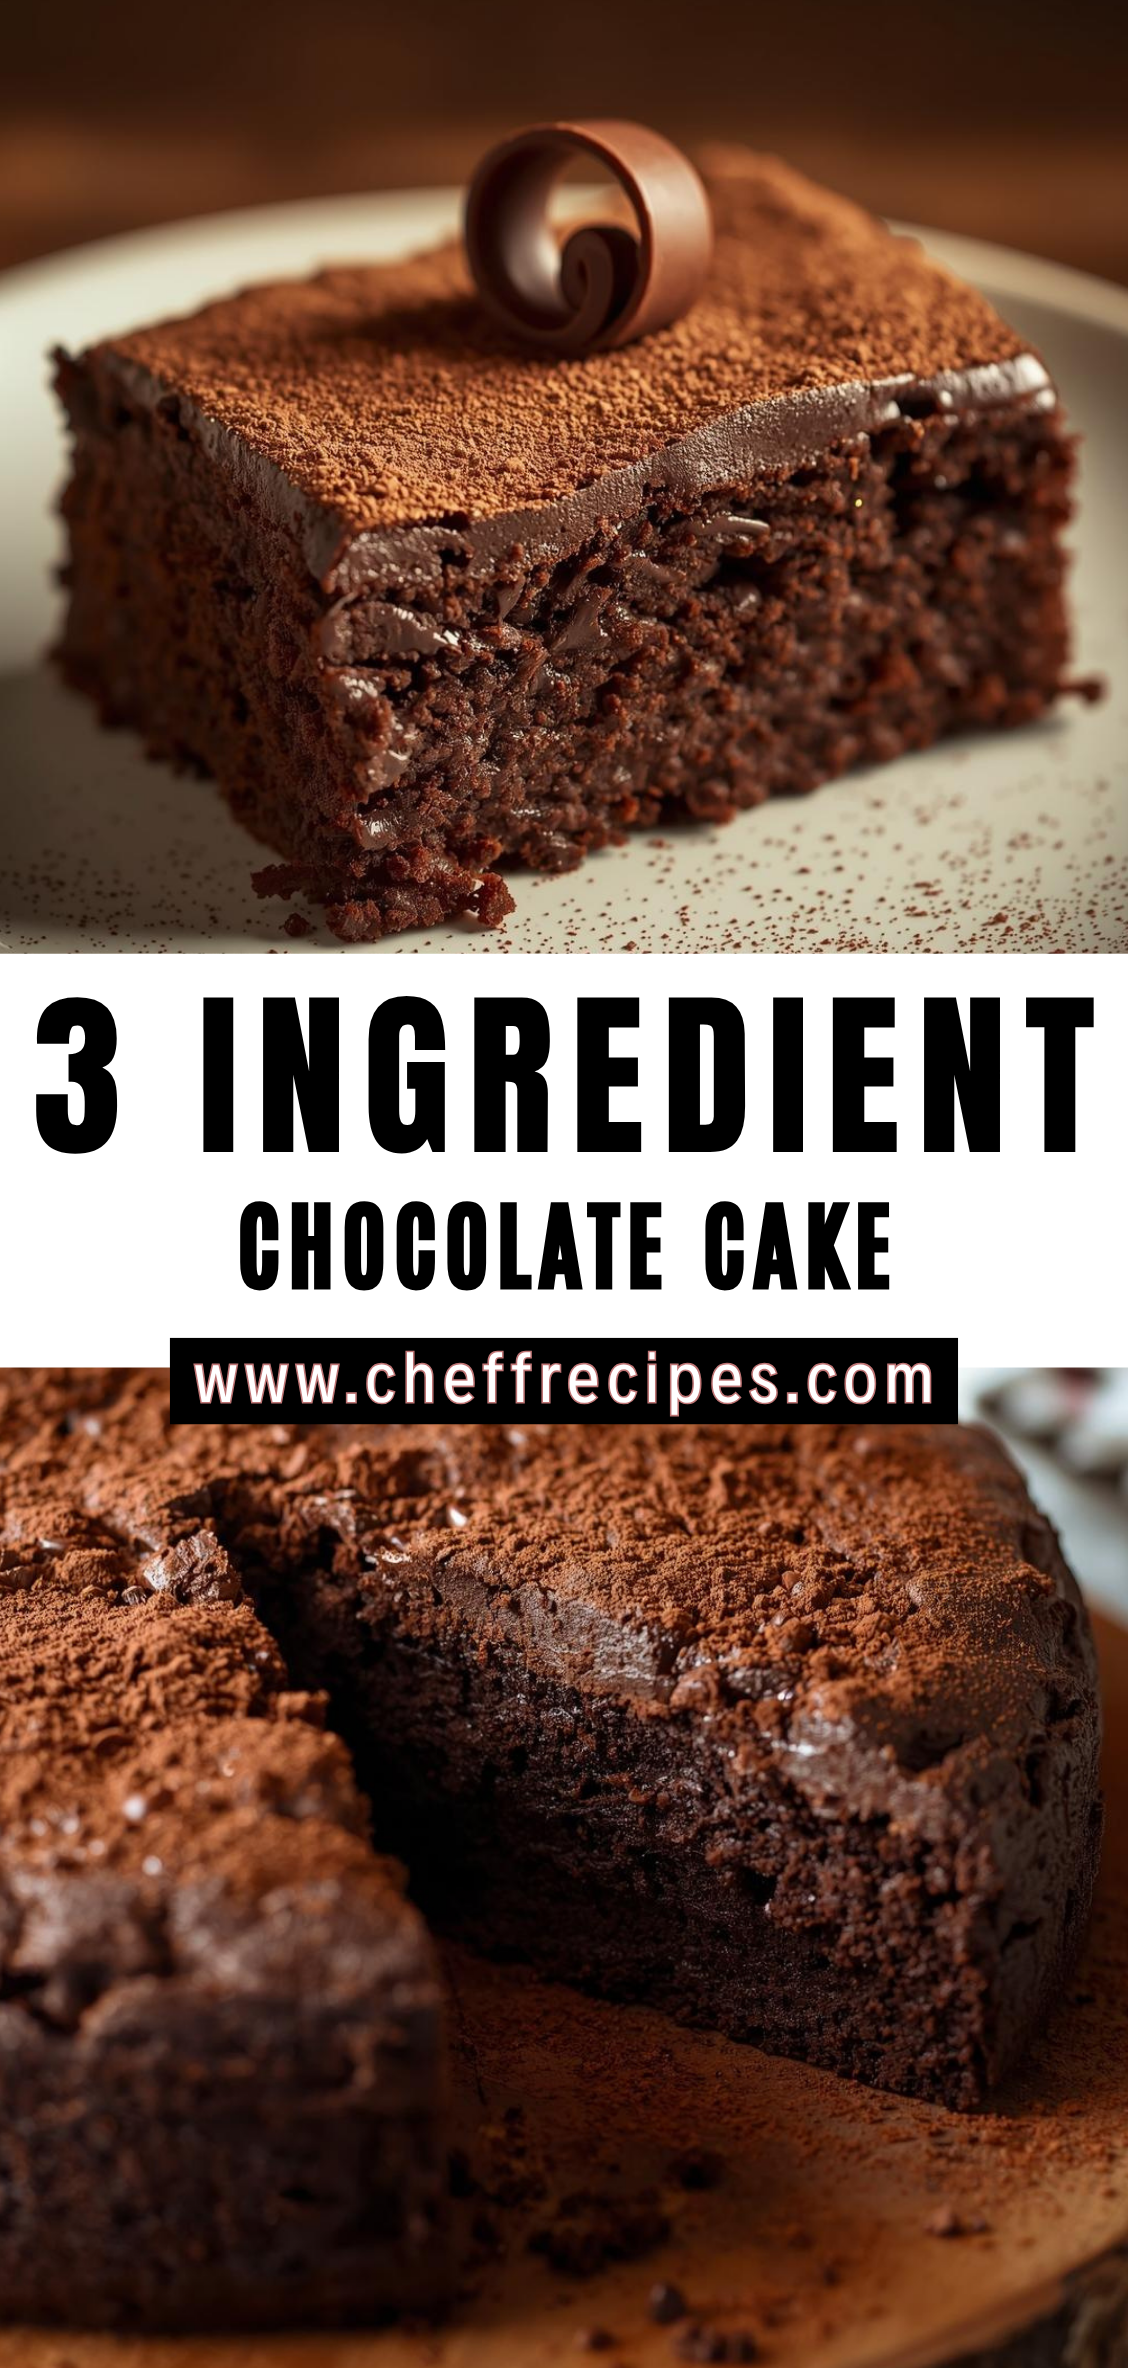
- Texture: The cake is rich and fudgy—similar to a flourless chocolate cake.
- Chocolate Choice: Use high-quality chocolate (at least 60% cocoa) for best flavor.
- Optional Add-ins: A pinch of salt, a splash of vanilla, or a teaspoon of espresso powder can enhance the chocolate flavor.
- Serving Tip: Dust with powdered sugar or serve with a dollop of whipped cream or ice cream.

