Mini cherry cheesecakes occupy a special place in the world of homemade desserts. They are elegant yet approachable, charmingly small yet rich with the same creaminess that has made classic cheesecake a beloved treat for generations. These individual portions offer a balance that full-sized cheesecakes sometimes struggle to achieve: they are simple to serve, visually appealing, and perfectly sized for gatherings where guests can enjoy a sweet bite without committing to a large dessert. Their modest size also encourages experimentation with presentation and flavor, allowing home bakers to create a dessert that feels both timeless and uniquely personal.
Although cheesecake is often associated with delicacy and precision, mini versions remove much of the stress. They bake more evenly, cool more quickly, and rarely crack, solving one of the most common challenges in cheesecake baking. Because each cake is self-contained in its own liner or mold, there is no need for complicated water baths or extensive chilling periods. The result is a dessert that is accessible both to beginners who may be intimidated by the idea of a full cheesecake and to seasoned bakers who want reliable, consistent results without a long process. Mini cheesecakes capture the essence of a classic recipe in a scaled-down format that fits effortlessly into modern baking routines.
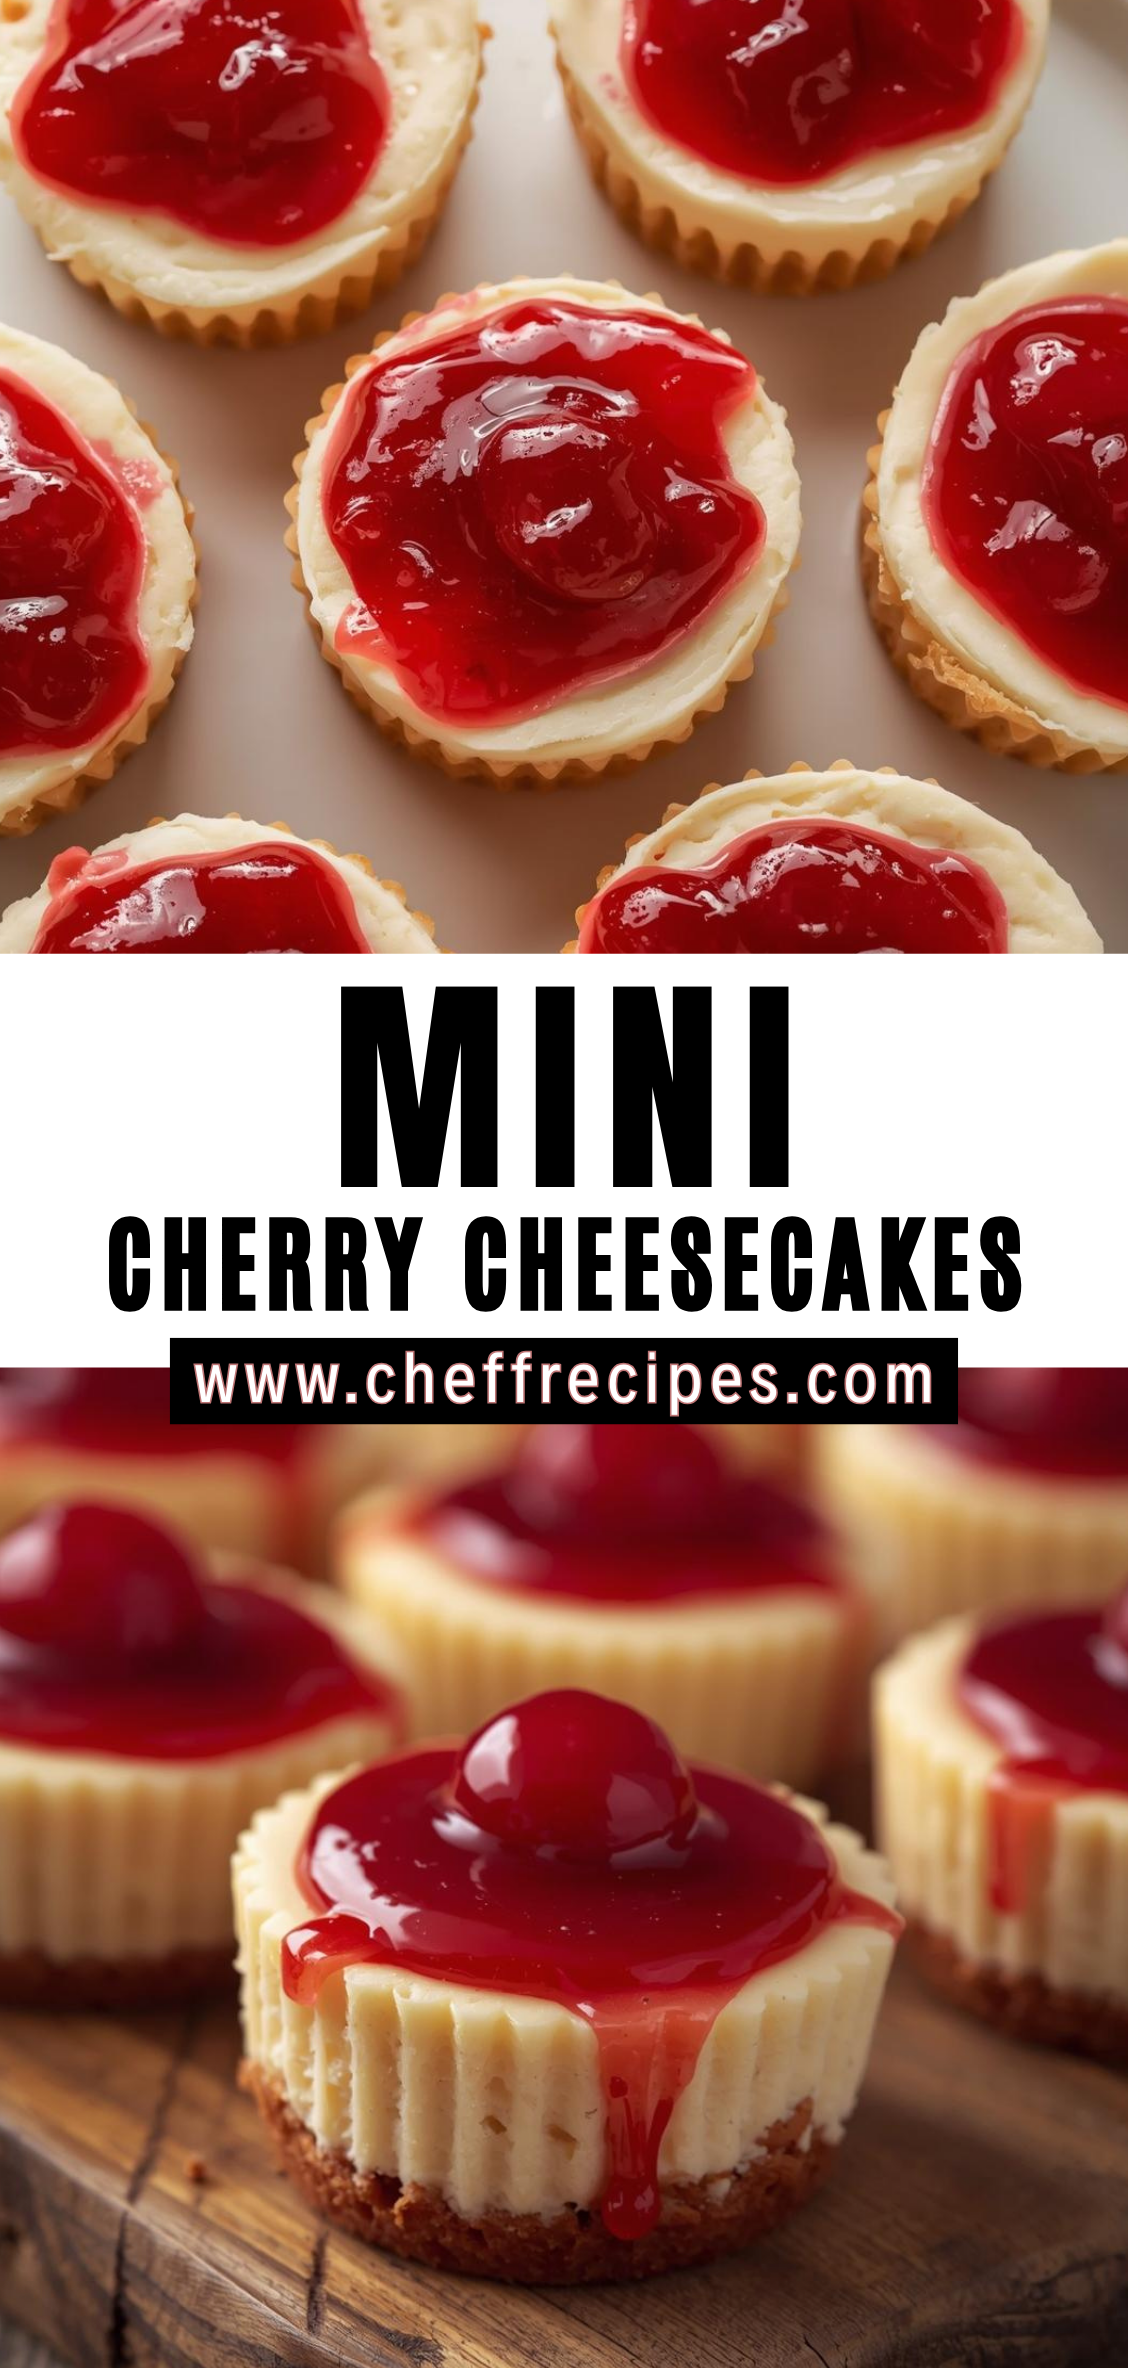
The topping of cherry compote or pie filling brings a bright contrast to the creamy base. Cherries introduce acidity, color, and a hint of nostalgia reminiscent of classic diner desserts. Their glossy finish enhances presentation while complementing the richness of the cheesecake beneath. Whether using homemade cherry sauce simmered with sugar and lemon or a high-quality canned filling, the vibrant topping transforms the mini cheesecakes into a dessert that catches the eye before even offering its first bite. This combination of creamy, smooth filling and tart, fruity topping creates a harmonious flavor experience that appeals to a wide range of tastes.
Mini cherry cheesecakes also lend themselves well to various occasions. They are an ideal dessert for holiday parties, baby showers, potlucks, birthdays, or intimate dinners. Their neat, portable form makes them easy to transport, and they hold up well when made ahead. Refrigerating them overnight deepens their flavor and firms their texture, allowing hosts to prepare desserts in advance with confidence. At the same time, their compact nature enables versatile serving options, from elegant plated presentations to casual dessert tables where guests can help themselves.
Beyond convenience and appeal, these cheesecakes offer a platform for creativity. The crust can be made with classic graham crackers, crisp vanilla cookies, chocolate wafers, or even spiced biscuit crumbs for a seasonal twist. The cheesecake filling may remain traditional or be infused with flavors such as vanilla bean, almond extract, lemon zest, or even a touch of white chocolate. Although this recipe centers on cherries, the topping can easily be swapped for blueberries, strawberries, caramel, or chocolate ganache for those seeking variation. The miniature size encourages exploration since multiple flavors can be produced in one batch.
Step-by-Step Instructions
1. Preparing Your Workspace
The process of making mini cheesecakes is much smoother when your kitchen is organized before you begin. Mini cheesecakes require multiple components assembled in stages: the crust, the cheesecake batter, the baking, cooling, and finally the cherry topping. Clear a large work surface and gather all necessary tools, including a muffin pan, paper or silicone liners, mixing bowls, a hand or stand mixer, and a small saucepan if preparing homemade cherry topping.
Place all measured ingredients in accessible containers and allow the cream cheese, eggs, and sour cream to come to room temperature. Room-temperature ingredients are essential for preventing lumps in the batter and ensuring a silky, even texture after baking. Having everything laid out before starting also helps maintain a steady workflow, which is especially important when working with a batter that must be mixed gently and carefully.
2. Preparing the Crust
Set up your muffin pan with liners. Even if you are using a nonstick muffin pan, liners are strongly recommended, as they make removing and serving the cheesecakes effortless while preserving their shape.
In a medium bowl, combine finely crushed graham crackers, granulated sugar, and melted butter. Stir until the texture resembles wet sand and the mixture clumps slightly when pressed between your fingers. Each crumb should be thoroughly coated in butter, as dry spots will cause uneven crusts and crumbling.
Spoon about 1 to 1½ tablespoons of crust mixture into each muffin liner. Using the flat bottom of a small glass, a measuring cup, or your fingertips, press the crust firmly into an even layer. A tightly packed crust provides a stable base that will not fall apart when the cheesecake is removed from the liner. Place the muffin pan in the refrigerator for at least ten minutes while preparing the cheesecake batter. Chilling the crust helps it set enough to maintain its shape during baking.
3. Mixing the Cheesecake Filling
Place the softened cream cheese in a large mixing bowl. Beat on medium speed until completely smooth and free of lumps. Do not rush this step; the smoother the cream cheese is at the beginning, the smoother the overall batter will be.
Add the granulated sugar and continue beating until the mixture becomes light and creamy. Scrape down the sides and bottom of the bowl frequently to ensure that no unmixed cream cheese remains. Incorporate the sour cream and vanilla extract, mixing just until combined.
Crack the eggs into a separate small bowl. Add them one at a time to the cream cheese mixture, beating on low speed. It is essential not to overmix once the eggs are added, as excessive mixing introduces air into the batter. Air bubbles can cause mini cheesecakes to rise too quickly and collapse or crack during cooling. Mix only until the eggs disappear into the batter, leaving it thick, glossy, and uniform.
4. Filling the Muffin Cups
Remove the chilled crusts from the refrigerator. Using a spoon or small scoop, portion the cheesecake batter evenly into each liner. Fill each cup about two-thirds to three-quarters full.
If you notice air bubbles on the surface of the batter, tap the muffin pan gently against the counter. This encourages trapped air to rise and escape, reducing the risk of cracking and promoting more even baking.
Take your time ensuring each cup is filled consistently. Uniformity in size helps all the mini cheesecakes bake at the same rate, preventing some from overbaking while others remain underdone.
5. Baking
Preheat your oven to 325°F (163°C). This slightly lower temperature helps prevent the tops from rising or browning too quickly, which can lead to cracking.
Place the muffin pan on the middle rack of the oven. For the best results, do not use a water bath; mini cheesecakes bake more evenly than full-sized ones and do not require the added moisture.
Bake for 15 to 18 minutes. The cheesecakes are done when the edges appear set but the centers still jiggle slightly when the pan is gently shaken. If the centers look wet or soupy, they need another minute or two. Avoid baking until the tops are fully firm, as this will result in a dry texture.
6. Cooling
Cooling is one of the most crucial steps in achieving a creamy, smooth texture. Remove the pan from the oven and place it on a cooling rack. Allow the cheesecakes to cool in the pan for approximately 30 minutes. During this time, they will settle slightly, and the centers will finish setting.
After 30 minutes, transfer the cheesecakes (still in their liners) to the refrigerator. Chill for at least 2 hours before adding the cherry topping. Longer chilling, such as overnight, improves the final texture and makes the flavors more pronounced.
Do not rush the chilling process. If served too soon, the cheesecakes may feel soft and lack structure.
7. Preparing the Cherry Topping
You may use canned cherry pie filling for convenience, but a homemade topping adds exceptional depth of flavor.
To make homemade topping, combine fresh or frozen cherries with sugar, lemon juice, and a little water in a saucepan. Bring the mixture to a gentle simmer over medium heat. Stir often to dissolve the sugar and distribute the heat evenly.
Once the cherries soften, mash a few lightly with a spoon to help release their juices. If a thicker consistency is desired, create a slurry by mixing cornstarch with a small amount of water and stirring it into the hot cherry mixture. Continue simmering until the sauce thickens enough to cling to a spoon.
Remove the pan from heat and let the topping cool completely. Warm cherry topping will melt the cheesecake surface, so temperature control is essential.
8. Adding the Topping
Once the cheesecakes are fully chilled, spoon a generous amount of cherry topping onto each one. Pressing lightly ensures the topping adheres to the surface.
Each mini cheesecake should have a balanced ratio of fruit to filling: enough cherry topping to provide contrast without overwhelming the delicate cheesecake beneath. Smooth the topping so it sits neatly and enhances visual appeal.
9. Final Chill Before Serving
After topping, return the cheesecakes to the refrigerator for at least 30 minutes. This brief final chill helps the topping set and allows the flavors to meld.
Chilling also ensures a clean bite when serving. Mini cheesecakes eaten too warm can soften around the edges, while cold ones retain their shape beautifully.
10. Serving
Before serving, gently peel away the liners. The cheesecakes should release easily thanks to the well-chilled structure and the smooth texture of the filling.
Serve on a platter or individually plated. If presenting at an event or buffet, consider placing them in decorative paper cups for a polished appearance.
Mini cherry cheesecakes are best enjoyed chilled. The creamy filling, crisp base, and tart cherry topping together create a balance of textures and flavors ideal for nearly any occasion.
Mini Cherry Cheesecakes
Mini cherry cheesecakes occupy a special place in the world of homemade desserts. They are elegant yet approachable, charmingly small yet rich with the same creaminess that has made classic cheesecake a beloved treat for generations. These individual portions offer a balance that full-sized cheesecakes sometimes struggle to achieve: they are simple to serve, visually appealing, and perfectly sized for gatherings where guests can enjoy a sweet bite without committing to a large dessert. Their modest size also encourages experimentation with presentation and flavor, allowing home bakers to create a dessert that feels both timeless and uniquely personal.
Ingredients
- For the Crust:
- 1 cup graham cracker crumbs
- 2 tbsp granulated sugar
- 4 tbsp unsalted butter, melted
- For the Cheesecake Filling:
- 8 oz cream cheese, softened
- ⅓ cup granulated sugar
- 1 tsp vanilla extract
- 1 large egg
- 1 tbsp sour cream (optional, for extra creaminess)
- For the Topping:
- 1 can cherry pie filling (about 1 cup)
Instructions
1. Prepare the Crust
- Preheat oven to 325°F (165°C).
- Line a muffin tin with 12 cupcake liners.
- Mix graham cracker crumbs, sugar, and melted butter until evenly moistened.
- Add about 1 tablespoon of crust mixture to each liner and press down firmly.
- Bake for 5 minutes, then set aside.
2. Make the Cheesecake Filling
- In a bowl, beat cream cheese until smooth.
- Add sugar and mix until creamy.
- Add vanilla and sour cream; mix well.
- Add egg last and mix on low speed, just until combined (avoid overmixing).
3. Fill and Bake
- Spoon filling over crusts, dividing evenly among 12 cups.
- Bake at 325°F (165°C) for 15–17 minutes, until centers are set but slightly jiggly.
- Remove from oven and cool to room temperature.
4. Chill and Serve
- Refrigerate for at least 2 hours (or up to overnight).
- Top each mini cheesecake with 1–2 spoonfuls of cherry pie filling.
- Serve chilled.
Notes
- Variations: – Use vanilla wafers or Oreos for the crust. – Swap cherry topping for blueberry, strawberry, or caramel.
- Tip for smooth cheesecake: Ensure cream cheese is fully softened and avoid overmixing once the egg is added.

