Cottage cheese chips might be one of the most surprising, quietly transformative recipes to emerge from the modern wave of high-protein, low-effort cooking. They challenge nearly every assumption one might hold about cottage cheese: that it is soft, mild, difficult to crisp, or best confined to bowls and spoons rather than baking sheets. Yet, when handled with intention, cottage cheese becomes something almost unrecognizable from its original form. It turns crisp, golden, and satisfyingly crunchy—morphing into a snack that feels both familiar and new, indulgent yet nutritionally conscious. It is precisely this duality that has made cottage cheese chips one of the most intriguing culinary experiments in contemporary home kitchens.
The idea itself seems improbable at first. Cottage cheese contains high moisture, delicate curds, and a creamy texture that rarely suggests structural stability. Chips, on the other hand, evoke thoughts of thinness, crunch, and dry heat. The juxtaposition of the two concepts—soft curds becoming brittle crisps—feels almost like culinary alchemy. And in many ways, it is. Through a thoughtful application of heat, spacing, seasoning, and patience, cottage cheese undergoes a transformation that is both textural and aromatic. What begins as a lumpy spoonful of dairy ends as a wafer-like chip with tiny pockets of airy crispness and deeply savory notes.
This transformation is thrilling for several reasons. First, it speaks to the ingenuity of modern home cooks who are increasingly interested not only in flavor but in the processes that generate new textures. Recipes like this reveal that familiar ingredients can behave unpredictably under new conditions. Second, it speaks to changing attitudes around healthy snacking. Cottage cheese has long been recognized as a nutritious, protein-dense food, but it has rarely been celebrated for its versatility. In chip form, it becomes a satisfying alternative to traditional salty snacks, offering crunch and richness without relying heavily on oil or refined carbohydrates.
The rise in popularity of cottage cheese chips also reflects a broader culinary movement—one that values simplicity, minimal ingredients, and efficient methods. Many people want snacks that fit into busy lifestyles but still feel homemade and intentional. Cottage cheese chips answer that call. With only a few ingredients and a single sheet pan, you can create a snack that feels artisanal without requiring hours of work or specialty equipment. It is a recipe that is approachable for beginners but also interesting enough for experienced cooks who enjoy discovering new techniques.
Another remarkable aspect of cottage cheese chips is their adaptability. Because the base flavor of cottage cheese is mild, it pairs beautifully with a wide range of seasonings. With just a sprinkle, you can nudge these chips in many possible directions—herbaceous, spicy, cheesy, smoky, or even subtly sweet. Paprika, garlic, chives, lemon pepper, chili flakes, Parmesan, nutritional yeast, everything seasoning, or even cinnamon sugar (for a dessert-like variation) can completely shift the character of the chips. The result is a snack that feels customizable in a way most store-bought alternatives cannot match.
The process of making cottage cheese chips is also surprisingly sensory. The scooping of small mounds of cottage cheese onto a tray, the gentle spreading to create thin discs, the slow evaporation of moisture as the chips bake, and the moment they shift from glossy to matte—a sign that crispness is approaching—make the experience both meditative and rewarding. As the chips cool, their texture sharpens, and the aromas from any seasonings intensify. The final result is a chip that snaps lightly between your fingers and delivers a savory, toasted bite that is distinct from anything bought in a bag.
Beyond taste and texture, cottage cheese chips represent a subtle reclamation of the home kitchen as a place of experimentation. For many years, home cooks have relied on packaged snacks because they seemed easier. Recipes like this remind us that homemade snacks can be just as quick—and far more customizable. Moreover, they allow you to avoid preservatives, artificial flavors, or excessive sodium. The simplicity of the ingredient list gives you control, which is one of the great pleasures of cooking from scratch.
There is also a practical side to the cottage cheese chip phenomenon. Many people who incorporate cottage cheese into their diets—whether for fitness reasons, weight management, or general health—eventually look for new ways to enjoy it. Eating it plain can become repetitive, and mixing it into spreads or bowls only goes so far. Transforming it into chips, however, opens an entirely new category of eating. You can pair cottage cheese chips with dips, use them as crunchy toppers for salads, crumble them over soups, or enjoy them straight from the oven. They elevate cottage cheese from something functional to something exciting.
The story of cottage cheese chips is also the story of how social media and modern food culture influence cooking trends. Short videos and recipe reels showcasing the crisping process have sparked widespread curiosity. For many viewers, seeing soft cheese become crisp in under an hour feels magical—and achievable. As a result, people who might not usually cook experiment with this recipe, often finding success on their first try. That sense of empowerment, of realizing that creative cooking can be simple, is part of what keeps these chips at the top of trending recipe lists.
From a culinary science perspective, cottage cheese chips are a fascinating example of how heat can reshape dairy. As moisture evaporates, proteins denature and reform, creating new structures that support crispness. Fat within the curds helps generate browning and nutty flavor compounds. Salt and seasonings meld into the surface as the chips bake, becoming more aromatic. This interplay of moisture loss, protein chemistry, and browning reactions explains why, despite the simplicity of the recipe, the final result tastes unexpectedly complex.
But beyond the science and trends, cottage cheese chips are simply enjoyable. They are light, crunchy, and deeply satisfying to eat. They fit into casual gatherings, lunch boxes, meal prep routines, and late-night snacking sessions. They also encourage experimentation—something as simple as switching the oven temperature or spreading the curds slightly thinner can produce a different texture. The recipe invites creativity without requiring perfection.
The introduction that follows will guide you through everything you need to know to create cottage cheese chips at home. From selecting the right type of cottage cheese to understanding how oven temperature affects crispness, from choosing seasonings to mastering thickness and spacing, these instructions aim to empower you to make chips that are tailored to your taste. As you continue through the next sections, you will gain confidence in the technique and discover many variations that allow this simple recipe to expand into a surprisingly versatile addition to your cooking repertoire.
Step-by-Step Instructions (Extremely Detailed)
Step 1: Select the Right Cottage Cheese
The success of cottage cheese chips begins long before the oven preheats—it begins with the cottage cheese itself. While it might seem intuitive that any container of cottage cheese will work, the reality is that texture, fat content, and curd size all influence the final chip.
1. Choose the correct fat percentage
Cottage cheese is commonly sold in 1%, 2%, and 4% milkfat varieties.
-
4% (full-fat) yields the crispest, most flavorful chips because fat aids browning and structural stability.
-
2% produces excellent chips with slightly less richness but still good crunch.
-
1% can work, but chips may be thinner, more fragile, and more prone to uneven browning due to lower fat.
2. Consider curd size
You will see varieties labeled “small curd” and “large curd.”
-
Small curd is easier to spread and yields more uniform chips.
-
Large curd works well, but the chips will have a more rustic appearance with airy pockets where the curds fuse together.
3. Examine moisture level
Some cottage cheeses contain more liquid than others. Excess moisture prolongs baking time and can reduce crispness. If your cottage cheese appears extremely wet, you can drain off a small amount of liquid using a fine-mesh strainer (do not rinse).
Step 2: Prepare Your Workspace and Tools
Even a simple recipe benefits from intentional setup.
1. Choose your baking tray
A heavy-duty, light-colored baking sheet works best. Dark sheets brown faster and can lead to uneven results.
2. Line with parchment paper
Parchment paper is essential. Cottage cheese curds soften and melt before crisping; without parchment, they will stick stubbornly to the tray.
3. Select your spreading tool
A spoon works fine, but a small offset spatula or the back of a tablespoon gives better control when shaping uniformly thin discs.
4. Preheat your oven
Set to 350°F (175°C) for slow, even drying.
You can crisp at slightly higher temperatures (375°F), but for detailed instructions and predictability, 350°F is ideal.
Step 3: Portion the Cottage Cheese
This is the stage where technique fully determines texture and crunch.
1. Scoop small mounds
Using a tablespoon, scoop small rounded portions of cottage cheese (about 1 to 1.5 tablespoons each). Place each mound on the prepared baking sheet with at least 2 inches of space between them. Cottage cheese spreads as it melts.
2. Spread carefully
Use the back of a spoon or spatula to flatten each mound into a thin circle, roughly 2–3 inches in diameter.
-
Thinner chips = crispier, lighter, more delicate.
-
Slightly thicker chips = heartier, more substantial crunch, but require longer baking.
Aim for even thickness. Uneven spreading leads to chips that are burnt at the edges and soft in the center.
3. Avoid over-spreading
If chips are too thin, they may develop holes or scorch easily. Think of it as spreading a thin layer of batter—just enough to fuse but not enough to disappear.
Step 4: Season the Chips
Seasoning is where cottage cheese chips become expressive, customizable, and deeply flavorful.
1. Season lightly before baking
Sprinkle chosen seasonings onto the wet surface of each chip. Because cottage cheese contains salt, avoid oversalting.
Popular seasonings include:
-
Garlic powder
-
Paprika
-
Smoked paprika
-
Everything seasoning
-
Chili powder
-
Lemon pepper
-
Onion powder
-
Dried herbs
-
Ranch seasoning
-
Nutritional yeast
-
Grated Parmesan
2. Avoid moisture-heavy seasonings
Fresh herbs, citrus juice, and wet sauces create steam and interrupt crisping. Add fresh elements after baking, if desired.
3. Keep toppings small
Large flakes (like coarse salt or dried garlic bits) may fall off or burn. Use finely ground seasonings for the best fusion.
Step 5: Bake the Chips
The baking process is part dehydration, part browning, part transformation. Patience is essential.
1. Place tray in the center of the oven
Middle-rack placement ensures even heat circulation.
2. Bake for 25–35 minutes
The exact time depends on:
-
Moisture content
-
Fat percentage
-
Thickness of chips
-
Oven consistency
You will observe three stages:
Stage 1: Melting (0–10 minutes)
Cottage cheese spreads slightly, curds unify, surface looks glossy.
Stage 2: Drying (10–25 minutes)
Moisture evaporates, edges begin to matte, bubbles appear.
Stage 3: Crisping and Browning (25–35 minutes)
Edges turn golden, chips shrink slightly, aroma deepens.
3. Rotate the tray halfway
This ensures even browning and prevents hot spots from overcooking one side.
4. Check carefully during the last 5 minutes
The difference between perfectly crisp and overly browned is small.
Remove chips when they appear uniformly golden with slightly darker edges.
Step 6: Cool the Chips Properly
Cottage cheese chips crisp during cooling, not just baking.
1. Transfer immediately
Use a spatula to lift chips from the hot parchment onto a wire cooling rack.
Remaining on the tray will trap steam and soften their texture.
2. Cool for at least 10–12 minutes
During cooling, the proteins firm up, and the chip achieves its final crisp structure. Eating too soon will give a chewier texture.
3. Listen for the sound
When fully cooled, chips should make a light snapping sound when broken—a signal of successful crisping.
Step 7: Taste and Adjust Flavor
Before making a full batch next time, evaluate your seasoning balance.
1. If chips taste under-seasoned
Increase seasoning on the next sheet. Cottage cheese absorbs flavors more mildly than expected.
2. If chips taste too salty
Use lower-sodium cottage cheese or reduce pre-bake seasoning.
3. If chips lack depth
Add a finishing sprinkle of Parmesan or a dash of smoked paprika after baking.
Step 8: Troubleshooting Common Issues
Even simple recipes benefit from detailed troubleshooting guidance.
Problem: Chips are soft or chewy
Possible causes:
-
Spread too thick
-
Cottage cheese too wet
-
Not baked long enough
-
Insufficient cooling
Solutions:
Thin slightly next time, extend bake time, or drain cottage cheese.
Problem: Chips taste burnt
Likely causes:
-
Too thin
-
Oven running hot
-
Over-browned seasonings (particularly paprika)
Solutions:
Spread slightly thicker, lower temperature, or check earlier.
Problem: Chips stick to parchment
Usually happens if chips weren’t baked long enough. Continue baking until they lift easily.
Problem: Chips break too easily
They may be too thin or cooled too long. Slightly thicker spreading can fix this.
Step 9: Enhancing and Customizing the Chips
Once you master the basic technique, you can build complexity.
1. Add cheese blends
Mix in a tablespoon of grated Parmesan or cheddar for richer flavor.
2. Create layered chips
Spread half the cottage cheese, sprinkle seasoning, then add a thin second layer. This creates sturdier chips.
3. Try patterned spreading
Use circular, teardrop, or rectangular shapes for serving variety.
Step 10: Serve or Store
Though best eaten fresh, cottage cheese chips can be stored with care.
1. For immediate serving
Serve warm or fully cooled. Pair with:
-
Greek yogurt dip
-
Salsa
-
Vegetable tapenade
-
Hummus
-
Hot sauce
-
Guacamole
2. For storage
Once completely cool, store in an airtight container for 1–2 days.
Avoid refrigeration—it reintroduces moisture.
3. Refreshing chips
If chips soften, re-crisp in a 300°F (150°C) oven for 4–6 minutes.
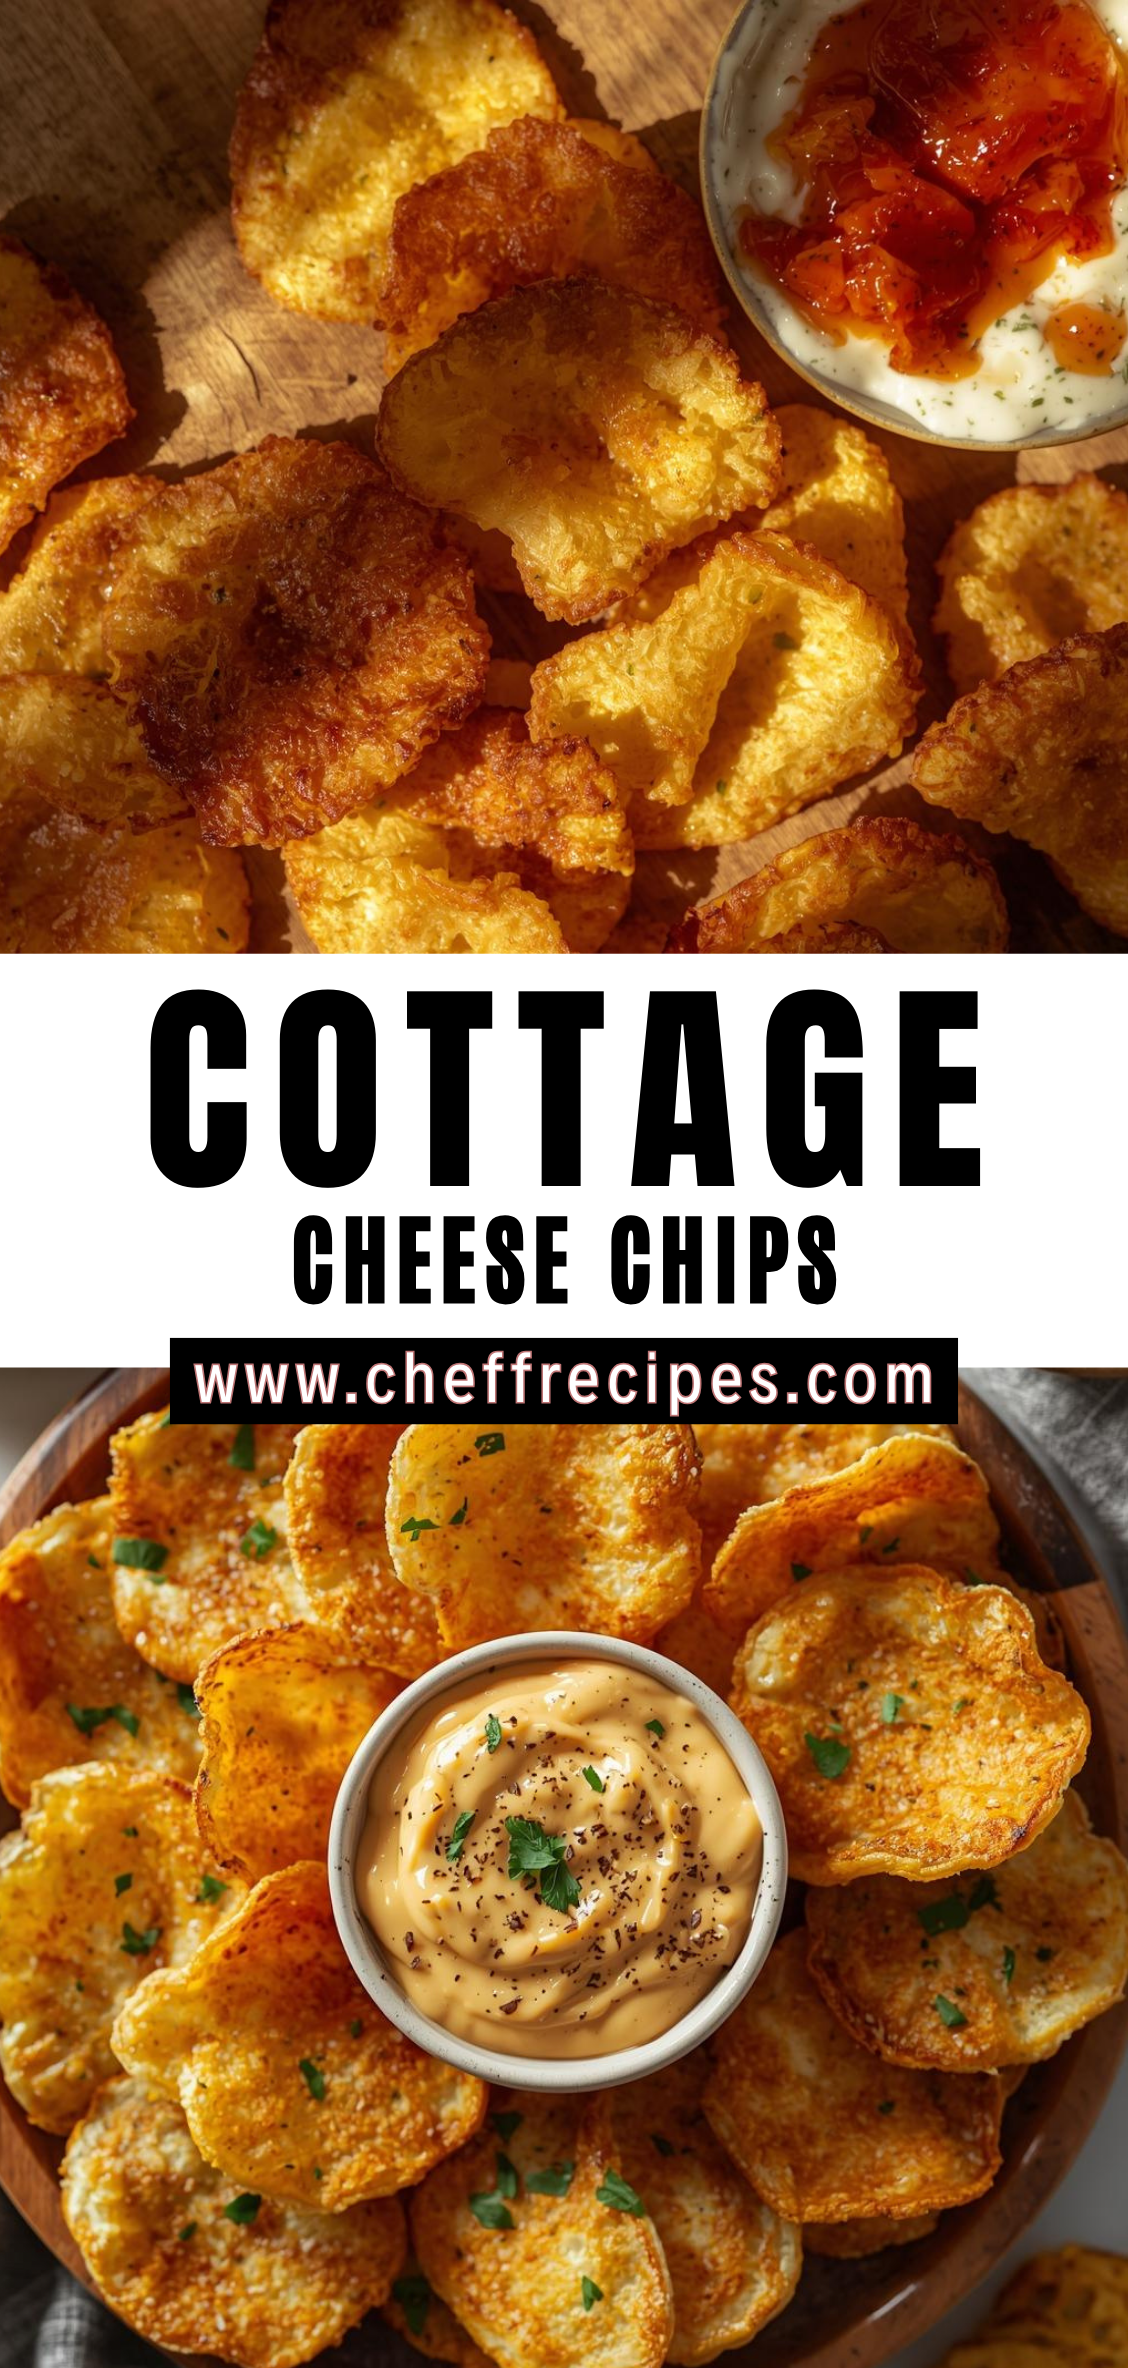
Cottage Cheese Chips
Cottage cheese chips might be one of the most surprising, quietly transformative recipes to emerge from the modern wave of high-protein, low-effort cooking. They challenge nearly every assumption one might hold about cottage cheese: that it is soft, mild, difficult to crisp, or best confined to bowls and spoons rather than baking sheets. Yet, when handled with intention, cottage cheese becomes something almost unrecognizable from its original form. It turns crisp, golden, and satisfyingly crunchy—morphing into a snack that feels both familiar and new, indulgent yet nutritionally conscious. It is precisely this duality that has made cottage cheese chips one of the most intriguing culinary experiments in contemporary home kitchens.
Ingredients
- 1 cup cottage cheese (any fat %; small curd works best)
- 1 egg (optional, helps with binding)
- ½ teaspoon garlic powder
- ½ teaspoon onion powder
- Salt & pepper to taste
- Optional mix-ins:
- Paprika or chili powder
- Ranch seasoning
- Everything bagel seasoning
- Grated parmesan
Instructions
1. Blend the Base
- Add cottage cheese, egg (if using), garlic powder, onion powder, salt, and pepper to a blender or food processor.
- Blend until completely smooth.
2. Prepare the Chips
- Line a baking sheet or air-fryer tray with parchment paper.
- Spoon small dollops (about 1–1½ tablespoons each) onto the paper, spreading into thin circles. The thinner you spread them, the crispier the chips.
3. Cook
Air Fryer Method (Best for Crispiness)
- Air fry at 350°F (175°C) for 10–12 minutes, until golden and crisp.
- If needed, cook 2–3 minutes more for extra crunch.
Oven Method
- Bake at 375°F (190°C) for 15–20 minutes, until edges are golden.
- Let the chips cool—they crisp up more as they rest.
4. Cool & Serve
- Allow chips to cool on the tray for 5–10 minutes.
- Enjoy plain or serve with dip (salsa, ranch, hummus, etc.).
Notes
- Make Them Extra Crispy: Spread the mixture very thin; thick chips stay chewy.
- Low-Moisture Cottage Cheese: Helps prevent soggy chips.
- Flavor Boosts: Mix parmesan, ranch powder, taco seasoning, or herbs into the batter before baking.

