A Buttery Twist on a Classic Chocolate Delight
Chocolate bark is a culinary canvas—a simple yet versatile confection that’s been delighting sweet lovers for generations. At its core, it’s nothing more than a slab of melted chocolate studded with toppings, but in its best form, it becomes something far more indulgent: an expression of flavor, texture, and creativity. Now, imagine enhancing this already luscious treat with the richness of real butter—a seemingly small addition that transforms the entire experience. This is the essence of Butter Chocolate Bark, a recipe that brings warmth, depth, and velvety smoothness to a timeless favorite.
This isn’t your typical holiday bark. It’s not just chocolate scattered with peppermint or nuts. Instead, this version introduces butter as a central player in the flavor profile, not just a background note. The result is a chocolate bark with an unusually smooth texture, a richer mouthfeel, and a subtly caramelized flavor that lingers on the palate. The butter doesn’t just melt into the chocolate—it elevates it.
The origins of chocolate bark can be traced back to the simple practice of melting and re-setting chocolate with mix-ins, a technique that found favor among European chocolatiers centuries ago. Traditionally served during festive seasons, bark was celebrated for its adaptability: it could be rustic or refined, sweet or savory, minimalist or elaborate. As bark recipes evolved, so did their complexity. Today’s modern versions can include everything from exotic dried fruits and spiced nuts to edible gold leaf and sea salt.
So where does butter come into play in this evolution?
Butter has always been a cornerstone of indulgent cooking and baking. In sauces, it softens acidity. In pastries, it creates flaky layers. In frostings and fudges, it adds creaminess. When introduced into chocolate bark, butter brings an entirely new dimension. It smooths out the chocolate’s bitterness, rounds off any sharp notes, and imparts a richness that is immediately noticeable but hard to place. It’s the kind of addition that makes people pause after the first bite and ask, “What’s in this?”
This Butter Chocolate Bark Recipe is not only about technique but also about experience. It invites the cook to slow down, to savor the melting of chocolate and butter together in a double boiler or gently in a pan. It encourages experimentation—with toppings, textures, and flavors. Most importantly, it proves that even the simplest recipes can be transformed with thoughtful ingredient choices.
In the following sections, we’ll explore how to select the best chocolate and butter for your bark, discuss different melting techniques, walk you through every step of the recipe in precise detail, and offer creative topping combinations that go beyond the basics. Whether you want to gift it during the holidays, serve it at a dinner party, or simply indulge in a luxurious homemade treat, this bark is designed to impress without stress.
Prepare yourself for an exploration of flavor that’s as comforting as it is indulgent. With its rich, buttery base and a world of customizable toppings, Butter Chocolate Bark is the kind of dessert that satisfies the soul and sparks inspiration. Let’s begin.
Detailed Instructions for Butter Chocolate Bark
Butter Chocolate Bark may seem simple at first glance—melt some chocolate, add toppings, and let it set—but crafting bark that’s glossy, rich, perfectly snappy, and buttery-smooth requires attention to detail and technique. In this section, we’ll walk you through the entire process, starting with what you need to do before you even unwrap the chocolate bar.
Step 1: Prepare Your Workspace and Tools
Before you begin, set yourself up for success by preparing your materials.
Tools You’ll Need:
-
Double boiler or a heatproof bowl and saucepan
-
Baking sheet (preferably rimmed)
-
Parchment paper or silicone baking mat
-
Rubber spatula
-
Sharp knife (for cutting the bark later)
-
Offset spatula (optional, for spreading chocolate evenly)
-
Measuring spoons
-
Clean, dry bowls for toppings
Prepping Tips:
-
Clean and dry everything: Water is the enemy of melted chocolate. Make sure all your tools are bone dry, especially the bowl used for melting.
-
Choose the right surface: A rimmed baking sheet lined with parchment paper provides the best surface for spreading and setting the chocolate bark. You can also use a silicone mat if you want an ultra-smooth bottom.
Step 2: Select and Prep Your Ingredients
Core Ingredients:
-
Chocolate – 12 oz (340g) total, chopped or in chips
-
Choose high-quality semi-sweet, dark, or milk chocolate, or a blend.
-
Avoid “baking chocolate” unless it’s labeled as couverture or high-quality melting chocolate.
-
-
Unsalted Butter – 3 tablespoons (42g)
-
Room temperature, cubed for easier melting.
-
Avoid margarine or spreads with added water.
-
-
Salt – pinch (optional)
-
Enhances flavor and balances sweetness.
-
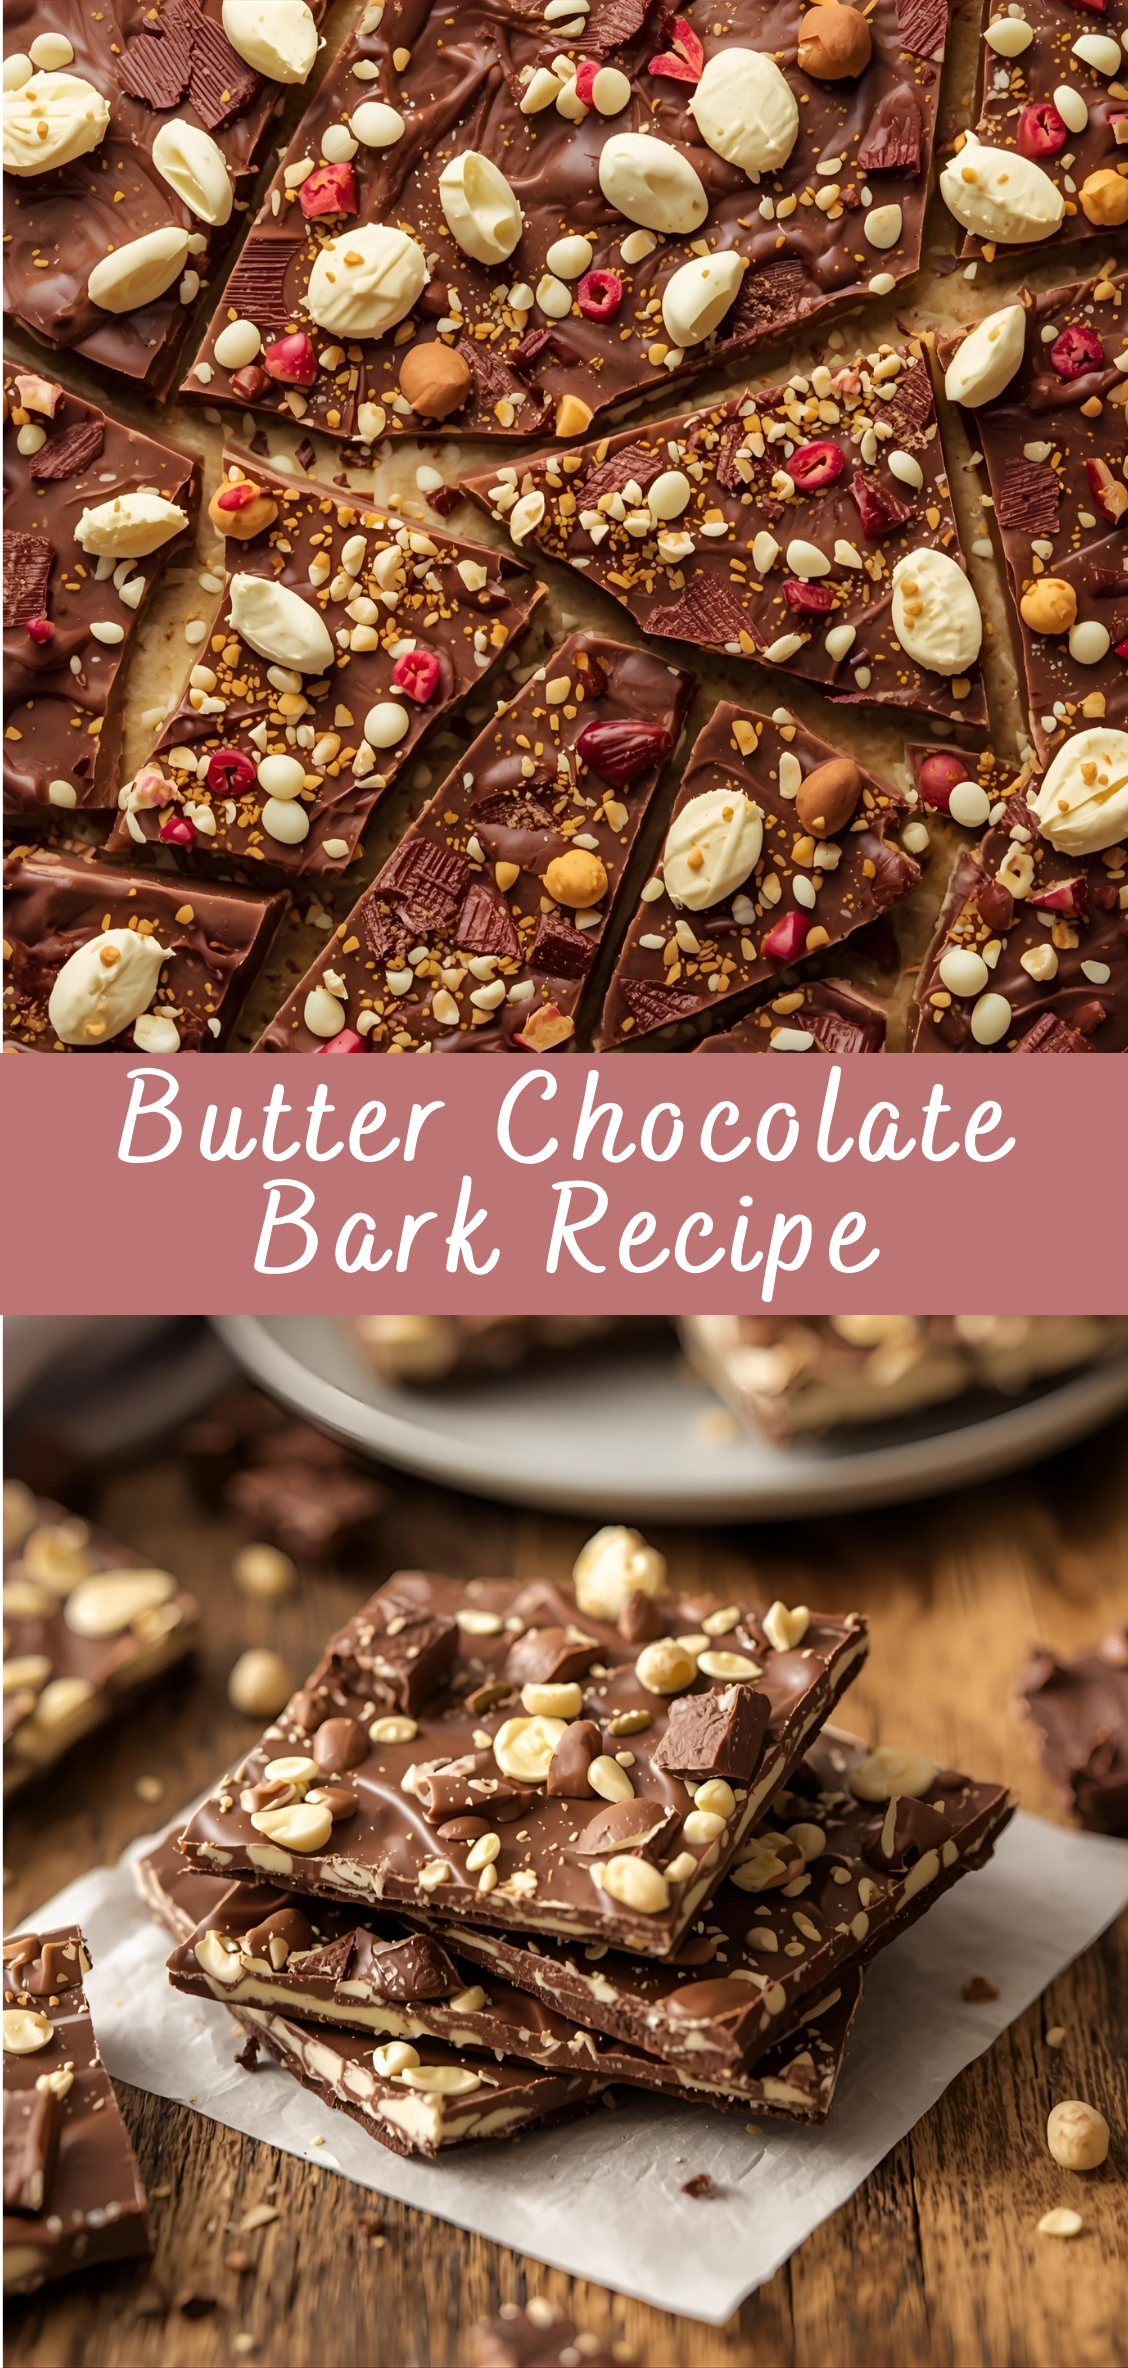
Topping Options (Choose 2–4 for balance):
-
Chopped toasted nuts (almonds, pecans, pistachios, hazelnuts)
-
Dried fruits (cranberries, cherries, apricots, mango)
-
Toasted coconut flakes
-
Crushed pretzels or potato chips
-
Crumbled cookies or toffee bits
-
Flaky sea salt
-
Cacao nibs or crushed espresso beans
-
Spices (cinnamon, cardamom, cayenne)
Ingredient Prep:
-
Toast your nuts: Always toast nuts before adding them to chocolate—it deepens flavor and enhances texture. Toast in a 350°F (175°C) oven for 6–8 minutes, then cool completely.
-
Chop toppings evenly: Uniform topping sizes ensure even distribution and prevent uneven bark thickness.
-
Pre-measure toppings: Have them ready to sprinkle before the chocolate sets. Timing is everything.
Step 3: Melt the Chocolate with Butter
This is the heart of the recipe—the melting. Done right, this step ensures a glossy, smooth, well-set bark with that signature buttery undertone.
Method 1: Double Boiler (Preferred)
-
Fill the bottom pot of your double boiler with about 1–2 inches of water. Bring to a simmer over medium heat.
-
Place the chopped chocolate in the top bowl, ensuring it doesn’t touch the water.
-
Add the cubed butter.
-
Stir continuously with a rubber spatula until both the chocolate and butter are completely melted and the mixture is silky-smooth.
-
Remove from heat immediately to avoid overheating, which can cause seizing or blooming.
Method 2: Microwave (Faster but Riskier)
-
Place chocolate and butter in a microwave-safe bowl.
-
Microwave in 30-second bursts, stirring well between each, until melted and smooth.
-
Do not overheat. Chocolate burns quickly in the microwave—use caution and stir often.
Step 4: Flavor the Base (Optional)
Once the chocolate-butter mixture is melted and smooth, you can add subtle flavorings.
Add-Ins to Consider:
-
Vanilla Extract – 1/2 teaspoon
-
Espresso Powder – 1/2 teaspoon for depth
-
Cinnamon – 1/4 teaspoon for warmth
-
Sea Salt – a pinch to enhance all the other flavors
Stir any flavorings in immediately after melting, before the chocolate begins to cool.
Step 5: Pour and Spread the Chocolate
This is where the bark starts to take shape.
-
Pour the melted butter-chocolate mixture onto your prepared baking sheet.
-
Use an offset spatula or the back of a spoon to spread the chocolate into an even layer.
-
Aim for about 1/4-inch thickness. Too thin and it will crack; too thick and it’ll lose its snap.
-
-
Don’t rush this step—smooth it slowly and evenly.
Step 6: Add the Toppings
This step must be done quickly before the chocolate begins to set.
-
Sprinkle toppings evenly over the surface of the chocolate.
-
Press down gently with clean hands or a spatula to ensure toppings adhere well.
-
Work from one end to the other to ensure even coverage and visual appeal.
Design Tips:
-
Think of color and contrast—green pistachios, red cranberries, white coconut, dark chocolate.
-
Cluster toppings for a mosaic-like effect or scatter for a rustic look.
-
Add a final sprinkle of flaky sea salt for sparkle and balance.
Step 7: Let the Bark Set Properly
Chocolate bark needs time and the right conditions to set fully.
Option 1: Room Temperature (Best for Gloss and Texture)
-
Leave the tray uncovered in a cool, dry place for 2–4 hours.
-
Avoid humid or hot environments—it can cause bloom (white streaks).
Option 2: Refrigerator (Faster, but Use Caution)
-
Chill for 30–60 minutes.
-
Only refrigerate if necessary, as this can dull the surface and change the texture.
Step 8: Break or Cut the Bark
Once fully set, your bark is ready to be portioned.
-
Remove the bark from the tray by lifting the parchment or mat.
-
Break into rustic pieces by hand or cut into clean rectangles with a sharp knife.
-
For clean edges, use a warm knife (dip in hot water and wipe dry between cuts).
-
For an organic, handmade feel, let the bark naturally break.
-
Step 9: Store or Serve
Serving Suggestions:
-
Serve alongside coffee or tea for an after-dinner treat.
-
Pair with red wine or port for an elevated dessert course.
-
Include in homemade gift boxes or party platters.
Storage:
-
Room Temperature: In an airtight container for up to 2 weeks in a cool, dry place.
-
Refrigerator: Up to 3 weeks, though texture may change.
-
Freezer: Wrap tightly and store for up to 3 months. Let thaw at room temp before serving to prevent condensation.
Bonus: Variations on the Classic Butter Chocolate Bark
If you’re feeling creative or want to personalize your bark, here are a few themed ideas:
1. Salted Caramel Pretzel Bark
-
Toppings: Mini pretzels, toffee bits, sea salt
-
Add a light drizzle of caramel over the toppings before chilling
2. Mocha Crunch Bark
-
Add espresso powder to the chocolate
-
Toppings: Crushed espresso beans, cacao nibs, and a dusting of powdered sugar
3. Tropical Bliss Bark
-
White chocolate + butter base
-
Toppings: Toasted coconut, dried mango, macadamia nuts
4. Spicy Aztec Bark
-
Add cayenne and cinnamon to the chocolate
-
Toppings: Crushed chili flakes, roasted pepitas, sea salt
Butter Chocolate Bark Recipe
Chocolate bark is a culinary canvas—a simple yet versatile confection that’s been delighting sweet lovers for generations. At its core, it's nothing more than a slab of melted chocolate studded with toppings, but in its best form, it becomes something far more indulgent: an expression of flavor, texture, and creativity. Now, imagine enhancing this already luscious treat with the richness of real butter—a seemingly small addition that transforms the entire experience. This is the essence of Butter Chocolate Bark, a recipe that brings warmth, depth, and velvety smoothness to a timeless favorite.
Ingredients
- 1 cup (2 sticks) unsalted butter
- 1 cup brown sugar (light or dark)
- 2 cups semi-sweet chocolate chips (or chopped chocolate)
- 1/2 tsp vanilla extract (optional)
- Pinch of salt
- Toppings (optional):
- Chopped nuts (almonds, pecans, walnuts)
- Sea salt flakes
- Sprinkles
- Crushed pretzels or toffee bits
Instructions
- Prepare the Pan:
Line a baking sheet (approx. 9x13") with parchment paper or foil. Lightly grease it or spray with nonstick spray. - Make the Butter Base:
In a saucepan over medium heat, melt the butter.
Add the brown sugar and stir constantly until it comes to a gentle boil.
Once boiling, continue to cook and stir for 4–5 minutes until the mixture thickens and looks caramel-like.
Remove from heat and stir in vanilla and a pinch of salt (optional). - Spread the Butter-Sugar Mixture:
Immediately pour the hot mixture onto the prepared baking sheet and spread it evenly with a spatula. - Add Chocolate:
Sprinkle the chocolate chips evenly over the hot butter mixture.
Let sit for 2–3 minutes to soften, then use a spatula to spread the melted chocolate evenly over the surface. - Add Toppings (Optional):
While the chocolate is still soft, sprinkle your toppings of choice. - Chill:
Place the pan in the refrigerator for at least 30–60 minutes, or until completely set. - Break Into Pieces:
Once firm, break the bark into rustic pieces using your hands or a knife.
Notes
- Flavor Variations:
Add a layer of crushed graham crackers or saltines under the butter mixture for a "cracker toffee" effect.
Use white or dark chocolate instead of semi-sweet.
Add a pinch of cayenne or chili powder for a spicy kick. - Texture Tip: The brown sugar butter layer will harden like toffee, creating a crisp, buttery base.

