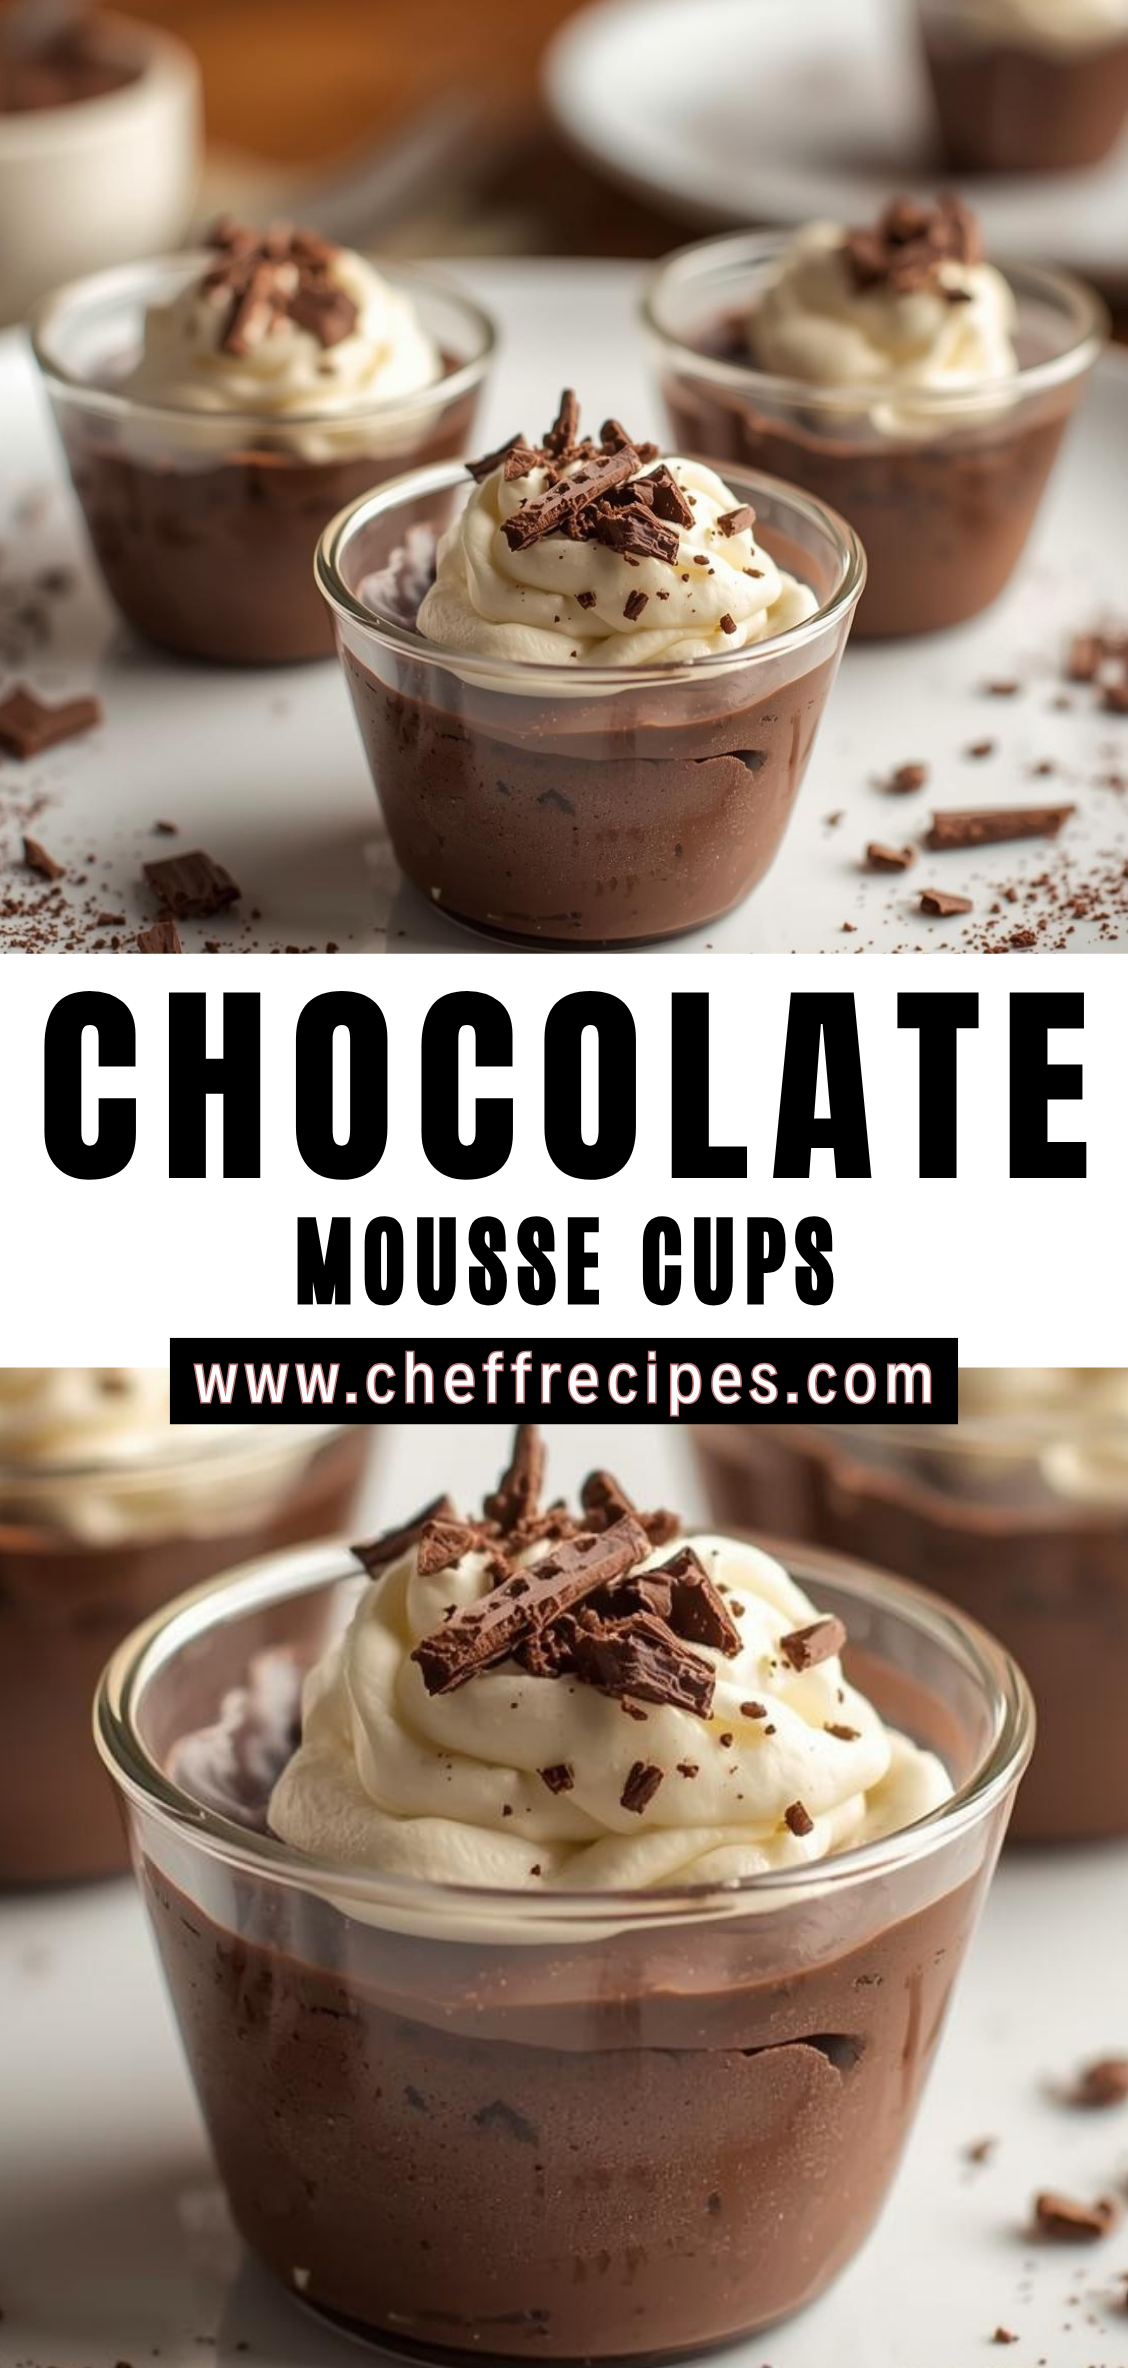
Few desserts embody pure indulgence as effortlessly as chocolate mousse cups. With their silky texture, deep cocoa flavor, and elegant presentation, they represent the perfect blend of sophistication and comfort. Whether served as the finale to a formal dinner or as a small moment of personal indulgence, chocolate mousse cups captivate dessert lovers across generations. Each spoonful promises a balance between airy lightness and rich, velvety depth, a harmony that makes this classic French dessert endure as a timeless favorite in kitchens around the world.

At its essence, a chocolate mousse is a culinary paradox — simultaneously light yet decadent, delicate yet intense. The very name, mousse, derived from the French word for “foam,” reflects its defining characteristic: a structure so soft and airy that it seems to melt on the tongue. When served in individual cups, this dessert becomes not only easier to portion and present but also transforms into a visually appealing masterpiece. Layers of smooth chocolate, sometimes paired with whipped cream, fruit, or even a crunchy base, create a sensory experience that delights both the eyes and the palate.
The magic of chocolate mousse lies not merely in its ingredients — chocolate, eggs, cream, and sugar — but in the technique that transforms them into something greater than the sum of their parts. The perfect mousse requires patience, precision, and an understanding of texture. Over the decades, chefs and home bakers alike have adapted this dessert to suit various tastes and dietary preferences, experimenting with dark, milk, and white chocolates, and even incorporating plant-based alternatives to create vegan or dairy-free versions. Despite these innovations, the essence of chocolate mousse remains unchanged: a celebration of chocolate in its most luxurious form.
Chocolate mousse cups, in particular, have become a staple of modern entertaining. Their individual portions are ideal for dinner parties, special occasions, or intimate gatherings, offering a sense of refinement without excessive complexity. They can be dressed up with garnishes of shaved chocolate, berries, or gold leaf for an elegant presentation, or kept simple and rustic, emphasizing the purity of the chocolate itself. In recent years, the dessert has evolved beyond the traditional French style, finding its way into creative interpretations that feature layered textures, flavored infusions, and even edible chocolate cups that enhance both flavor and aesthetics.
What makes this dessert so universally beloved is its adaptability. It can be rustic or refined, quick to prepare or elaborately layered, sweetened lightly or made intensely rich. The foundational technique remains consistent, but the possibilities for customization are nearly endless. For professional pastry chefs, chocolate mousse represents a canvas for artistic expression; for home cooks, it offers a reliable yet impressive treat that never fails to delight.
In this comprehensive guide, we will explore every aspect of making chocolate mousse cups — from selecting the right type of chocolate and mastering the classic technique to experimenting with creative variations and presentation styles. You will learn not only how to achieve the perfect texture and flavor balance but also how to troubleshoot common mistakes, adjust sweetness levels, and tailor the dessert to suit different occasions and dietary needs. By the end, you will have a complete understanding of what makes chocolate mousse cups an enduring masterpiece in the world of desserts — and how you can recreate their magic in your own kitchen.
Detailed Instructions: How to Make Chocolate Mousse Cups
Step 1: Preparing Your Workspace and Ingredients
Before any cooking begins, organization is key. The success of chocolate mousse depends heavily on timing and temperature, so having everything prepared in advance — a concept known in professional kitchens as mise en place — will prevent mistakes later.
Gather the following:
-
Mixing bowls (preferably metal or glass, dry and grease-free)
-
A heatproof bowl for melting chocolate
-
Saucepan for creating a double boiler
-
Electric mixer or balloon whisk
-
Rubber spatula for folding
-
Measuring cups and spoons
-
Fine-mesh strainer (optional but recommended for the smoothest texture)
-
Serving cups, ramekins, or dessert glasses
-
Ice bath (optional for cooling chocolate quickly)
Ensure all your utensils are impeccably clean. Even a trace of oil or moisture in the bowl used for whipping egg whites or cream can prevent them from reaching the desired volume. Place your serving cups in the refrigerator so that when the mousse is ready to pour, they’re cool enough to help the mixture set evenly.
Step 2: Selecting and Melting the Chocolate
The chocolate you choose defines the flavor of your mousse. A higher cocoa percentage (between 60% and 70%) will yield an intense, bittersweet profile. For a lighter flavor, use milk chocolate; for a more complex and adult version, use dark couverture chocolate with at least 65% cocoa solids.
Melting the chocolate properly:
-
Chop the chocolate into small, even pieces. The smaller the pieces, the more evenly and gently they will melt.
-
Place the chopped chocolate in a heatproof bowl.
-
Set the bowl over a pot of gently simmering water (do not allow the bowl to touch the water). This setup is known as a double boiler or bain-marie.
-
Stir slowly with a rubber spatula until the chocolate is just melted and smooth.
-
Remove from heat and let it cool slightly — it should remain fluid but not hot to the touch.
Professional Tip:
Never melt chocolate directly over a flame or at high temperatures. Rapid heating causes the cocoa butter to separate and the mixture to seize, becoming grainy and unusable. For an even smoother finish, you can strain the melted chocolate through a fine-mesh sieve before incorporating it into the mousse base.
Step 3: Preparing the Egg Yolks Base
The richness and structure of a traditional chocolate mousse come from a gently cooked mixture of egg yolks and sugar, sometimes stabilized with a touch of cream. This step requires precision; overheating will scramble the eggs, while undercooking will prevent proper thickening.
Method:
-
In a separate heatproof bowl, whisk together the egg yolks and granulated sugar until pale and thickened. This stage is called blanching.
-
Set the bowl over a pan of simmering water and whisk continuously. The gentle heat will dissolve the sugar and slightly cook the yolks.
-
Continue whisking until the mixture reaches a light, ribbon-like consistency — it should fall from the whisk in slow ribbons that briefly hold their shape on the surface.
-
Remove from heat immediately.
If you want to add extra depth of flavor, a tablespoon of espresso, orange liqueur, or dark rum can be whisked into the yolk mixture at this stage. Allow it to cool slightly before combining with the chocolate.
Step 4: Combining the Chocolate and Egg Base
When both the melted chocolate and egg yolk mixture are warm — roughly the same temperature — they can be safely combined. If one is significantly cooler, the mixture may seize or separate.
To combine:
-
Pour the melted chocolate slowly into the yolk mixture, stirring constantly with a spatula until fully incorporated.
-
The result should be a glossy, smooth base that is thick but pourable.
-
Taste a small amount to ensure the flavor balance suits your preference. You can adjust sweetness slightly at this stage with a teaspoon or two of powdered sugar if needed.
Allow the mixture to cool to room temperature. If it is too warm, it will deflate the whipped cream or egg whites added later; if it is too cold, it may set prematurely, creating lumps.
Step 5: Whipping the Egg Whites (or Cream Alternative)
Traditional French mousse uses whipped egg whites for lightness and airiness, while modern recipes sometimes substitute whipped cream for a richer, silkier result. Both methods work, but the textures differ slightly:
-
Egg whites create a lighter, more aerated mousse.
-
Whipped cream yields a denser, creamier texture.
-
Combination (half whites, half cream) balances richness and lift.
Whipping method:
-
In a clean, grease-free bowl, beat the egg whites (or cold heavy cream) with an electric mixer at medium speed until soft peaks form.
-
For egg whites: once they reach soft peaks, add a tablespoon of sugar gradually and continue beating until glossy, stiff peaks form. Avoid over-whipping — the foam should still look moist and flexible.
-
For whipped cream: beat until it holds soft peaks that gently curl when the whisk is lifted. Over-beating will turn cream grainy and eventually into butter.
Step 6: Folding Everything Together
This step determines the mousse’s final texture. Folding introduces air while maintaining smoothness and preventing deflation.
Folding technique:
-
Add about one-third of the whipped cream or egg whites into the chocolate base and stir gently to lighten the mixture.
-
Using a rubber spatula, fold the remaining portion in two or three additions.
-
Turn the bowl as you fold, cutting down the middle and sweeping along the bottom to lift the mixture.
-
Stop folding as soon as the mixture looks uniform. Overmixing deflates the mousse, leading to a heavy texture.
You should end up with a luscious, velvety mixture that holds its shape when scooped but still looks soft and glossy.
Step 7: Portioning the Mousse into Cups
Preparing the cups:
-
Retrieve the chilled serving cups from the refrigerator.
-
Spoon or pipe the mousse into each cup, filling about three-quarters full to leave space for toppings or whipped cream.
-
Tap the cups gently on the counter to remove air pockets and even out the surface.
-
For a neater presentation, use a piping bag fitted with a round nozzle — it allows precise filling and creates a clean look.
Step 8: Chilling and Setting
Place the filled cups in the refrigerator for at least 2 to 3 hours to set fully. During this time, the mousse will firm up as the chocolate solidifies again, creating that signature melt-in-the-mouth consistency. For an even smoother finish, cover each cup with plastic wrap to prevent surface drying or flavor absorption from other foods in the fridge.
Timing tips:
-
For a softer, more spoonable texture, chill for about 2 hours.
-
For a firmer, sliceable texture (ideal for layered desserts), chill for 4 to 6 hours or overnight.
Never freeze the mousse, as ice crystals will destroy its delicate texture when thawed.
Step 9: Garnishing and Serving
Presentation elevates the experience. Since mousse cups are often served individually, each one becomes a miniature work of art.
Suggested garnishes:
-
Lightly whipped cream piped on top
-
Chocolate shavings or curls
-
Cocoa powder dusting
-
Fresh berries or a single mint leaf for color contrast
-
Caramel drizzle or fruit coulis for added flavor dimension
When ready to serve, remove the cups from the refrigerator about 10 minutes before eating. Allowing them to warm slightly brings out the full aroma and flavor of the chocolate.
Chocolate Mousse Cups Recipe
Few desserts embody pure indulgence as effortlessly as chocolate mousse cups. With their silky texture, deep cocoa flavor, and elegant presentation, they represent the perfect blend of sophistication and comfort. Whether served as the finale to a formal dinner or as a small moment of personal indulgence, chocolate mousse cups captivate dessert lovers across generations. Each spoonful promises a balance between airy lightness and rich, velvety depth, a harmony that makes this classic French dessert endure as a timeless favorite in kitchens around the world.
Ingredients
- 6 oz (170 g) semisweet or bittersweet chocolate, chopped
- 3 tablespoons unsalted butter, cut into small pieces
- 3 large eggs, separated
- 1/4 cup (50 g) granulated sugar
- 1 cup (240 ml) heavy cream
- 1 teaspoon pure vanilla extract
- Pinch of salt
- Optional toppings:
- Whipped cream
- Chocolate shavings or curls
- Fresh berries
- Mint leaves
Instructions
- Melt the Chocolate: In a heatproof bowl set over simmering water (double boiler), melt the chocolate and butter together until smooth. Remove from heat and let it cool slightly (about 5 minutes).
- Add Egg Yolks: Whisk in the egg yolks one at a time until fully incorporated. Stir in the vanilla extract. Set aside.
- Beat Egg Whites: In a clean bowl, add the egg whites and salt. Beat with an electric mixer until soft peaks form. Gradually add the sugar and continue to beat until stiff, glossy peaks form.
- Whip the Cream: In another bowl, beat the heavy cream until it forms soft peaks. Do not overbeat.
- Combine: Gently fold the whipped cream into the cooled chocolate mixture until partially combined. Then, carefully fold in the egg whites in two additions, mixing just until no white streaks remain. The mixture should be airy and smooth.
- Portion and Chill: Spoon the mousse into small cups, ramekins, or dessert glasses. Cover and refrigerate for at least 2 hours, or until set.
- Serve: Top with whipped cream, chocolate shavings, or berries before serving.
Notes
- Chocolate quality matters: Use high-quality chocolate for the best flavor and texture.
- Raw eggs: If you’re concerned about consuming raw eggs, use pasteurized eggs.
- Texture tip: Avoid overmixing when folding in whipped cream and egg whites — this keeps the mousse light and airy.

