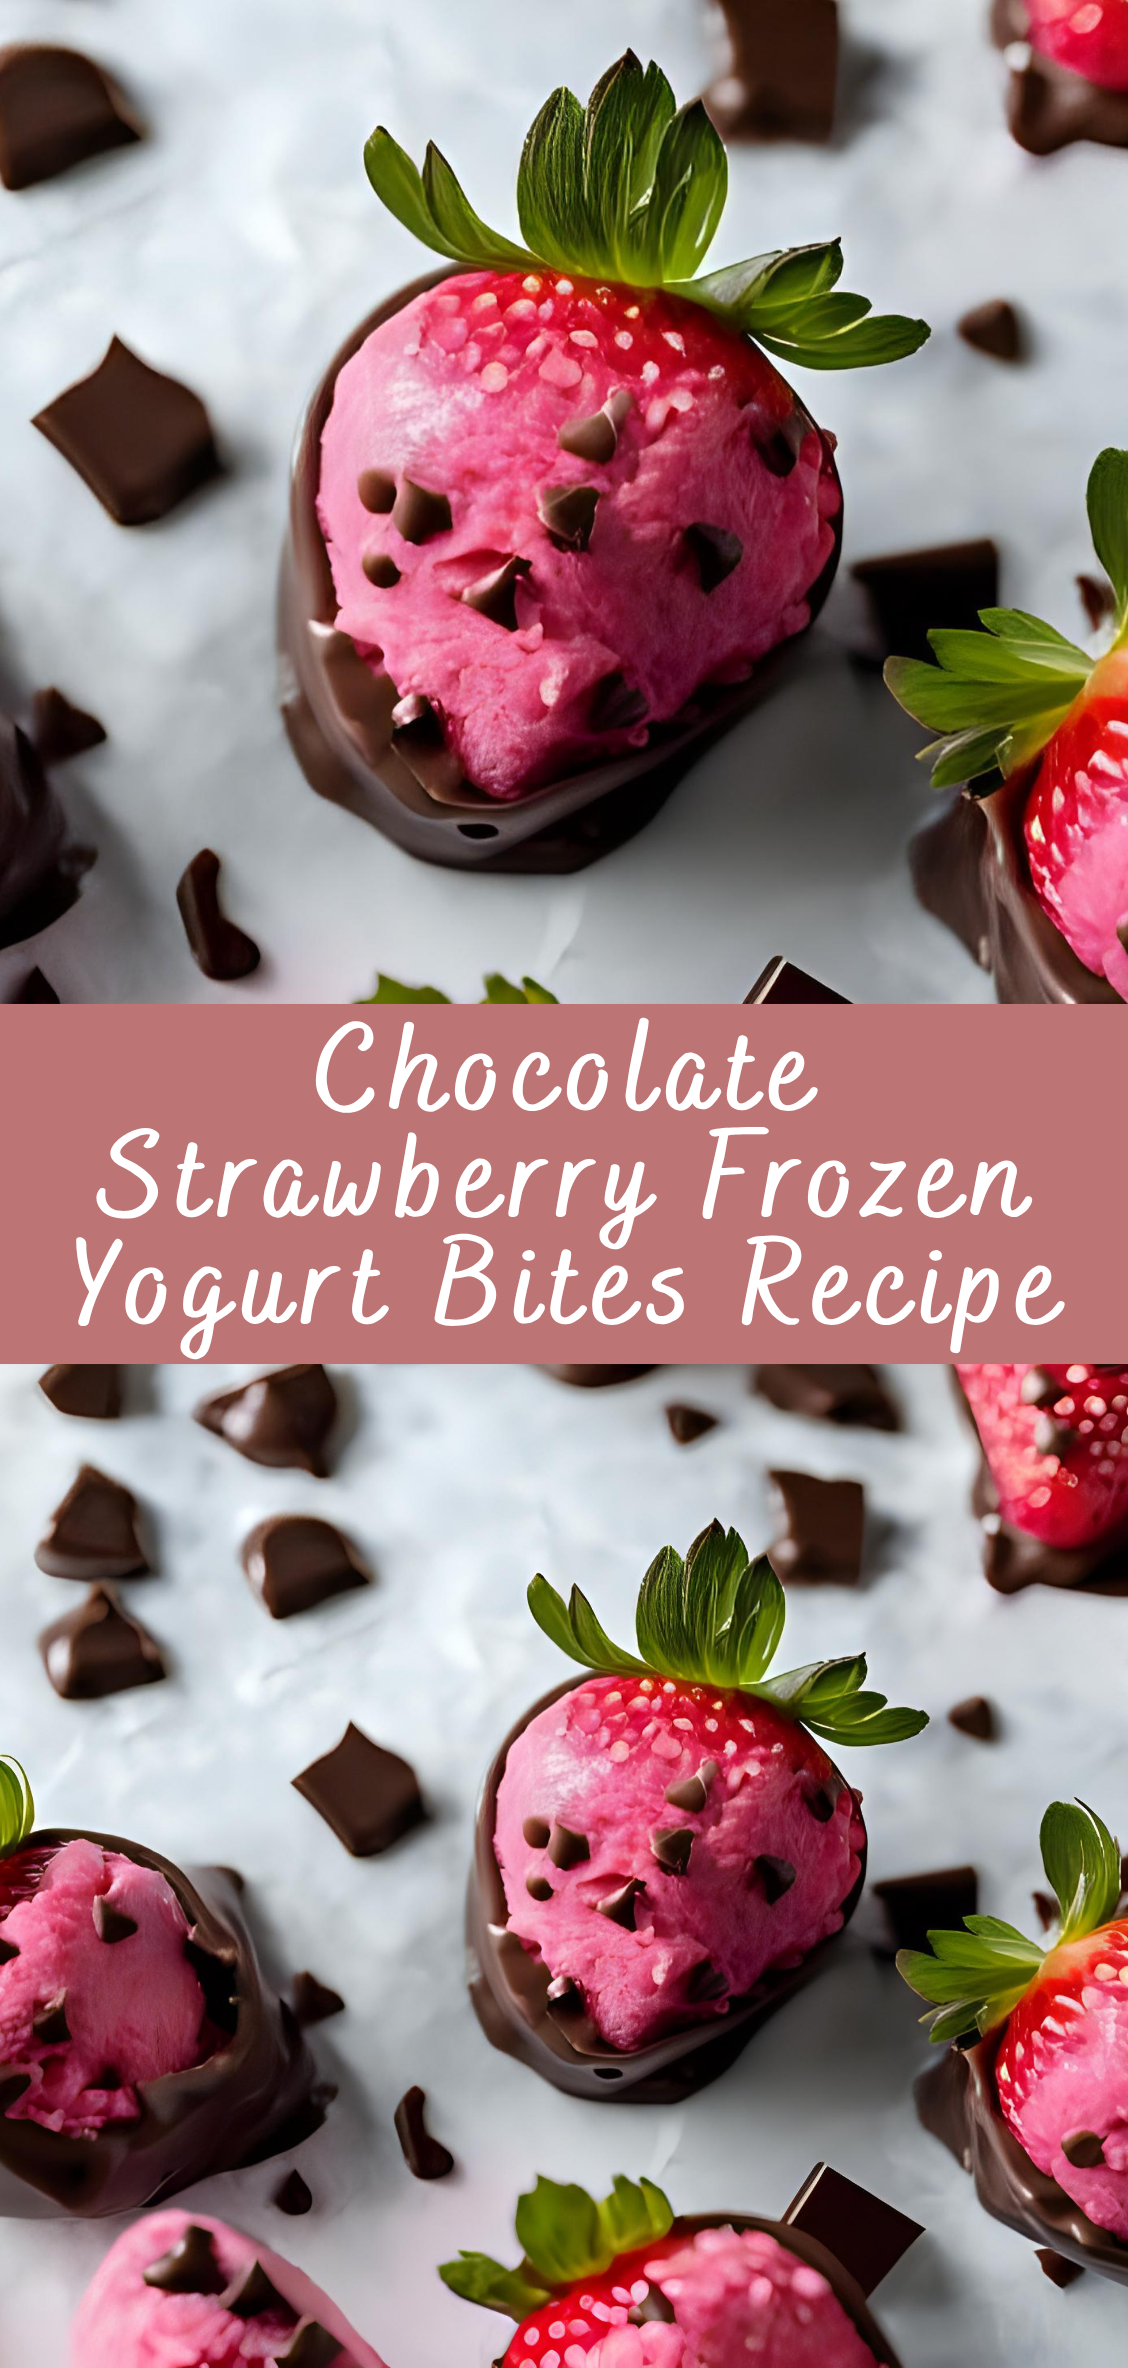
Chocolate Strawberry Frozen Yogurt Bites Recipe
In a world where health-conscious snacking has become more than a trend—it’s a lifestyle—finding treats that satisfy both the sweet tooth and nutritional goals can feel like searching for a needle in a haystack. That’s where Chocolate Strawberry Frozen Yogurt Bites come in: a delightful fusion of indulgence and wellness, combining the richness of chocolate, the natural sweetness of strawberries, and the creamy tang of Greek yogurt into bite-sized morsels of joy.
These frozen bites are not just another DIY snack—they’re a testament to the growing movement toward mindful eating, where flavor, texture, and nutrition coexist harmoniously. Whether you’re a busy parent seeking healthier treats for your children, a fitness enthusiast looking for a post-workout snack, or simply someone who appreciates the balance of natural ingredients and satisfying taste, this recipe offers a solution that checks all the boxes.
Chocolate and strawberries have long been a beloved pairing, celebrated for their complementary flavor profiles. The tart, juicy burst of fresh strawberries contrasts beautifully with the rich, smooth decadence of chocolate, a duo often associated with romance, celebration, and dessert. When paired with creamy yogurt and frozen to a cool, refreshing temperature, the combination becomes something truly special—an ideal treat for hot summer days, cozy winter nights by the fire, or anytime in between.
Moreover, these bites are customizable, simple to prepare, and store well, making them a practical addition to any kitchen routine. Unlike store-bought snacks that are often packed with refined sugars and artificial ingredients, homemade Chocolate Strawberry Frozen Yogurt Bites allow for control over every component. Want a lower-sugar version? Use unsweetened yogurt and dark chocolate. Prefer dairy-free? Swap in plant-based yogurt and vegan chocolate. The versatility of this recipe means it can fit seamlessly into a wide range of dietary needs and preferences.
In this comprehensive guide, we’ll dive deep into every aspect of creating these irresistible frozen treats. From selecting the perfect strawberries and choosing the best type of yogurt, to mastering the chocolate coating technique and ensuring optimal storage for maximum freshness, this article will equip you with all the knowledge and confidence needed to create your own batch from scratch. We’ll also explore the health benefits of the core ingredients, offer variations and add-ins for adventurous palates, and provide troubleshooting tips to guarantee success, even on your first try.
Whether you’re crafting these bites as an after-school snack, a party dessert, or a guilt-free indulgence to keep in your freezer for personal enjoyment, the experience is sure to be both fun and rewarding. By the end of this article, you’ll not only have a foolproof recipe for Chocolate Strawberry Frozen Yogurt Bites but also a deeper appreciation for how simple, wholesome ingredients can transform into something truly delightful.
Let’s begin this journey into frozen treat perfection, starting with a closer look at the essential ingredients that make these bites so irresistible.
Step-by-Step Instructions: How to Make Chocolate Strawberry Frozen Yogurt Bites
Making Chocolate Strawberry Frozen Yogurt Bites is a straightforward process, but attention to detail can make the difference between good and truly exceptional results. Below is a comprehensive guide broken down into distinct stages, each with precise instructions to ensure success. Before you begin, ensure all your tools are clean, your ingredients are fresh, and you have adequate freezer space available.
Step 1: Gather Your Ingredients and Tools
Ingredients:
-
1 cup fresh strawberries (washed, hulled, and finely chopped)
-
1 cup Greek yogurt (plain or vanilla, full-fat or low-fat depending on preference)
-
1–2 tablespoons honey or maple syrup (optional, for added sweetness)
-
1/2 teaspoon vanilla extract (if using plain yogurt)
-
1 1/2 cups chocolate chips or chopped chocolate (dark, milk, or semi-sweet)
-
1 tablespoon coconut oil (optional, for smoother chocolate coating)
Tools:
-
Mixing bowl
-
Silicone mini muffin pan or silicone ice cube tray
-
Small spoon or mini cookie scoop
-
Baking sheet or flat tray (to support the mold)
-
Microwave-safe bowl or double boiler (for melting chocolate)
-
Spatula
-
Freezer-safe container with lid (for storage)
-
Parchment paper or silicone mat (for cleanup and ease of handling)
Step 2: Prepare the Yogurt-Strawberry Mixture
-
Finely chop the strawberries.
Use a sharp knife to dice the strawberries into small, even pieces. You want them small enough to distribute evenly in the yogurt without creating clumps or watery pockets. -
Mix the yogurt base.
In a medium mixing bowl, combine the Greek yogurt, honey or maple syrup (if using), and vanilla extract (only if using plain yogurt). Stir until smooth. -
Fold in the strawberries.
Gently fold the chopped strawberries into the yogurt mixture using a spatula. Mix just enough to evenly distribute the fruit without crushing it. Overmixing may lead to excess moisture release from the berries, which can affect freezing consistency. -
Taste test.
At this stage, taste the mixture and adjust sweetness if needed. Remember, flavors will be slightly muted once frozen, so a touch of extra sweetness now will go a long way.
Step 3: Fill the Silicone Molds
-
Place your silicone mold on a tray.
Set your silicone mini muffin pan or ice cube tray on a flat tray or baking sheet that will fit in your freezer. This provides stability and makes transferring the filled molds easier. -
Spoon in the mixture.
Use a small spoon or mini cookie scoop to fill each cavity of the mold with the strawberry-yogurt mixture. Fill each mold nearly to the top, but leave a slight gap (about 1–2mm) to account for chocolate coating later. -
Smooth the tops.
Lightly tap the tray on the counter to settle the mixture and remove any air bubbles. Use the back of a spoon to smooth the tops for a cleaner finish.
Step 4: Freeze the Yogurt Bites
-
Cover and freeze.
Carefully cover the mold with plastic wrap or a silicone lid if it comes with one. Place the tray in the freezer and let the yogurt bites freeze solid. This will take at least 3–4 hours, but preferably overnight for best texture. -
Check for firmness.
Before proceeding to the chocolate coating step, make sure each yogurt bite is completely frozen. If they’re even slightly soft, the warm chocolate will melt them and cause a mess during dipping.
Step 5: Melt the Chocolate
-
Choose your method.
You can melt the chocolate using a double boiler (for better control) or in the microwave (for convenience). -
Double boiler method:
-
Fill a saucepan with 1–2 inches of water and bring to a simmer.
-
Place chocolate and coconut oil in a heatproof bowl on top of the pan, ensuring the bottom doesn’t touch the water.
-
Stir frequently until melted and smooth.
-
-
Microwave method:
-
Combine chocolate and coconut oil in a microwave-safe bowl.
-
Microwave in 20–30 second intervals, stirring between each interval, until fully melted. Be careful not to overheat—the chocolate should be just warm enough to remain fluid.
-
-
Let it cool slightly.
Allow the melted chocolate to cool for 2–3 minutes. It should still be pourable but not too hot, which can cause rapid melting of the yogurt.
Step 6: Dip or Coat the Frozen Bites
There are two main methods to apply the chocolate: dipping and pouring.
Option 1 – Dipping:
-
Remove the frozen yogurt bites from the mold.
-
Using a fork or dipping tool, lower one bite at a time into the chocolate, turning to coat.
-
Let the excess chocolate drip off before placing the coated bite onto a parchment-lined tray.
Option 2 – Pouring (easier for beginners):
-
Keep the bites in the mold and spoon melted chocolate over the top of each.
-
Use the back of a spoon to spread the chocolate evenly and let it run slightly down the sides.
-
Return the tray to the freezer to set the chocolate.
Optional Garnishes:
Before the chocolate hardens completely, sprinkle chopped nuts, shredded coconut, freeze-dried strawberry pieces, or a pinch of flaky sea salt on top for added flavor and visual appeal.
Step 7: Final Freeze and Storage
-
Freeze to set chocolate.
After coating, return the tray to the freezer for at least 20–30 minutes, or until the chocolate has fully hardened. -
Transfer to a storage container.
Once fully set, gently remove each bite from the mold (if you haven’t already) and place them in a freezer-safe airtight container. Separate layers with parchment paper to prevent sticking. -
Label and date.
Label the container with the date and type of treat. These bites are best enjoyed within 2–3 weeks for optimal texture and flavor, though they may last up to a month if stored properly.
Step 8: Serve and Enjoy
When ready to eat, remove desired number of bites from the freezer and let them sit at room temperature for 2–3 minutes to soften slightly. The yogurt will have a creamy, ice cream-like texture, the chocolate will have a satisfying snap, and the strawberries will provide refreshing sweetness.
Perfect as a midday pick-me-up, an after-dinner dessert, or a sweet treat in a child’s lunchbox (with an ice pack), these Chocolate Strawberry Frozen Yogurt Bites will quickly become a freezer favorite in your home.
Chocolate Strawberry Frozen Yogurt Bites Recipe
In a world where health-conscious snacking has become more than a trend—it's a lifestyle—finding treats that satisfy both the sweet tooth and nutritional goals can feel like searching for a needle in a haystack. That’s where Chocolate Strawberry Frozen Yogurt Bites come in: a delightful fusion of indulgence and wellness, combining the richness of chocolate, the natural sweetness of strawberries, and the creamy tang of Greek yogurt into bite-sized morsels of joy.
Ingredients
- 1 cup plain or vanilla Greek yogurt
- 1–2 tablespoons honey or maple syrup (to taste)
- 1 teaspoon vanilla extract (if using plain yogurt)
- 1 cup fresh strawberries, finely chopped
- 1 cup semi-sweet or dark chocolate chips
- 1 tablespoon coconut oil (optional, for smoother chocolate)
Instructions
- Prepare Yogurt Mixture:
In a medium bowl, mix yogurt, honey/maple syrup, and vanilla extract (if using plain yogurt).
Stir in the finely chopped strawberries. - Spoon into Molds:
Line a mini muffin tin with paper liners or use a silicone mold.
Spoon about 1 tablespoon of the yogurt-strawberry mixture into each mold cavity. - Freeze:
Place in the freezer for 1–2 hours, or until solid. - Melt Chocolate:
In a microwave-safe bowl, melt chocolate chips and coconut oil together in 20-30 second intervals, stirring in between, until smooth. - Dip or Drizzle:
Remove yogurt bites from molds. Dip the tops in melted chocolate or drizzle chocolate over each bite.
Return to the freezer for another 15–30 minutes to set the chocolate. - Serve & Store:
Serve frozen. Store leftovers in an airtight container in the freezer for up to 2 weeks.
Notes
- Variations: Swap strawberries for blueberries, raspberries, or mango.
- Dairy-Free Option: Use coconut yogurt and dairy-free chocolate.
- Texture Tip: Let bites sit at room temp for 2–3 minutes before eating for a softer bite.
- Sweetness: Adjust sweetener based on your taste and yogurt type.

