The holiday season has always been a time when the kitchen becomes the true heart of the home — a space filled with warmth, laughter, and the irresistible aroma of freshly baked bread. Among the many treats that bring festive joy to the table, few are as charming and universally loved as Cheesy Christmas Tree Bread. It is not just a dish; it is a centerpiece, a conversation starter, and a symbol of everything that makes the holidays special: togetherness, creativity, indulgence, and the pleasure of sharing food that feels both comforting and celebratory.

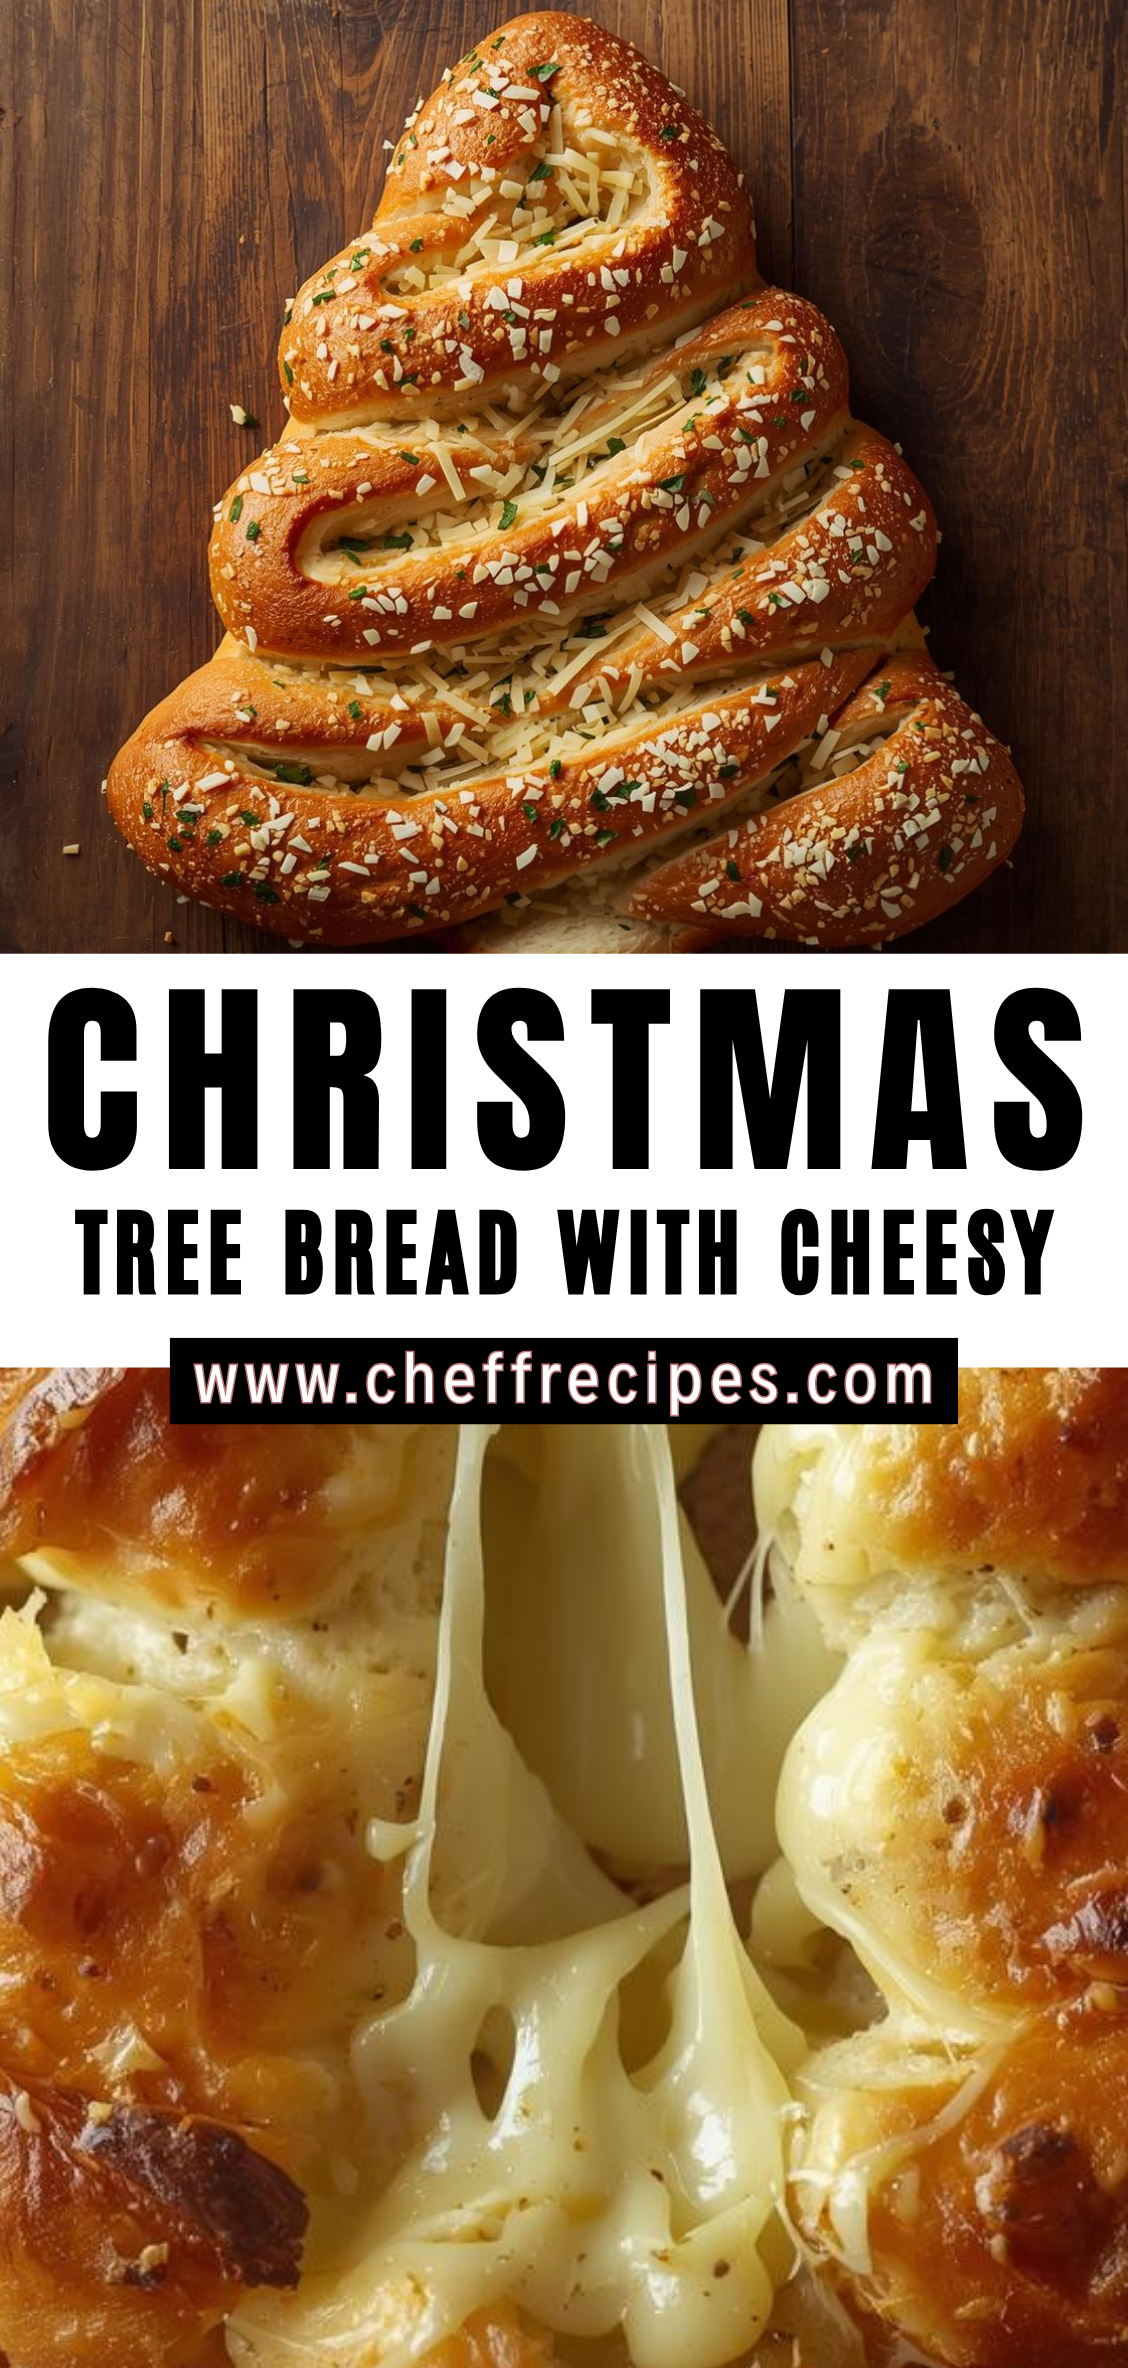
At first glance, Cheesy Christmas Tree Bread dazzles with its whimsical shape — a golden, pull-apart bread arranged in the form of a Christmas tree, glistening under the soft glow of holiday lights. Each piece is filled with melted cheese that stretches and oozes as you pull it apart, releasing a buttery aroma infused with garlic and herbs. Beneath the playful exterior lies a dough that is pillowy yet sturdy, yielding just the right balance of chew and fluff. It is festive baking at its finest: familiar ingredients transformed into something that looks magical but feels like home.
This recipe embodies the heart of modern holiday cooking — where tradition meets innovation. The concept of bread shaped into symbols or figures is centuries old, reaching back to ancient European traditions in which bakers crafted loaves resembling stars, wreaths, and animals for midwinter feasts. Bread was seen as both sustenance and celebration, a life-giving staple elevated into art during special times of the year. The Cheesy Christmas Tree Bread continues this lineage, transforming humble dough and simple cheese into a centerpiece that honors that same spirit of festivity.
At its core, this dish combines two of the most comforting culinary pleasures: freshly baked bread and melted cheese. The result is a recipe that transcends culinary skill levels — impressive enough to grace the holiday table yet simple enough for anyone to make. It is a dish that invites hands-on participation, whether you are shaping the dough into small, cheese-filled balls with children, brushing the golden tree with melted butter, or arranging it on a serving board surrounded by sprigs of rosemary that mimic pine branches. The process itself becomes part of the holiday ritual, something to look forward to year after year.
Beyond its aesthetic appeal, Cheesy Christmas Tree Bread serves a deeper purpose in festive gatherings. It encourages sharing — literally pulling pieces from the same loaf, laughing as the melted cheese strings between hands, passing the warm bread around the table. In an age where so much of our dining can feel rushed or individual, this bread slows everything down. It becomes an invitation to gather closer, to savor each bite, and to enjoy the tactile pleasure of food made with love.
The recipe also reflects the adaptable nature of home baking. While mozzarella is often the traditional choice for its stretch and mildness, variations abound: sharp cheddar for a bolder taste, brie for a touch of luxury, or even a blend of cheeses for complexity. Some cooks incorporate herbs directly into the dough, while others brush the baked tree with garlic butter or sprinkle it with grated Parmesan for an irresistible finish. This flexibility makes the recipe ideal for personal expression — you can tailor it to your family’s preferences or regional ingredients while maintaining its festive essence.
In culinary terms, Cheesy Christmas Tree Bread is an exercise in contrasts. The exterior is crisp and golden, kissed by heat until it achieves a beautiful sheen, while the inside remains soft and airy. The melted cheese adds a creamy, savory richness that balances the light sweetness of the dough. Every bite is a sensory journey — the gentle crunch of the crust, the warmth of the cheese, and the fragrance of herbs like rosemary, thyme, or parsley that linger in the air. This interplay of texture and flavor is what elevates a simple bread recipe into a showpiece worthy of the holiday table.
But beyond technique and taste, this bread carries something intangible — the emotional resonance that makes certain recipes timeless. When placed on a festive table surrounded by twinkling lights and the hum of conversation, the Cheesy Christmas Tree Bread becomes more than food. It becomes a symbol of celebration itself. It reminds us that the most memorable holiday moments are often the simplest ones: the scent of baking, the laughter of family in the kitchen, the joy of breaking bread together.
In this comprehensive guide, we will delve deeply into every aspect of crafting this holiday favorite. From choosing the right flour and yeast for the perfect rise to selecting the ideal cheese for flavor and meltability, every element of the recipe will be explored in detail. We will discuss shaping techniques that ensure your bread holds its tree-like form, timing tips for flawless baking, and creative garnish ideas that make your creation stand out on the holiday table. Along the way, you will discover not only how to bake this bread but also how to infuse it with the spirit of the season — warmth, care, and creativity.
By the end of this guide, you will have more than a recipe; you will have a culinary tradition to share. Whether you are hosting a large Christmas gathering, contributing to a holiday potluck, or simply baking with loved ones on a quiet winter afternoon, this Cheesy Christmas Tree Bread will bring a touch of magic to your kitchen. It is festive food at its most delightful — approachable, beautiful, and irresistibly delicious, destined to become a cherished part of your holiday repertoire.
Detailed Instructions for Cheesy Christmas Tree Bread
Step 1: Prepare Your Ingredients and Workspace
Before you begin, ensure that your kitchen is well-organized. Bread-making requires both patience and rhythm, so having every ingredient measured and ready will help maintain focus and consistency throughout the process.
You will need:
-
All-purpose flour – 3 ½ cups (440 g), plus more for kneading
-
Warm milk – 1 cup (240 ml), ideally between 100–110°F (37–43°C)
-
Instant yeast – 2 ¼ teaspoons (7 g, or one standard packet)
-
Granulated sugar – 2 tablespoons (25 g)
-
Salt – 1 teaspoon (6 g)
-
Unsalted butter – 3 tablespoons (45 g), melted and cooled slightly
-
Egg – 1 large, for binding the dough
-
Cheese for filling – 200–250 g (about 2 cups), cut into 1-inch cubes (mozzarella, cheddar, or a mix)
-
Butter-garlic glaze – 3 tablespoons melted butter mixed with 2 minced garlic cloves
-
Herbs – 1 tablespoon finely chopped parsley or rosemary (fresh preferred)
-
Egg wash – 1 egg beaten with 1 tablespoon milk, for brushing before baking
Equipment:
-
A large mixing bowl or stand mixer with a dough hook
-
Measuring cups and spoons
-
Rolling pin
-
Baking sheet or pizza stone
-
Parchment paper
-
Pastry brush
Set up your workspace with enough counter area for kneading and shaping. Lightly flour the surface to prevent sticking, and keep a clean kitchen towel or plastic wrap nearby to cover the dough during proofing.
Step 2: Activate the Yeast and Prepare the Dough
-
Warm the milk: Heat the milk gently until it is just warm to the touch. Avoid overheating; milk above 115°F can kill yeast.
-
Activate the yeast: In a large mixing bowl, combine the warm milk with sugar and yeast. Stir lightly, then let it sit for 5–10 minutes. You’ll know it’s active when a frothy layer forms on the surface. This step ensures your yeast is alive and ready to work.
-
Mix the wet ingredients: Once the yeast mixture is foamy, whisk in the melted butter and egg. Stir until smooth and uniform.
-
Incorporate the dry ingredients: Add flour and salt gradually, about one cup at a time, mixing with a wooden spoon or stand mixer on low speed. The dough should begin to come together, pulling away from the sides of the bowl.
If mixing by hand, once the dough becomes too stiff to stir, transfer it to a lightly floured surface. Continue adding small amounts of flour until the dough is soft, slightly tacky, and pliable.
Step 3: Knead the Dough
Kneading develops the gluten structure that gives bread its elasticity and airy texture.
-
Manual kneading: Using the heel of your hands, push the dough away from you, then fold it back over itself. Rotate the dough slightly with each push. Continue this rhythmic motion for about 8–10 minutes.
-
Stand mixer kneading: If using a stand mixer, knead with a dough hook attachment on medium speed for 6–7 minutes. The dough should be smooth, elastic, and slightly springy to the touch.
-
Check the windowpane test: Tear off a small piece of dough and gently stretch it. If it forms a thin, translucent sheet without tearing, the gluten is properly developed.
If the dough feels too sticky, sprinkle in a tablespoon of flour at a time, but avoid adding too much — overly dry dough will yield dense bread.
Step 4: First Rise (Proofing)
-
Shape into a ball: Form the dough into a smooth ball and place it in a lightly oiled bowl, turning once to coat the surface.
-
Cover and rest: Cover the bowl with a clean towel or plastic wrap and let it rise in a warm, draft-free place for 1–1.5 hours, or until it doubles in size.
Professional tip: The ideal proofing temperature is around 80°F (27°C). If your kitchen is cool, you can place the bowl in a turned-off oven with the light on or near a warm stovetop.
When the dough has doubled, press two fingers gently into its surface. If the indentation remains and does not bounce back immediately, the dough is ready for the next step.
Step 5: Prepare the Filling and Shaping the Tree
This is where the bread transforms into its festive form.
-
Punch down the dough: Gently deflate the dough to release trapped gas, then transfer it to a lightly floured surface.
-
Divide and portion: Roll the dough into a large rectangle about 12 × 16 inches (30 × 40 cm). Use a knife or bench scraper to cut it into 30–35 even squares, roughly 2 inches each.
-
Add the cheese filling: Place one cube of cheese in the center of each square. Carefully fold the edges over the cheese and pinch them tightly to seal. Roll each into a smooth ball.
Important: Ensure the seams are well sealed so the cheese does not leak during baking.
-
Shape the tree:
-
Line a large baking sheet with parchment paper.
-
Arrange the dough balls seam-side down in a triangular “tree” shape: start with one ball at the top, then two below it, three beneath that, and so on until you reach the base.
-
Add a small cluster of 2–3 balls at the bottom to form the tree trunk.
-
Leave a slight space (about ½ inch) between each ball to allow for expansion during the second rise.
-
This arrangement creates an attractive pull-apart effect once baked.
Step 6: Second Rise
Cover the shaped dough loosely with plastic wrap or a damp towel and let it rest for another 30–40 minutes. The balls should puff slightly, nearly touching each other. This step is crucial for achieving a soft, airy crumb.
While the dough rises, preheat your oven to 375°F (190°C).
Step 7: Apply Egg Wash and Bake
-
Brush with egg wash: Beat one egg with a tablespoon of milk and brush it gently over the surface of the dough. This step ensures a shiny, golden finish.
-
Bake: Place the baking sheet in the preheated oven and bake for 20–25 minutes, or until the bread turns a deep golden brown and sounds hollow when tapped on the bottom.
Professional observation: Rotate the baking sheet halfway through baking to promote even browning, especially if your oven has hot spots.
The aroma that fills your kitchen during this stage — butter, bread, and baking cheese — is one of the unmistakable signatures of the holiday season.
Step 8: Glaze and Garnish
-
Prepare the garlic butter glaze: While the bread bakes, melt 3 tablespoons of butter and stir in 2 cloves of finely minced garlic. Add a pinch of salt and fresh herbs like parsley, rosemary, or thyme.
-
Brush the glaze: As soon as the bread comes out of the oven, brush it generously with the garlic butter mixture. The residual heat will help the butter seep into the bread, adding depth and shine.
-
Optional garnishes:
-
Sprinkle with grated Parmesan or sea salt flakes for a touch of luxury.
-
Arrange small rosemary sprigs around the edges of the tree for a “pine branch” effect.
-
For a sweet-savory contrast, scatter pomegranate seeds or cherry tomato halves as “ornaments.”
-
Allow the bread to cool for about 5–10 minutes before serving — this lets the cheese set slightly while keeping it soft and stretchy.
Step 9: Serving and Presentation
Serve the Cheesy Christmas Tree Bread warm as a centerpiece on your holiday table.
-
Presentation tip: Place it on a large wooden board or serving platter, drizzle with a final brush of melted butter, and garnish with a light dusting of Parmesan for a snowy effect.
-
Dipping sauces: Offer marinara, pesto, or garlic aioli in small bowls for dipping — perfect for enhancing the pull-apart experience.
-
Portioning: Guests can easily pull apart individual rolls from the “branches” of the tree, making it ideal for sharing.
The bread’s soft interior and molten cheese contrast beautifully with the golden crust, offering a satisfying, melt-in-your-mouth texture.
Step 10: Creative Variations
This festive bread is highly versatile. Here are some ways to adapt it:
-
Stuffed Variation: Add a small spoonful of garlic cream cheese or spinach dip along with the cheese cube for added richness.
-
Herbed Dough: Mix 1 tablespoon of dried Italian herbs or finely chopped fresh herbs directly into the dough before the first rise.
-
Sweet Version: Replace the cheese with chocolate or Nutella and brush the baked tree with melted butter and cinnamon sugar for a dessert twist.
-
Mini Trees: Divide the dough into smaller portions and make personal-sized Christmas tree breads — ideal for gifting or individual servings.
Step 11: Pairings and Holiday Serving Ideas
Pair your Cheesy Christmas Tree Bread with festive accompaniments:
-
Soup pairing: A velvety tomato basil soup or roasted red pepper bisque makes a comforting companion.
-
Charcuterie integration: Place your bread at the center of a charcuterie board surrounded by cured meats, olives, and roasted vegetables for an impressive appetizer spread.
This bread is more than a dish — it’s an edible ornament, a centerpiece that captures the spirit of the holidays.
Christmas Tree Bread with Cheesy
The holiday season has always been a time when the kitchen becomes the true heart of the home — a space filled with warmth, laughter, and the irresistible aroma of freshly baked bread. Among the many treats that bring festive joy to the table, few are as charming and universally loved as Cheesy Christmas Tree Bread. It is not just a dish; it is a centerpiece, a conversation starter, and a symbol of everything that makes the holidays special: togetherness, creativity, indulgence, and the pleasure of sharing food that feels both comforting and celebratory.
Ingredients
- For the Bread:
- 1 lb (450 g) pizza dough (homemade or store-bought)
- 6 oz (170 g) mozzarella cheese, cut into small cubes (or string cheese pieces)
- 2 tbsp butter, melted
- 1 tsp garlic powder
- ½ tsp Italian seasoning
- 2 tbsp grated Parmesan cheese
- 1 tbsp chopped fresh parsley (for garnish)
- For Serving:
- ½ cup warm marinara sauce or pizza sauce
Instructions
- Preheat the Oven: Preheat your oven to 375°F (190°C). Line a large baking sheet with parchment paper.
- Prepare the Dough Balls: Roll out the pizza dough on a lightly floured surface into a rectangle (about ¼ inch thick). Cut into 33 small squares (around 1½ inches each). Place one cube of mozzarella in the center of each square and pinch the dough edges to seal, forming a ball.
- Assemble the Christmas Tree: Arrange the dough balls seam-side down on the prepared baking sheet in the shape of a Christmas tree — starting with one ball at the top, then two below it, three below that, and so on, until you have a large tree shape. Use leftover balls to form a tree trunk at the bottom.
- Bake: Bake for 20–25 minutes, or until the bread is golden brown and puffed up.
- Add the Cheesy Butter Topping: While baking, mix the melted butter, garlic powder, Italian seasoning, and Parmesan cheese. When the bread is done, brush the mixture generously over the warm rolls. Sprinkle with chopped parsley for a festive touch.
- Serve: Serve warm with a bowl of marinara sauce in the center or on the side for dipping.
Notes
- Cheese Options: Try mixing mozzarella with cheddar or pepper jack for extra flavor.
- Make Ahead: You can assemble the tree, cover it with plastic wrap, and refrigerate up to 6 hours before baking.
- Festive Touch: Add cherry tomatoes or pepperoni slices as ornaments for decoration!

