Few appetizers manage to evoke the same sense of comfort and anticipation as a well-made dip. It is communal by nature, encouraging guests to gather around a bowl, share conversation, and enjoy something richly flavored without ceremony. Among the many options available, creamy caramelized onion dip stands apart as a timeless classic—one that bridges nostalgia and culinary craft. Though often associated with store-bought versions or quick mixes, the homemade variation offers a depth and complexity that far exceeds its packaged counterparts. Here, slow-cooked onions form the foundation of a dip that is simultaneously luxurious and approachable, transforming a handful of humble ingredients into something deserving of center stage at any gathering.
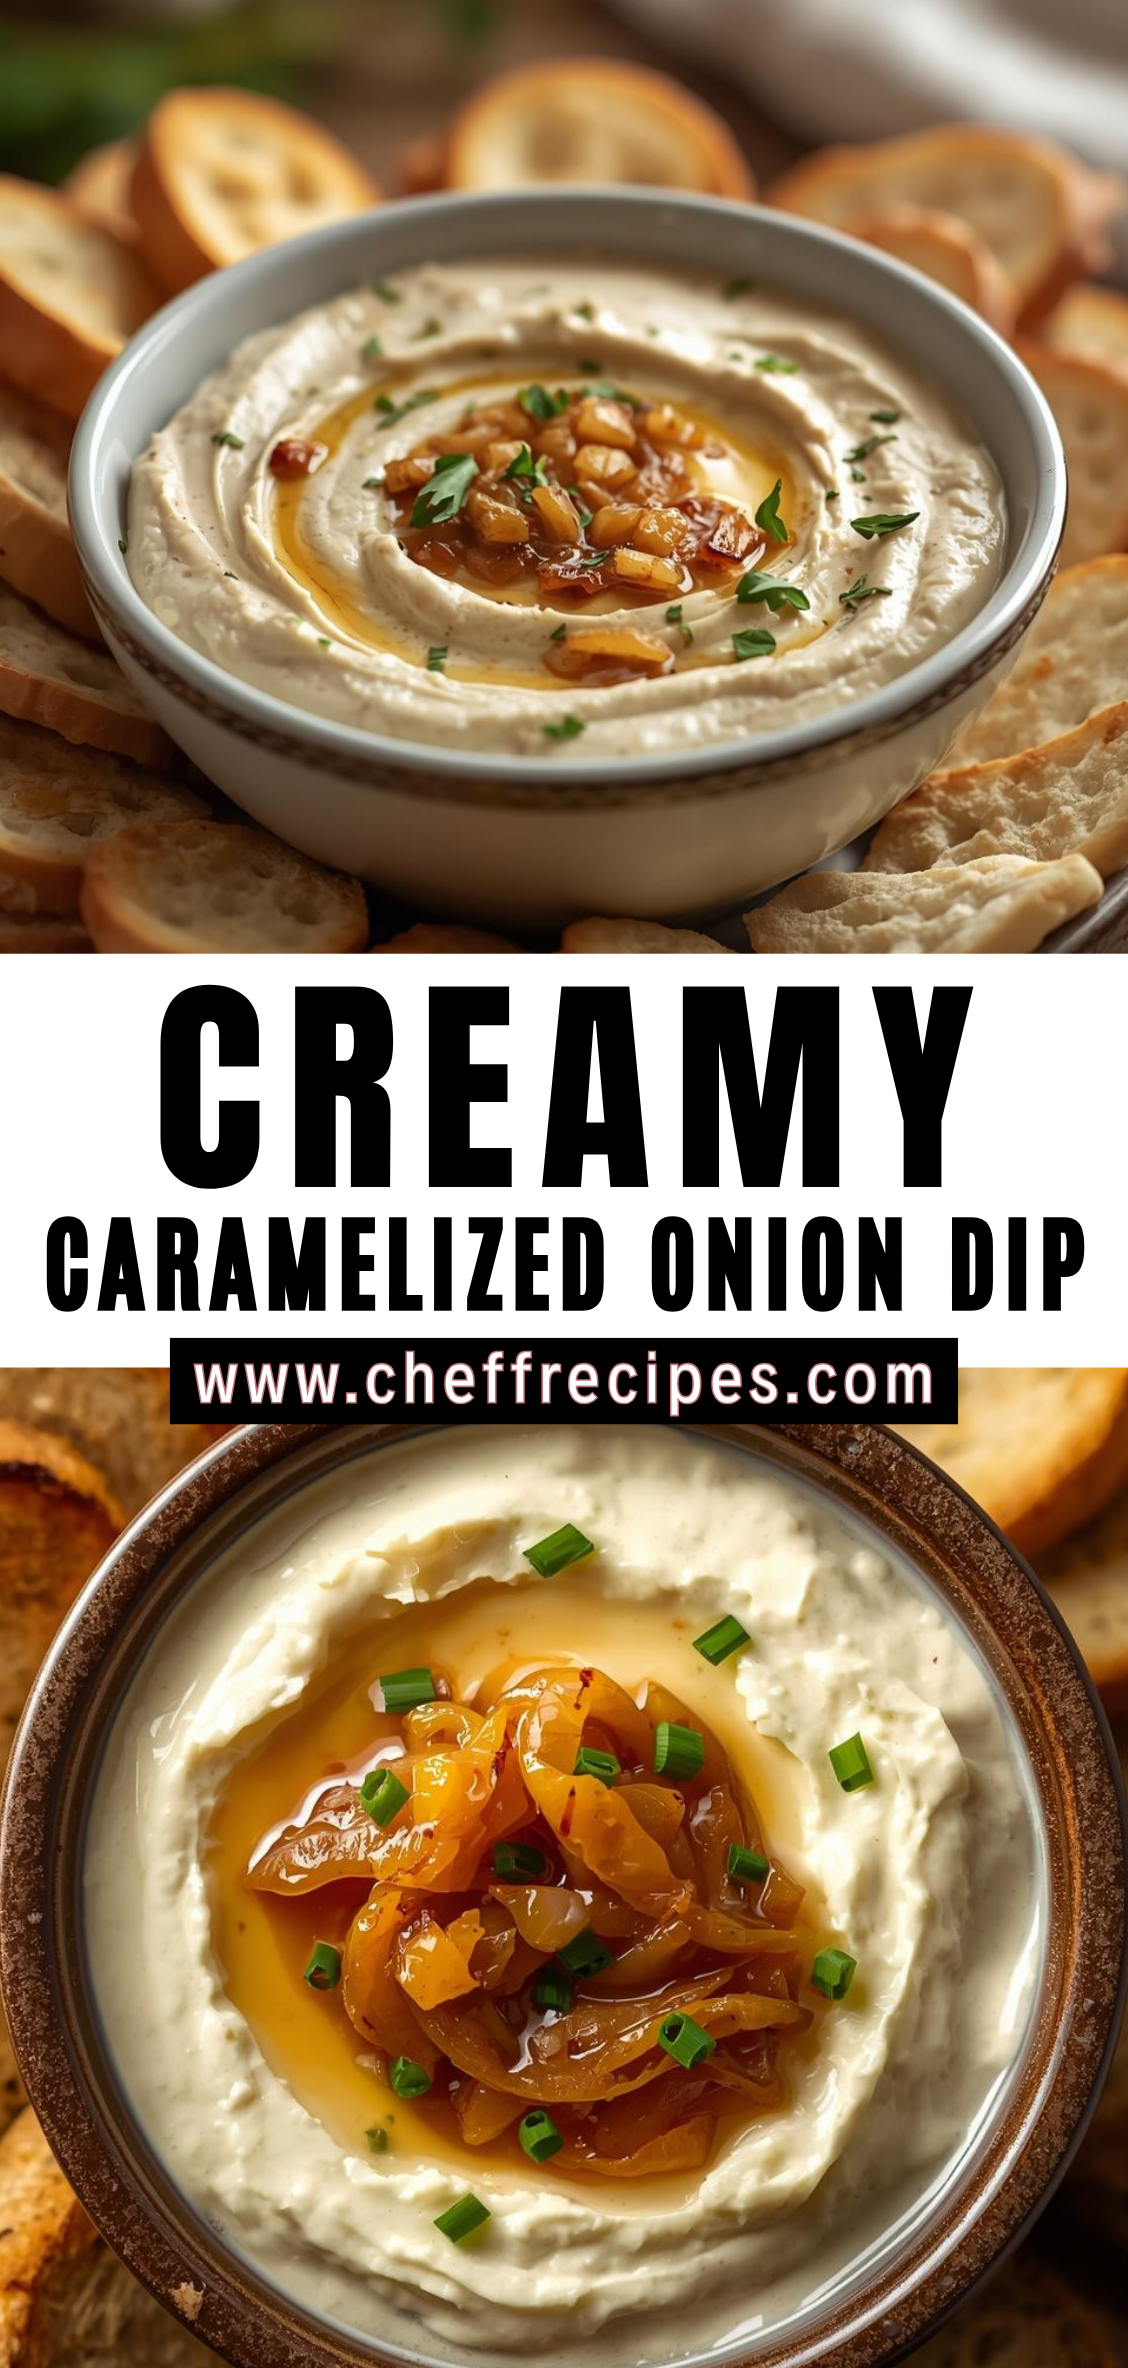
The defining element, naturally, is the caramelized onion. Achieving true caramelization is an act of patience, requiring low heat, steady stirring, and enough time for the onions’ natural sugars to deepen into a rich golden-brown hue. As the onions soften and concentrate, they develop a sweet savoriness layered with subtle bitterness, creating a flavor profile that is both robust and mellow. This depth, paired with a creamy base of tangy sour cream, smooth cream cheese, and a hint of aromatic seasoning, results in a dip that feels balanced and deeply satisfying. The interplay between sweetness, acidity, and richness gives the dish its signature character.
While the process of caramelizing onions may seem meticulous, it is precisely this technique that elevates the dip beyond convenience food. Once prepared, the mixture is adaptable, stable, and versatile, welcoming countless variations. Whether you prefer added herbs, a touch of heat, roasted garlic, or a lighter base, the framework remains forgiving and customizable. This adaptability makes the dip suitable for everything from casual movie nights to elegant holiday spreads.
In addition to its flavor and flexibility, creamy caramelized onion dip holds an undeniable nostalgic appeal. It echoes familiar gatherings, classic party tables, and the comforting simplicity of foods that encourage people to linger. Yet the homemade version adds refinement, making it a dish that appeals to both nostalgic tastes and modern sensibilities. It bridges the gap between rustic and sophisticated, offering depth that surprises first-time tasters while still feeling wonderfully familiar.
In the pages that follow, we will explore each component of the dip in detail, examining how onions caramelize, discussing ingredient choices, and offering step-by-step guidance to ensure consistent results. We will also explore creative variations, serving suggestions, storage tips, and troubleshooting notes that help you perfect the recipe according to your preferences. By the end, you will have not only a comprehensive understanding of how to prepare this beloved dip but also the confidence to make it your own.
Detailed Instructions
1. Gather and Prepare Your Ingredients
Begin by assembling all necessary ingredients: onions, butter or oil, sour cream, cream cheese, optional mayonnaise, and seasonings such as salt, pepper, garlic powder, or fresh herbs. Preparing everything in advance ensures a smooth workflow, especially because caramelizing onions requires uninterrupted attention.
Place a sharp knife, cutting board, heavy-bottomed skillet, and a wooden spoon or heatproof spatula within easy reach. Softening the cream cheese ahead of time by letting it sit at room temperature will make blending significantly easier later in the process.
2. Slice the Onions
Peel the onions and cut them into thin, even slices. Uniformity matters; slices that are consistent in thickness cook at the same rate, ensuring even caramelization. Aim for slices approximately one-eighth to one-quarter inch thick.
If you prefer a softer, more integrated texture in the finished dip, slice the onions more thinly. For a slightly chunkier result, increase the thickness by a small margin. Place the sliced onions in a large bowl and set aside.
3. Heat the Skillet
Choose a wide, heavy-bottomed skillet—cast iron or stainless steel works best. Heat it over medium to medium-low heat, then add butter, oil, or a combination of the two. Butter provides rich flavor, while oil raises the smoke point and prevents scorching. Allow the fat to melt fully before adding the onions.
The pan should be hot enough that the onions begin to soften within a few minutes but not so hot that they brown immediately. Caramelization depends on a steady, controlled heat.
4. Add the Onions and Begin Softening
Once the fat has melted, add the onions to the skillet. Stir to coat them evenly in the butter or oil. At this stage, sprinkle in a small pinch of salt—just enough to help draw out moisture.
Allow the onions to soften, stirring occasionally. They will begin to release water and become translucent. This stage typically takes 8–10 minutes. Avoid rushing; proper softening sets the foundation for deep, even caramelization.
5. Begin the Caramelization Process
Reduce the heat to low or medium-low. Continue cooking the onions slowly, stirring every few minutes to prevent sticking and uneven browning. Over time, the onions will shrink, darken, and develop a jam-like consistency.
If you notice them browning too quickly, reduce the heat. Caramelization relies on the slow conversion of natural sugars, not high-heat browning. Expect this stage to take anywhere from 30 to 45 minutes, depending on the heat level and pan size.
6. Manage Moisture and Deglaze When Needed
As the onions cook, the moisture evaporates, and browned bits will begin to form on the bottom of the pan. These bits contain concentrated flavor. To incorporate them, splash a small amount of water, broth, or even a touch of vinegar into the pan and scrape the bottom with your spoon.
Deglazing prevents burning and enhances the sweetness and complexity of the onions. Do this whenever the pan looks dry, usually every 5–10 minutes toward the later stages of cooking.
7. Taste for Proper Caramelization
The onions are ready when they are soft, deep golden brown, and intensely fragrant with a sweet, savory aroma. Taste a small amount. They should be tender with no raw onion sharpness.
If they still taste sharp or slightly bitter, continue cooking at low heat until fully mellowed. Proper caramelization is the defining element of this dip, and achieving it elevates the final flavor significantly.
8. Allow the Onions to Cool
Transfer the caramelized onions to a plate or shallow bowl to cool. Cooling prevents the onion heat from melting the dairy mixture too quickly during the blending stage.
If you prefer a smoother texture, you may chop the onions finely once they are cool enough to handle. For a chunkier dip, leave them as they are or give them only a light chop.
9. Prepare the Creamy Base
In a medium mixing bowl, add the softened cream cheese and sour cream. Using a spatula or hand mixer, blend until the mixture is completely smooth. A hand mixer creates a lighter, whipped texture, while a spatula results in a denser, richer dip.
If using a small amount of mayonnaise for extra creaminess, add it now and blend until fully incorporated. The goal is to create a cohesive, silky mixture before adding the onions.
10. Season the Base
Add salt, black pepper, garlic powder, onion powder, or any preferred seasonings to the cream mixture. Start conservatively; caramelized onions add natural sweetness and flavor depth, so seasoning is best adjusted after combining all components.
Remember that dips often taste stronger after resting, so slightly under-seasoning at this stage can be preferable.
11. Fold in the Caramelized Onions
Add the cooled caramelized onions to the creamy base. Use a spatula or spoon to fold them in gently. Stir until the onions are evenly distributed but still visually distinct—swirls or streaks of onion throughout the dip look appealing and indicate proper texture.
If you prefer a more uniform dip, continue mixing until completely integrated. Taste the mixture at this stage to determine if salt, pepper, or acidity needs adjustment.
12. Optional Add-Ins
Depending on your preferred flavor profile, this is the time to add optional enhancements such as chopped chives, minced roasted garlic, smoked paprika, Worcestershire sauce, or crushed red pepper.
Add these sparingly at first, mixing and tasting as you go. The goal is to complement the caramelized onions without overshadowing their natural sweetness.
13. Chill the Dip
Transfer the dip to an airtight container or serving bowl and cover it tightly. Refrigerate for at least one hour. Chilling allows the flavors to meld and intensify, often transforming the dip from good to exceptional.
If preparing for a gathering, you can make this dip up to 24 hours in advance. The flavors deepen overnight, and the texture becomes more cohesive.
14. Final Taste and Adjustments Before Serving
Before serving, remove the dip from the refrigerator and stir well. Taste again. You may find that the dip needs a pinch more salt, a squeeze of lemon juice to brighten the flavor, or a small spoonful of sour cream to adjust the texture.
Once adjusted, transfer it to a serving bowl. For presentation, top with a spoonful of reserved caramelized onions or a sprinkle of fresh herbs.
15. Serve with Complementary Dippers
Serve the creamy caramelized onion dip with sturdy chips, toasted bread slices, crisp vegetables, or crackers. Because the dip has weight and richness, pair it with dippers that offer crunch or structure.
Arrange the dippers around the bowl to create an inviting presentation. You may also serve it in a chilled bowl or over ice for warm-weather gatherings to maintain its texture.
Creamy Caramelized Onion Dip
Few appetizers manage to evoke the same sense of comfort and anticipation as a well-made dip. It is communal by nature, encouraging guests to gather around a bowl, share conversation, and enjoy something richly flavored without ceremony. Among the many options available, creamy caramelized onion dip stands apart as a timeless classic—one that bridges nostalgia and culinary craft. Though often associated with store-bought versions or quick mixes, the homemade variation offers a depth and complexity that far exceeds its packaged counterparts. Here, slow-cooked onions form the foundation of a dip that is simultaneously luxurious and approachable, transforming a handful of humble ingredients into something deserving of center stage at any gathering.
Ingredients
- For the Caramelized Onions:
- 2 large yellow onions, thinly sliced
- 2 tbsp unsalted butter
- 1 tbsp olive oil
- ½ tsp salt
- ½ tsp sugar (optional, helps caramelize faster)
- 1–2 tsp balsamic vinegar or sherry vinegar (optional, at the end)
- For the Creamy Dip:
- 1 cup sour cream
- ½ cup mayonnaise
- 4 oz cream cheese, softened
- 1 garlic clove, minced or grated
- ½ tsp Worcestershire sauce
- ½ tsp onion powder (boosts flavor)
- ¼ tsp black pepper
- Salt to taste
- Chives or green onions, finely chopped (optional garnish)
Instructions
1. Caramelize the Onions
- Heat butter and olive oil in a large skillet over medium heat.
- Add sliced onions and salt. Cook, stirring often, until they soften and turn golden.
- Reduce heat to medium-low and continue cooking 25–30 minutes until deeply caramelized.
- Add sugar if using to help them brown.
- Once caramelized, stir in a splash of balsamic or sherry vinegar to deglaze and add depth (optional).
- Transfer to a cutting board, cool slightly, and finely chop.
2. Make the Dip
- In a mixing bowl, combine sour cream, mayonnaise, and cream cheese until smooth.
- Add garlic, Worcestershire sauce, onion powder, pepper, and a pinch of salt.
- Fold in the chopped caramelized onions.
- Taste and adjust seasoning.
3. Chill & Serve
- Chill at least 30 minutes for flavors to meld (or up to 24 hours).
- Garnish with chives or green onions.
- Serve with potato chips, pita chips, veggies, or crostini.

