Garlic Herb Dutch Oven Bread Recipe
There’s something deeply satisfying about baking your own bread, especially when it’s golden, crusty, and infused with aromatic herbs and roasted garlic. Dutch oven bread delivers that artisan bakery quality with minimal effort—no fancy equipment, no kneading marathons—just simple ingredients, a bit of time, and a heavy pot with a lid.
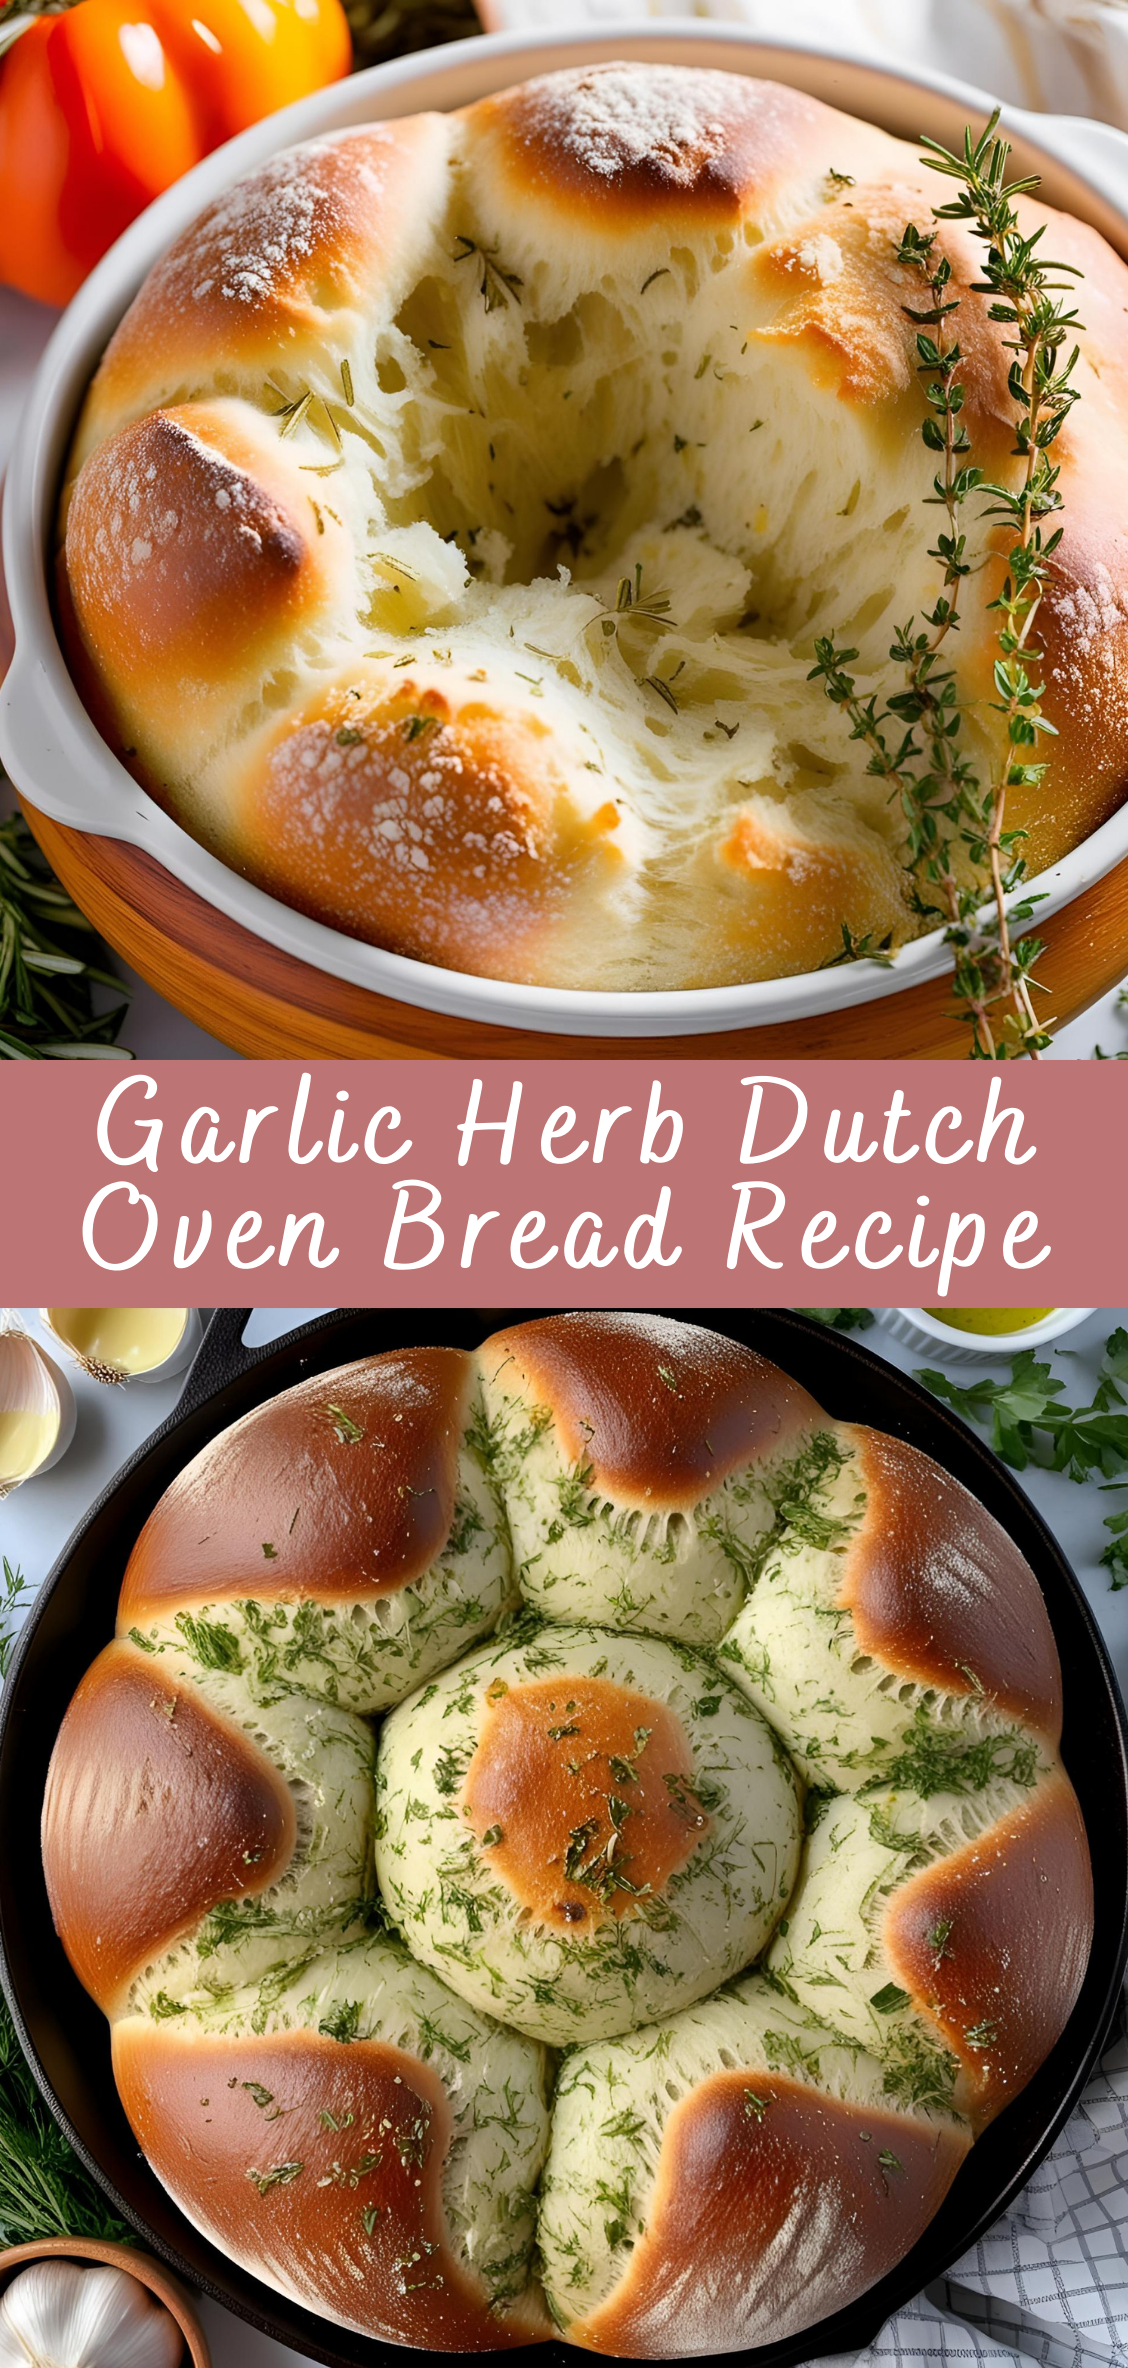
This Garlic Herb Dutch Oven Bread is the kind of loaf that makes your kitchen smell like a European countryside bakery. The crust is perfectly crisp, the inside is soft and chewy, and the flavors of garlic and herbs are layered throughout each bite. Serve it with soup, olive oil, butter, or just tear off a warm hunk and eat it as is. Heaven.
Step 1: Roast the Garlic (Flavor Bomb Loading…)
-
Preheat your oven to 400°F (200°C).
-
Slice the top off a whole bulb of garlic, just enough to expose the tops of the cloves.
- Advertisement - -
Drizzle with olive oil and wrap in foil.
-
Roast for 35–40 minutes, until soft, golden, and caramelized.
-
Let cool, then squeeze the cloves out of their skins and mash with a fork. Set aside.
Pro Tip: Roasted garlic is mellow and sweet. It blends beautifully into the dough and gives the bread a rich, earthy depth.
Step 2: Mix the Dough (No Kneading Required!)
-
In a large mixing bowl, combine flour, salt, and yeast.
-
Stir in the warm water using a wooden spoon or spatula until a shaggy dough forms.
-
Gently fold in:
-
Mashed roasted garlic
-
Dried and/or fresh herbs
-
Any additional flavorings (pepper, chili flakes, etc.)
-
The dough will be sticky—that’s what you want. Cover the bowl tightly with plastic wrap or a damp towel.
Step 3: Let It Rise (The Slow Magic)
Let the dough rise at room temperature for 12 to 18 hours. Overnight works best. It will expand, bubble, and become stretchy.
Bread science: The long fermentation develops gluten and flavor naturally—no kneading required. This is the heart of artisan bread.
Step 4: Shape and Second Rise
-
Once risen, the dough will be jiggly and airy.
-
Flour your hands and a clean surface. Gently scrape the dough out and fold it a few times—just enough to shape it into a ball.
-
Place the dough on parchment paper. Cover with a towel and let rest for 30–60 minutes.
While it rests, preheat your Dutch oven (with the lid on) at 450°F (230°C) for at least 30 minutes.
Safety tip: That pot will be super hot. Use oven mitts and caution when handling it.
Step 5: Bake the Bread
-
When ready, carefully remove the hot Dutch oven.
-
Lift the dough using the parchment paper and place it inside the pot.
-
Cover and bake for 30 minutes.
-
Remove the lid and bake for another 10–15 minutes, until the crust is deep golden and crisp.
Cool Before Slicing (If You Can Resist)
Let the bread cool on a wire rack for at least 30 minutes before slicing. This allows the interior to set and finish baking from residual heat.
You’ll hear the crust crackle as it cools—that’s the sound of perfect bread.
Serving Suggestions
-
Dip into olive oil + balsamic + cracked pepper
-
Spread with salted butter, especially when still warm
-
Serve with soups like tomato basil, minestrone, or creamy potato leek
-
Make epic grilled cheese or paninis with a herbaceous twist
-
Use leftovers for rustic croutons or stuffing
Customizations and Variations
-
Cheesy Garlic Herb Bread: Add ½ cup shredded Parmesan or mozzarella to the dough
-
Lemon-Herb Zest: Add 1 teaspoon of lemon zest for brightness
-
Olive & Garlic Bread: Fold in ½ cup chopped kalamata olives
-
Whole Wheat Version: Substitute 1 cup of flour with whole wheat; may need slightly more water
Storage Tips
-
Room Temp: Store in a paper bag or wrapped in a clean towel for 2–3 days.
-
Freezer: Slice and freeze in a zip-top bag. Reheat in oven or toaster for fresh flavor.
Never store fresh bread in the fridge—it dries out the crumb!
Final Thoughts
There’s something deeply grounding about baking bread, especially a loaf like this. With just a handful of ingredients, a Dutch oven, and some time, you create something nourishing, fragrant, and deeply satisfying. The roasted garlic weaves through the dough like a hidden gem, while herbs dot the bread with flavor and elegance.
Whether you’re baking it for a dinner party, your family, or just because it’s a rainy Sunday afternoon, this Garlic Herb Dutch Oven Bread will earn you a little silence at the dinner table—that magical moment when everyone takes their first bite and just… nods.
So go ahead, bake it. Let your kitchen smell like heaven.
Garlic Herb Dutch Oven Bread Recipe
There’s something deeply satisfying about baking your own bread, especially when it's golden, crusty, and infused with aromatic herbs and roasted garlic. Dutch oven bread delivers that artisan bakery quality with minimal effort—no fancy equipment, no kneading marathons—just simple ingredients, a bit of time, and a heavy pot with a lid.
Ingredients
- 3 cups all-purpose flour
- 1 1/2 tsp salt
- 1/2 tsp instant yeast (or active dry yeast)
- 1 1/2 cups warm water
- 3 cloves garlic, minced (or roasted for a milder flavor)
- 1 tbsp chopped fresh rosemary (or 1 tsp dried)
- 1 tbsp chopped fresh thyme (or 1 tsp dried)
- 1 tbsp olive oil (optional, for extra richness)
- Extra flour or cornmeal for dusting
Instructions
1. Mix the Dough
- In a large bowl, whisk together flour, salt, and yeast.
- Add garlic and herbs; stir to distribute evenly.
- Pour in warm water and stir until a shaggy dough forms.
- Cover with plastic wrap or a clean towel and let rise at room temperature for 3–4 hours (or up to overnight for more flavor).
2. Shape and Second Rise
- Once dough is bubbly and doubled in size, turn it out onto a floured surface.
- Gently shape into a ball (don’t knead too much).
- Let it rest on parchment paper or a floured towel for about 30 minutes.
- Meanwhile, preheat your oven to 450°F (230°C) with your Dutch oven inside (lid on) for 30 minutes.
3. Bake
- Carefully remove hot Dutch oven from oven.
- Transfer dough into it (using parchment makes this easy).
- Score the top if desired for looks.
- Cover and bake for 30 minutes.
- Remove the lid and bake an additional 15–20 minutes until golden brown and crusty.
4. Cool
- Remove bread and let cool on a wire rack for at least 15–20 minutes before slicing.
Notes
- Herb Swap: Try oregano, basil, parsley, or dill for variety.
- Garlic Tip: Roast the garlic first for a mellow, sweeter flavor.
- Storage: Store loosely wrapped at room temp for 2–3 days. Can be frozen (wrap well).
- Crispier crust? Leave the loaf in the cooling oven with the door slightly open for 5–10 minutes.

