Italian Basil Chicken Cutlets Recipe
There’s something truly special about Italian cuisine—the way simple, fresh ingredients come together to create dishes that are bursting with flavor, yet comforting and approachable. Among the countless Italian classics, chicken cutlets hold a cherished place for their versatility, ease of preparation, and ability to carry vibrant flavors beautifully. One such dish that perfectly captures the essence of Italian home cooking is Italian Basil Chicken Cutlets.
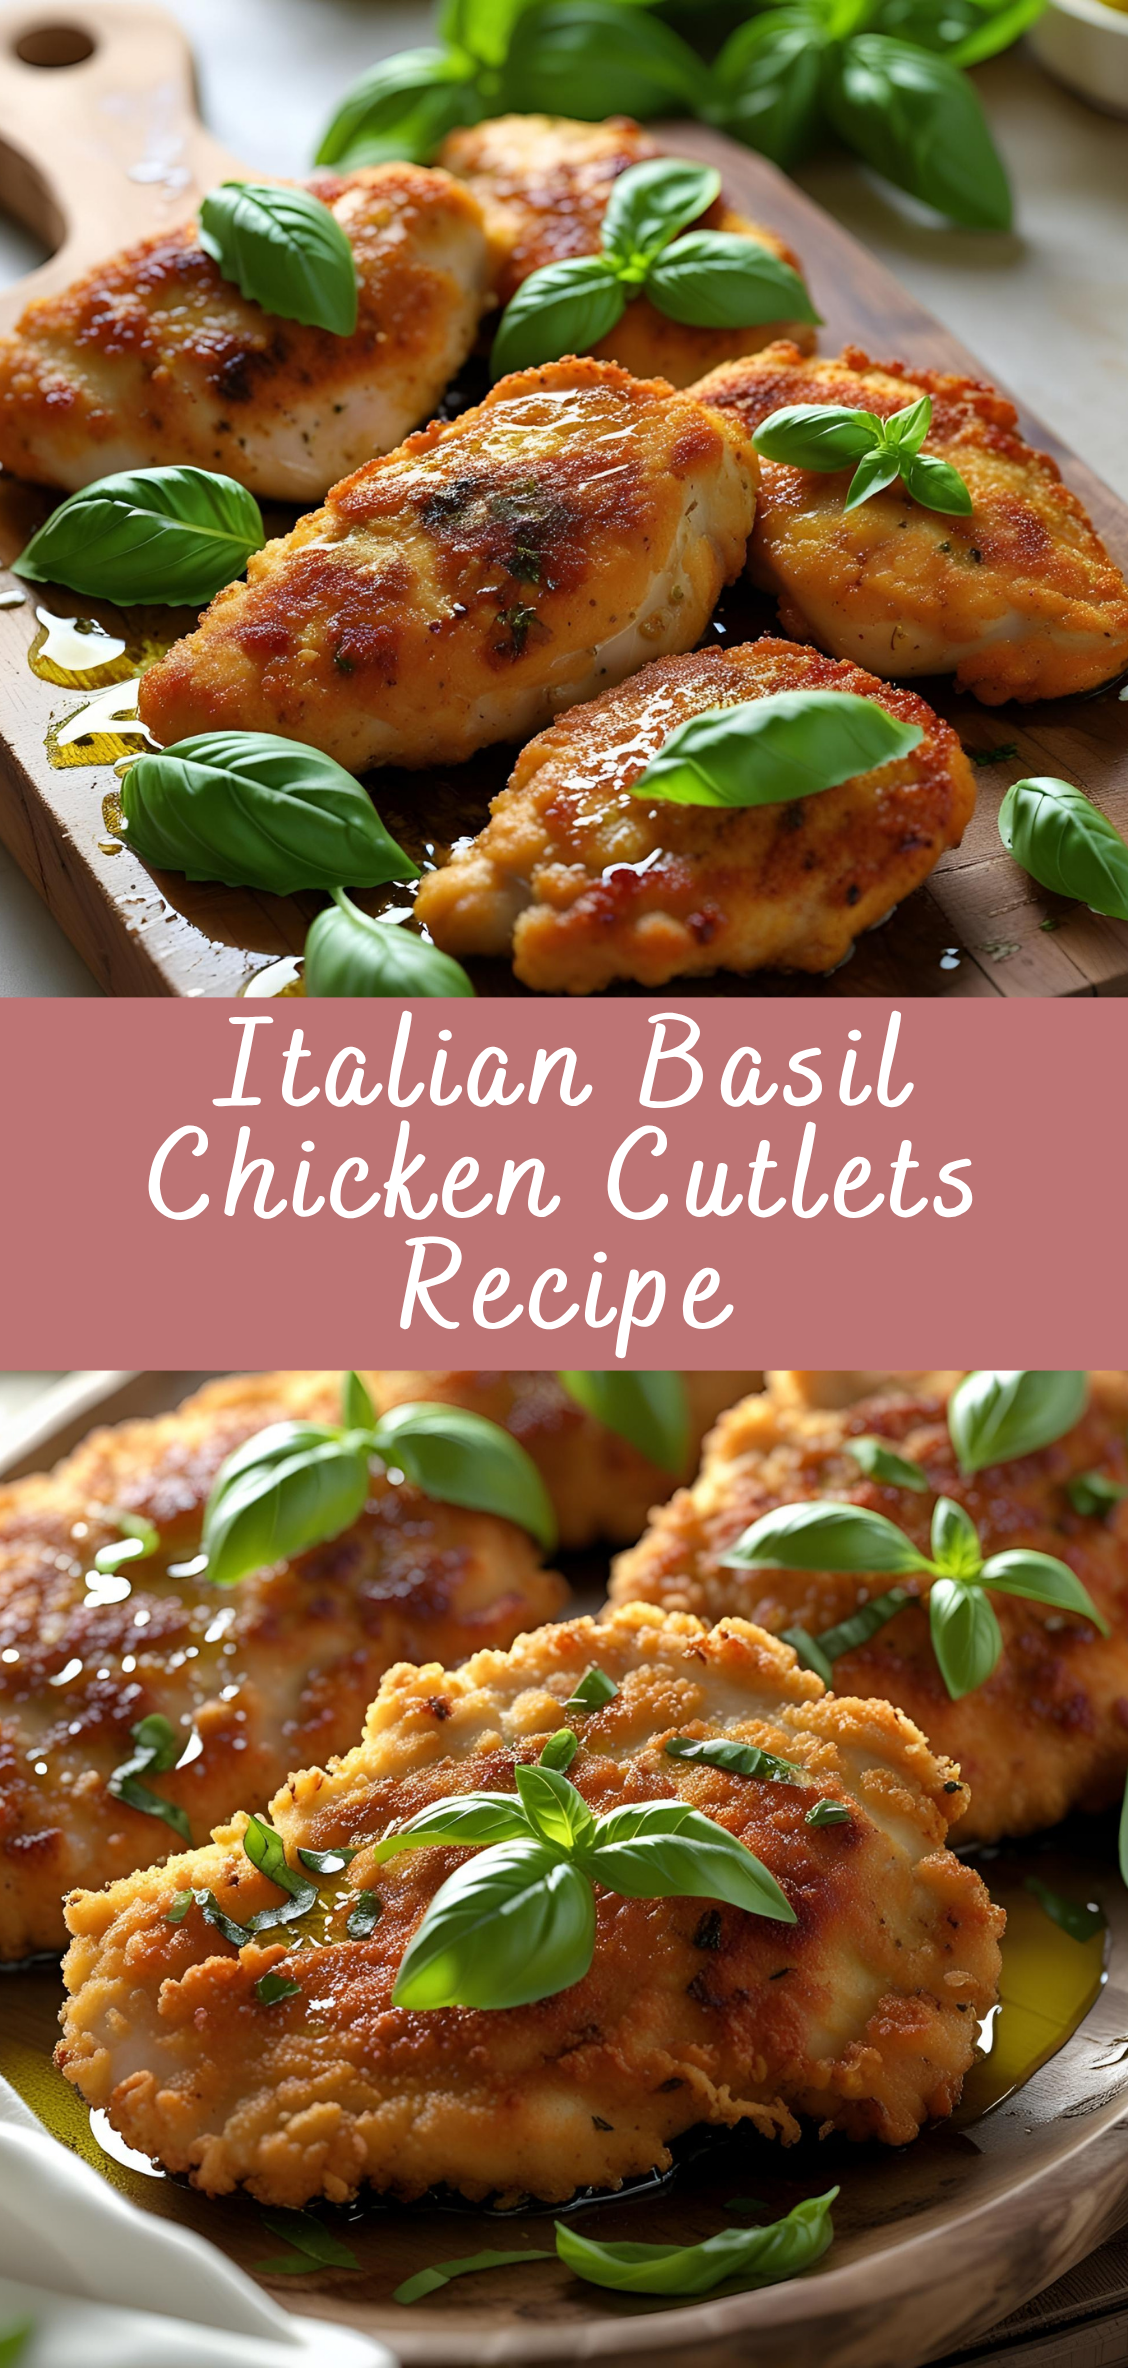
These cutlets offer a delightful balance of tender, juicy chicken infused with the aromatic freshness of basil, complemented by a crisp, golden crust that adds texture and richness. The magic lies in the harmony of the herbaceous basil, the subtle garlic undertones, and often a hint of lemon, which together elevate what might otherwise be a simple chicken breast into a dish worthy of any dinner table, from casual family meals to special occasions.
Italian Basil Chicken Cutlets are more than just a main course—they embody the Mediterranean spirit of clean, bold flavors and uncomplicated preparation. They can be served alongside a variety of sides, from light salads and roasted vegetables to creamy risottos and pasta, making them a versatile choice for home cooks everywhere.
Detailed Instructions for Italian Basil Chicken Cutlets
Phase 1: Preparing the Chicken Cutlets
Step 1: Selecting and Preparing Your Chicken
-
Start with boneless, skinless chicken breasts. For best results, use fresh chicken rather than frozen, as thawed chicken can sometimes be a bit watery.
-
To get thin, even cutlets, place each chicken breast between two pieces of plastic wrap or inside a large zip-top bag.
-
Using a meat mallet, rolling pin, or heavy skillet, gently pound the chicken to about ¼-inch thickness. This not only tenderizes the meat but ensures even cooking and a quick cook time.
-
If you prefer, you can ask your butcher to butterfly the breasts or pre-cut them into cutlet-sized pieces.
Tip: Make sure the cutlets are roughly uniform in size for consistent cooking.
Phase 2: Marinating the Chicken
A light marinade infuses the cutlets with flavor and helps keep them juicy.
Step 1: Make the Basil Marinade
-
In a shallow dish, combine:
-
¼ cup extra virgin olive oil
-
2 cloves garlic, minced
-
½ teaspoon salt
-
¼ teaspoon black pepper
-
Zest and juice of 1 lemon
-
½ cup finely chopped fresh basil leaves
-
-
Whisk the ingredients together until well combined.
Step 2: Marinate
-
Place the chicken cutlets into the dish and coat each piece evenly with the marinade.
-
Cover and refrigerate for at least 30 minutes, or up to 2 hours for deeper flavor.
-
Avoid marinating too long (over 4 hours), as the acid in lemon juice can start to “cook” the chicken and change its texture.
Tip: For a no-marinade version, you can mix chopped basil directly into the breading step for fresh herb flavor.
Phase 3: Bread the Chicken Cutlets
Breading gives the cutlets a crispy, golden crust that contrasts beautifully with the tender chicken and fresh basil.
Step 1: Prepare the Breading Station
Set up three shallow dishes:
-
Flour: ½ cup all-purpose flour seasoned with a pinch of salt and pepper.
-
Egg Wash: 2 large eggs beaten with 1 tablespoon water or milk.
-
Breading Mixture: 1 cup Italian-style breadcrumbs mixed with ¼ cup grated Parmesan cheese and 2 tablespoons finely chopped fresh basil.
Step 2: Bread Each Cutlet
-
Remove cutlets from the marinade, letting excess drip off.
-
Lightly dredge each piece in the seasoned flour, shaking off any excess.
-
Dip into the egg wash, coating fully.
-
Press into the breadcrumb mixture, coating evenly on both sides.
-
Place breaded cutlets on a plate or wire rack while you prepare the rest.
Tip: For extra crunch, double-dip: after the first breadcrumb coat, dip in egg again, then breadcrumbs again.
Phase 4: Cook the Chicken Cutlets
Step 1: Heat the Pan
-
In a large skillet, heat 3 tablespoons olive oil or a mix of olive oil and butter over medium heat.
-
The oil should be shimmering but not smoking.
Step 2: Fry the Cutlets
-
Add the breaded cutlets to the pan in a single layer.
-
Cook for 3–4 minutes per side until golden brown and cooked through.
-
Flip carefully using tongs or a spatula to avoid knocking off the breading.
-
Adjust heat as needed to prevent burning; medium to medium-high is ideal.
-
Work in batches if necessary, adding more oil between batches.
Step 3: Drain and Rest
-
Transfer cooked cutlets to a plate lined with paper towels to absorb excess oil.
-
Let rest for a few minutes to allow juices to redistribute.
Phase 5: Prepare the Basil Garnish and Serve
Step 1: Make a Fresh Basil Garnish
-
Finely chop additional fresh basil leaves.
-
Optionally, prepare a simple lemon butter sauce by melting 2 tablespoons butter with lemon juice and a pinch of salt to drizzle over cutlets.
Step 2: Plate the Cutlets
-
Arrange cutlets on serving plates.
-
Spoon lemon butter sauce if using.
-
Sprinkle chopped fresh basil and additional grated Parmesan over the top.
-
Garnish with lemon wedges for an extra citrus burst.
Additional Tips for Perfect Italian Basil Chicken Cutlets
-
Don’t overcrowd the pan: Crowding causes steaming rather than frying, resulting in soggy breading.
-
Maintain oil temperature: If the oil cools down too much, the breading absorbs oil and becomes greasy.
-
Use fresh basil: The flavor of fresh basil is bright and fragrant, essential to the dish’s character.
-
For a gluten-free version: Substitute all-purpose flour with almond flour or gluten-free flour blend, and use gluten-free breadcrumbs.
-
For baking instead of frying: Place breaded cutlets on a greased baking sheet and bake at 425°F (220°C) for 15–20 minutes, flipping halfway, until golden and cooked through.
Italian Basil Chicken Cutlets Recipe
There’s something truly special about Italian cuisine—the way simple, fresh ingredients come together to create dishes that are bursting with flavor, yet comforting and approachable. Among the countless Italian classics, chicken cutlets hold a cherished place for their versatility, ease of preparation, and ability to carry vibrant flavors beautifully. One such dish that perfectly captures the essence of Italian home cooking is Italian Basil Chicken Cutlets.
Ingredients
- 4 boneless, skinless chicken breasts (pounded to about 1/2-inch thickness)
- Salt and black pepper, to taste
- 1 cup all-purpose flour
- 2 large eggs
- 1 cup Italian-style breadcrumbs (or plain breadcrumbs + 1 tsp dried Italian herbs)
- 1/2 cup grated Parmesan cheese
- 2 tbsp fresh basil, chopped (or 1 tsp dried basil)
- 3 tbsp olive oil (for frying)
- 2 cloves garlic, minced
- Lemon wedges, for serving
Instructions
- Prep the Chicken:
Pound chicken breasts to even thickness.
Season both sides with salt and pepper. - Set up Breading Stations:
Place flour in a shallow dish.
Beat eggs in another shallow dish.
In a third dish, mix breadcrumbs, Parmesan, and basil. - Bread the Cutlets:
Dredge each chicken breast in flour, shaking off excess.
Dip into beaten eggs.
Coat evenly with breadcrumb mixture, pressing gently. - Cook the Cutlets:
Heat olive oil in a large skillet over medium heat.
Add minced garlic and sauté for 30 seconds until fragrant.
Fry chicken cutlets 3-4 minutes per side, until golden brown and cooked through. - Serve:
Transfer to a plate lined with paper towels to drain excess oil.
Serve with lemon wedges for squeezing over the top.
Notes
- For extra flavor, add a pinch of crushed red pepper to the breadcrumb mix.
- Serve with a fresh salad or over pasta with marinara sauce.
- To keep cutlets crispy, avoid overcrowding the pan.
- You can bake cutlets at 400°F (200°C) for 15-20 minutes for a lighter option.

