Keto Cheesy Garlic Chicken Wraps Recipe
The ketogenic lifestyle has transformed the way millions of people around the world think about food. Centered around high-fat, moderate-protein, and ultra-low-carb principles, the keto diet encourages mindful eating, nutrient density, and metabolic efficiency. But one challenge that often arises for keto adherents is finding comfort foods that satisfy cravings without kicking them out of ketosis. That’s where this recipe comes in: Keto Cheesy Garlic Chicken Wraps—a rich, satisfying, and low-carb meal solution that hits every craving in a single bite.
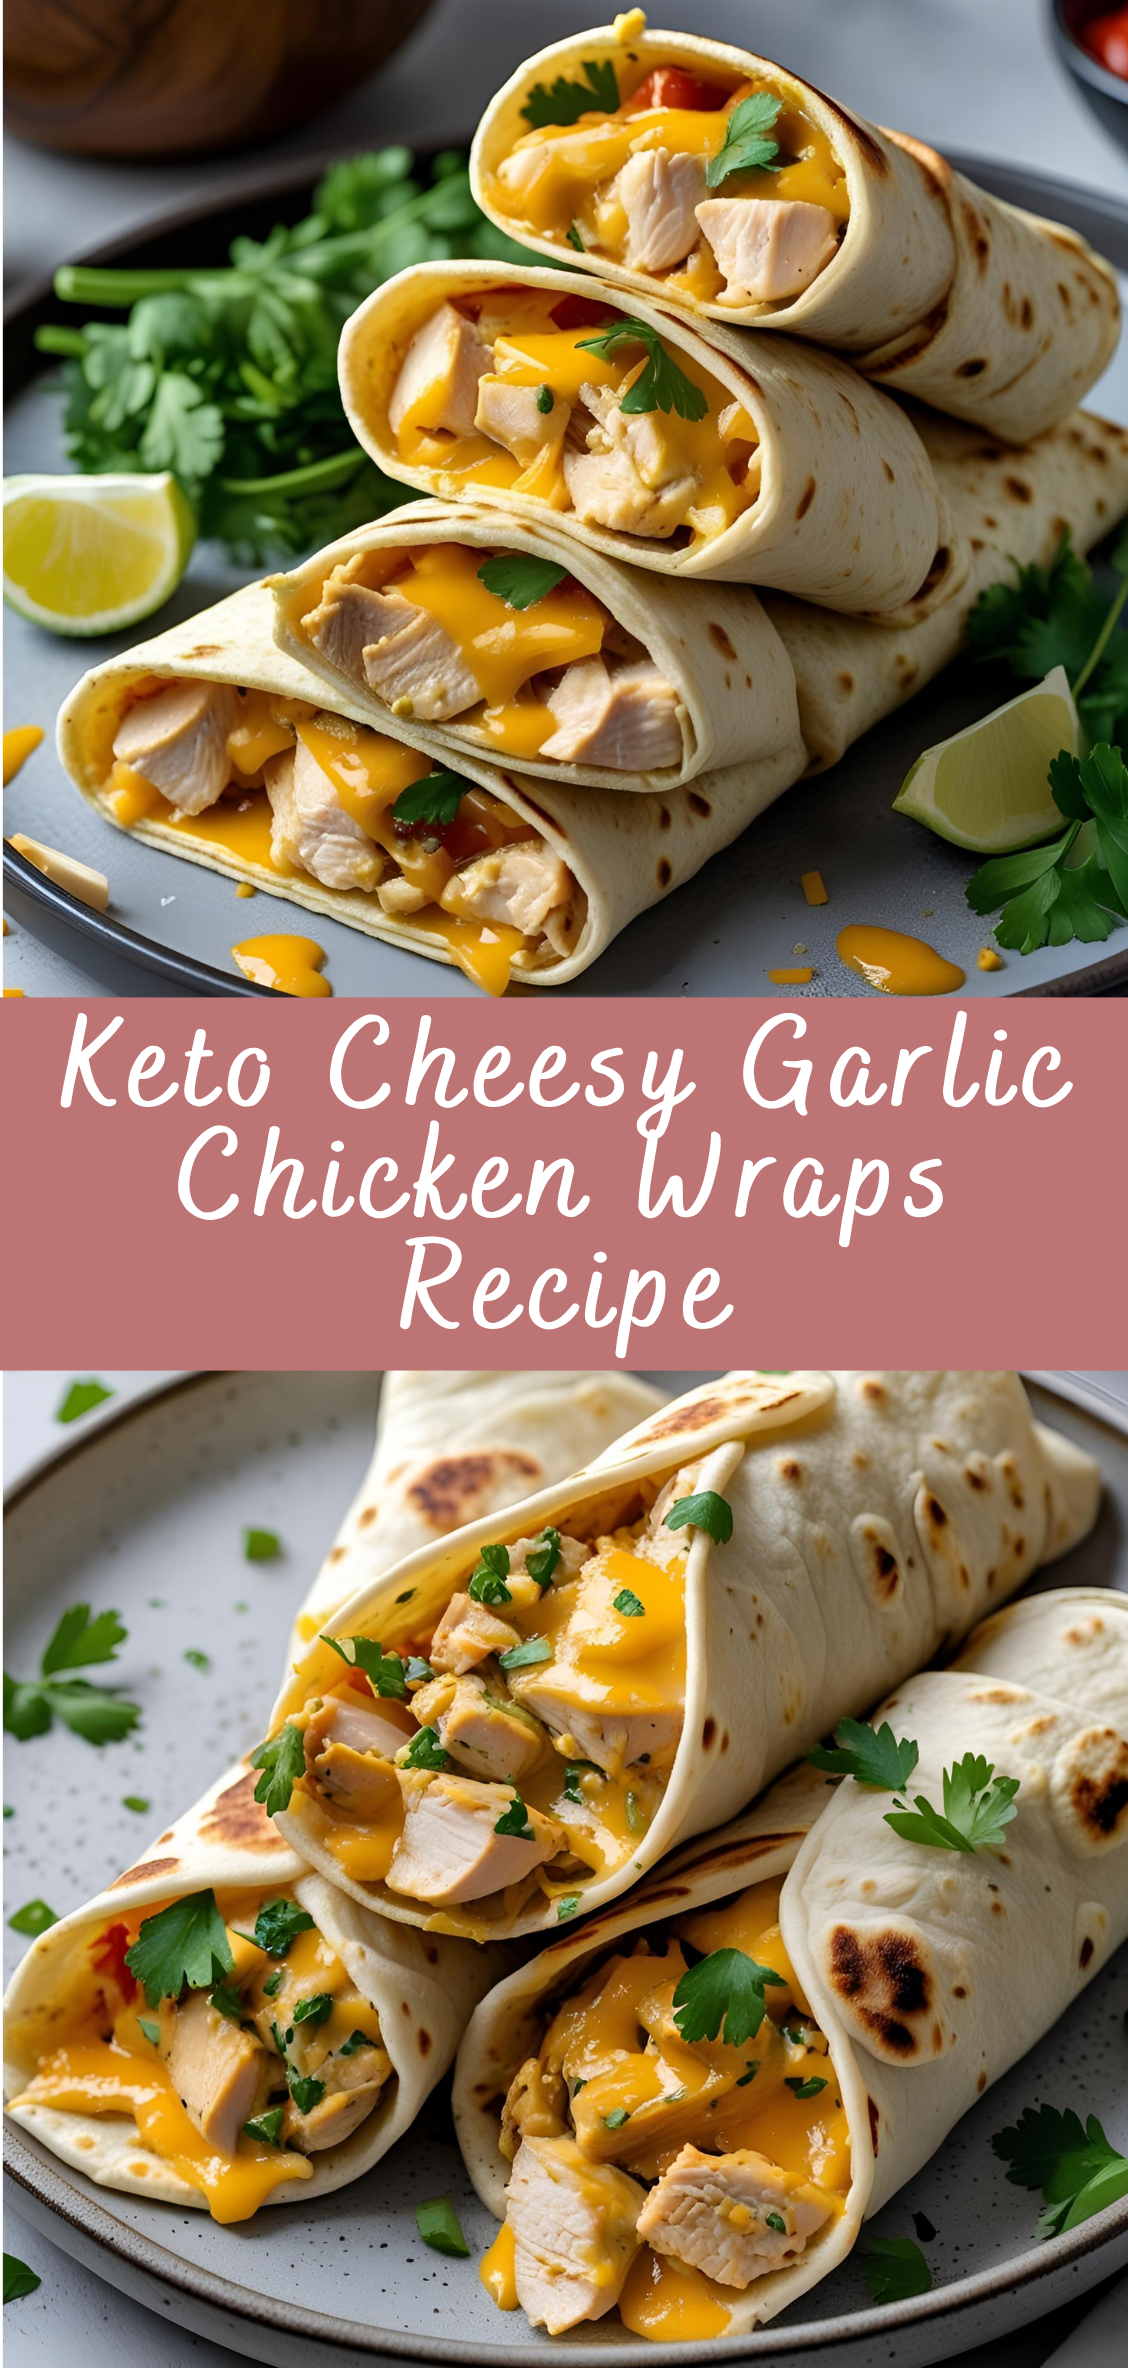
Imagine the bold flavor of roasted garlic, the gooey indulgence of melted cheese, and the savory depth of perfectly seasoned chicken—all wrapped together in a keto-friendly package. These wraps are more than just a substitute for traditional tortillas; they’re a high-protein, high-flavor option that supports your goals while delivering on taste. Whether you’re preparing a quick lunch, a family dinner, or meal-prepping for the week, this recipe is as functional as it is flavorful.
The beauty of these wraps lies in their versatility. They’re portable, customizable, and ideal for anyone avoiding grains, gluten, or excess carbohydrates. Unlike many keto recipes that rely heavily on processed substitutes, this wrap uses whole, real ingredients that are naturally low in carbs and high in nutritional value. And despite being diet-conscious, this dish doesn’t compromise on flavor—thanks to generous layers of cheese, aromatic garlic, juicy chicken, and complementary seasonings.
Garlic, a staple in global cuisines, isn’t just included here for its taste. It’s also packed with antioxidants and carries anti-inflammatory properties, adding both flavor and function to your food. Paired with gooey mozzarella or sharp cheddar, garlic transforms into something almost luxurious, creating a rich base that elevates the entire dish. The chicken, of course, provides lean protein that fuels the body while keeping carbs at bay.
Over the course of this comprehensive recipe guide, we’ll take a deep dive into everything you need to know about Keto Cheesy Garlic Chicken Wraps—from ingredient selection and cooking techniques to nutritional insights and creative serving ideas. We’ll explore keto-friendly wrap alternatives, tips for keeping the cheese from sticking or breaking, and how to maximize flavor without adding unnecessary carbs. Whether you’re new to keto cooking or a seasoned veteran looking for a new staple, this guide offers the detail and depth you need to master the recipe with confidence.
So if you’ve ever missed the convenience of a wrap, the comfort of melted cheese, or the satisfaction of a hearty handheld meal while following keto, look no further. This recipe brings it all together in one low-carb package that’s as nourishing as it is indulgent.
Detailed Instructions: How to Make Keto Cheesy Garlic Chicken Wraps
Overview
This recipe makes approximately 4 large wraps, depending on the size of your pan and ingredients used. Each wrap is loaded with flavor and satisfies both hunger and dietary goals. The process involves three main components:
-
Preparing the chicken filling
-
Making the cheesy garlic “wrap” base
-
Assembling and finishing the wrap
Stage 1: Preparing the Chicken Filling
Ingredients:
-
2 medium boneless, skinless chicken breasts (about 1.5 lbs total)
-
1 tablespoon olive oil or avocado oil
-
1 teaspoon garlic powder
-
1 teaspoon onion powder
-
1/2 teaspoon smoked paprika (optional for depth)
-
Salt and pepper to taste
-
2 cloves fresh garlic, minced
-
1 tablespoon butter (for sautéing garlic)
-
1/4 cup heavy cream (optional for creamier texture)
-
1/2 cup shredded mozzarella or provolone (for added melt and stretch)
Step-by-Step Instructions – Chicken Filling
-
Trim and Cube the Chicken:
-
Trim off any excess fat or tendons from the chicken breasts.
-
Cut into small bite-sized cubes (about 1/2-inch pieces) for quick cooking and even distribution in the wrap.
-
-
Season the Chicken:
-
In a bowl, toss the cubed chicken with olive oil, garlic powder, onion powder, paprika, salt, and pepper. Ensure every piece is evenly coated.
-
-
Cook the Chicken:
-
Heat a skillet over medium-high heat. Add the seasoned chicken pieces in a single layer.
-
Cook for about 6–8 minutes, flipping occasionally, until the chicken is browned and cooked through (internal temperature should reach 165°F/74°C).
-
Remove from heat and set aside in a covered bowl to stay warm.
-
-
Sauté the Garlic:
-
In the same skillet, reduce the heat to medium. Add 1 tablespoon of butter and the minced fresh garlic.
-
Sauté for about 30 seconds until fragrant, being careful not to burn the garlic.
-
-
(Optional) Add Cream and Cheese:
-
For a creamy garlic chicken filling, stir in 1/4 cup heavy cream and 1/2 cup shredded mozzarella.
-
Let it simmer gently for 1–2 minutes until the mixture is creamy and the cheese has melted.
-
Return the cooked chicken to the pan and toss to coat. Remove from heat and keep warm.
-
Stage 2: Making the Cheesy Garlic Wrap
This is the heart of the keto wrap—no flour, no tortillas—just cheese and garlic forming a golden, flexible crust.
Ingredients (per wrap):
-
3/4 to 1 cup shredded cheese (mozzarella, cheddar, provolone, or a mix)
-
1/4 teaspoon garlic powder (or 1/2 teaspoon minced roasted garlic for extra depth)
-
Optional: 1 teaspoon finely chopped parsley or chives
-
Optional: 1 tablespoon grated parmesan (for added crispness and flavor)
Step-by-Step Instructions – Cheese Wrap
-
Preheat a Nonstick Skillet:
-
Use a good-quality nonstick skillet (8–10 inch recommended).
-
Preheat over medium heat. Do not add oil or butter—the cheese has enough fat to cook on its own.
-
-
Distribute the Cheese:
-
Sprinkle 3/4 to 1 cup of shredded cheese evenly into the skillet, forming a circular shape.
-
Make sure the layer is even, not too thick in the center.
-
-
Add Garlic and Seasoning:
-
While the cheese is melting, sprinkle garlic powder evenly over the top. Add herbs or parmesan if using.
-
-
Cook Until Golden:
-
Allow the cheese to melt and bubble. It will first look greasy, then start to brown around the edges.
-
Let it cook for about 3–5 minutes. When the bottom is golden brown and the top is mostly set (but still pliable), it’s ready to be shaped.
-
-
Remove and Cool Slightly:
-
Carefully lift the cheese wrap with a silicone spatula and transfer to a plate or clean cutting board.
-
Let it cool for about 30–60 seconds—it should still be warm and flexible, not crisp.
-
Stage 3: Assembling the Wrap
Now that you have your garlic-infused cheese wrap and hot chicken filling, it’s time to bring everything together.
Step-by-Step Instructions – Assembly
-
Layer the Chicken:
-
Spoon a generous amount of chicken filling (about 1/2 to 3/4 cup) onto the center of the cheese wrap.
-
Spread it in a horizontal line across the center third of the wrap, leaving some room at the edges for folding.
-
-
Add Optional Fillings:
-
At this point, you can add extras like:
-
Sliced avocado or guacamole
-
A handful of baby spinach or arugula
-
Thin slices of cooked bacon
-
Keto-friendly ranch or aioli drizzle
-
-
-
Fold the Wrap:
-
Fold the bottom of the cheese wrap up over the filling, then fold the sides in like a burrito.
-
If the wrap has cooled too much and becomes brittle, microwave it for 10 seconds to regain flexibility.
-
-
Secure and Rest:
-
Let the assembled wrap rest for 1 minute to firm up and seal itself.
-
If desired, place seam-side down in the skillet for 30 seconds to help it hold.
-
Stage 4: Final Toast (Optional But Recommended)
For a slightly crispy exterior and extra flavor, give the wrapped rolls a quick final toast in the pan.
-
Return to Skillet:
-
Wipe out any residue in the skillet. Heat over medium heat.
-
Place the assembled wraps seam-side down into the pan.
-
-
Toast Gently:
-
Cook for 1–2 minutes per side until lightly browned and sealed.
-
-
Remove and Slice:
-
Slice in half on the diagonal for presentation—or serve whole as a handheld wrap.
-
Stage 5: Serving
Serve your Keto Cheesy Garlic Chicken Wraps hot and fresh. Ideal sides or accompaniments include:
-
A small green salad with vinaigrette
-
Keto coleslaw
-
Pickled jalapeños
-
A dollop of sour cream or low-carb salsa
Keto Cheesy Garlic Chicken Wraps Recipe
The ketogenic lifestyle has transformed the way millions of people around the world think about food. Centered around high-fat, moderate-protein, and ultra-low-carb principles, the keto diet encourages mindful eating, nutrient density, and metabolic efficiency. But one challenge that often arises for keto adherents is finding comfort foods that satisfy cravings without kicking them out of ketosis. That’s where this recipe comes in: Keto Cheesy Garlic Chicken Wraps—a rich, satisfying, and low-carb meal solution that hits every craving in a single bite.
Ingredients
- For the Wraps:
- 2 cups cooked chicken breast, shredded (rotisserie works great)
- 1 ½ cups shredded mozzarella cheese
- 1/2 cup shredded cheddar cheese
- 1/4 cup cream cheese (softened)
- 1 tbsp butter
- 2 cloves garlic, minced
- 1/2 tsp garlic powder
- 1/2 tsp Italian seasoning (optional)
- Salt and pepper, to taste
- For the Cheese Wrap Shells (Keto alternative to tortillas):
- 1 cup shredded mozzarella or cheddar cheese (or mix)
Instructions
1. Make the Cheese Wrap Shells:
- Preheat oven to 375°F (190°C).
- Line a baking sheet with parchment paper.
- Make 4 small piles (about 1/4 cup each) of shredded cheese. Flatten each into a 6-inch circle.
- Bake for 6–8 minutes until edges are golden and bubbly. Remove from oven and cool slightly (not fully—just enough to be flexible).
- Carefully lift each and mold over a rolling pin or bottle for taco-like shape (optional).
2. Prepare the Garlic Chicken Filling:
- In a skillet over medium heat, melt butter.
- Add minced garlic and sauté for 30 seconds.
- Stir in the shredded chicken, cream cheese, garlic powder, and Italian seasoning. Mix until warmed through and creamy.
- Add shredded mozzarella and cheddar, stir until cheese melts and mixture is gooey.
- Season with salt and pepper to taste.
3. Assemble Wraps:
- Spoon the hot cheesy garlic chicken mixture into each cheese wrap.
- Fold or roll like a burrito or taco.
- Optional: return to a skillet or air fryer for 1–2 minutes per side to crisp them up!
Notes
- Want crunch? Pan-sear the filled wraps seam-side down for a golden crust.
- Add greens: Toss in chopped spinach or arugula before wrapping for extra nutrients.
- Make it spicy: Add red pepper flakes or a dash of hot sauce to the filling.
- Shortcut tip: Use store-bought keto cheese wraps (like Folios) if you're short on time.

