Mini Coffee Cheesecakes Recipe
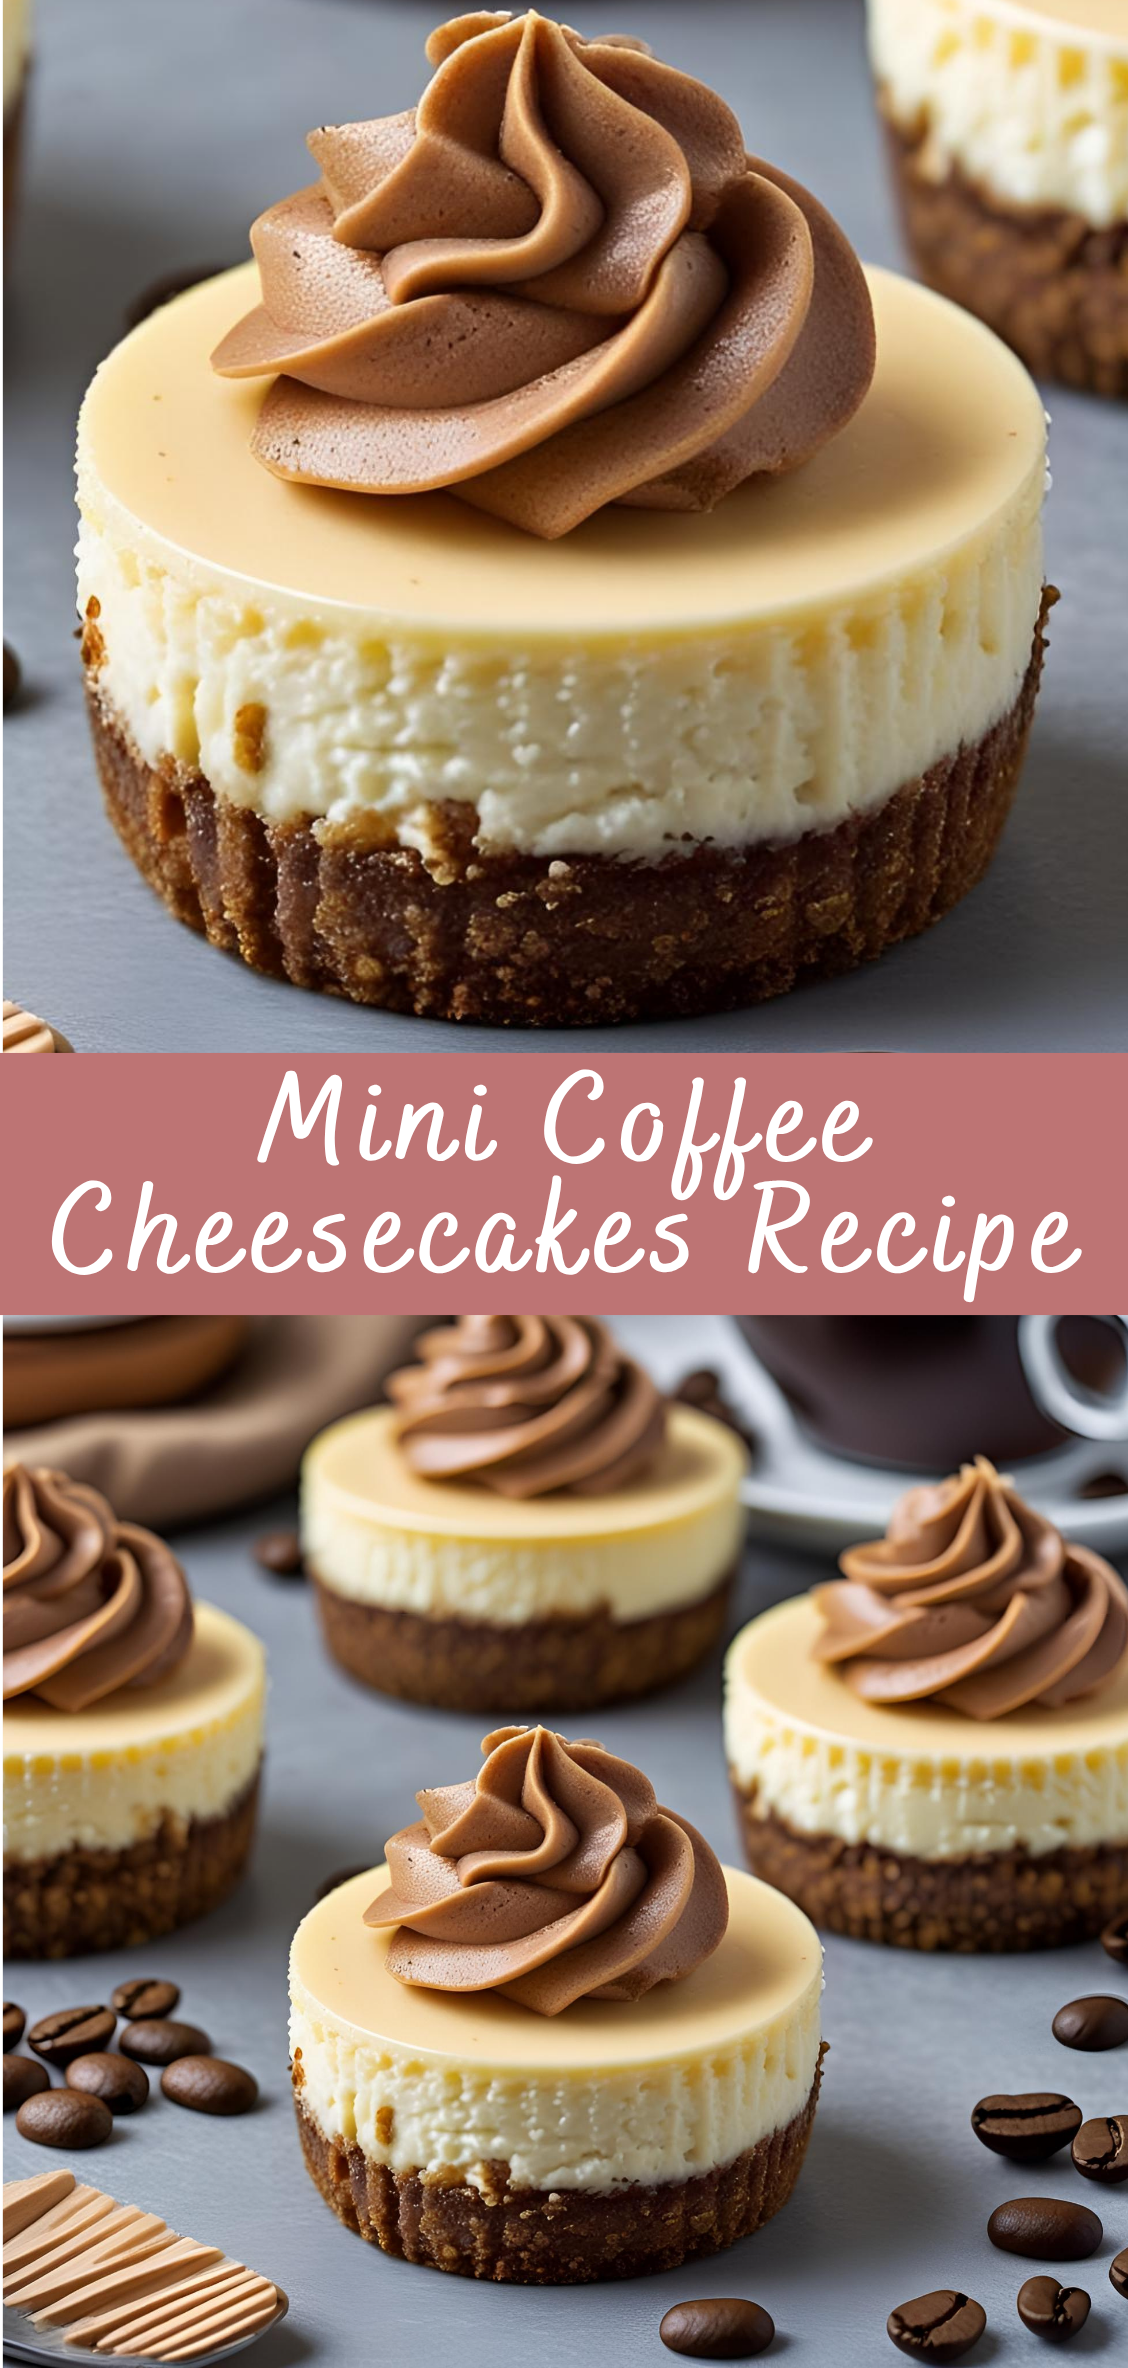
Cheesecake has long held a special place in the world of desserts — rich, creamy, and indulgent, it straddles the line between elegance and comfort food. Add coffee into the equation, and you’ve got a decadent, aromatic twist that elevates this classic dessert to an entirely new level. Enter Mini Coffee Cheesecakes: bite-sized treats that deliver the full intensity of a traditional cheesecake, enhanced with the bold, slightly bitter complexity of coffee. Individually portioned and beautifully presentable, these little delights offer the perfect combination of convenience, flavor, and sophistication.
Coffee and cheesecake are natural companions. Coffee brings depth, warmth, and subtle bitterness that balance the richness of cream cheese and the sweetness of the crust and topping. In mini form, this pairing becomes even more appealing — easier to serve, easier to store, and ideal for everything from casual gatherings to upscale celebrations. Whether you’re hosting brunch, looking for a show-stopping dessert for a dinner party, or meal-prepping for a week of indulgent treats, mini coffee cheesecakes hit all the right notes.
What sets these mini versions apart — beyond their size — is their versatility. They can be baked in a standard muffin tin, individual ramekins, or specialty mini cheesecake pans. They’re freezer-friendly, travel well, and allow for a variety of customizations, from crust variations (think chocolate cookie crumbs, gingersnaps, or almond flour) to toppings like chocolate ganache, whipped cream, espresso dust, or even a drizzle of caramel. You can also tailor the level of coffee intensity — from a mild latte flavor to an espresso-forward experience — depending on the type of coffee used and how it’s incorporated.
Beyond their deliciousness, mini cheesecakes solve a number of problems often associated with full-size cheesecakes. There’s no need for a water bath, no long cooling period, and no risk of cracking tops or uneven slices. Plus, they bake faster and chill quickly, making them a smart choice for time-sensitive occasions or last-minute dessert needs.
In this in-depth guide, we’ll take you step by step through the process of making flawless mini coffee cheesecakes at home. We’ll begin by selecting the right ingredients — from the best coffee (instant espresso, cold brew, or brewed coffee) to the ideal cream cheese consistency. We’ll cover preparation techniques, the optimal mixing process, baking and chilling instructions, and troubleshooting tips to avoid common issues like sinking centers, rubbery textures, or soggy crusts. You’ll also find sections on variations (including mocha, caramel coffee, and dairy-free options), make-ahead strategies, and presentation ideas to make your mini cheesecakes as beautiful as they are delicious.
Whether you’re a home baker just beginning your cheesecake journey or an experienced dessert enthusiast looking to refine your skills and explore new flavor combinations, this recipe offers everything you need. Mini coffee cheesecakes deliver big flavor in a compact, elegant package — a harmonious blend of sweet, creamy, and bold that’s sure to impress both casual coffee lovers and serious dessert aficionados alike.
Step-by-Step Instructions: How to Make Mini Coffee Cheesecakes
Creating mini coffee cheesecakes from scratch may seem complex, but when broken down into stages, it becomes a manageable and rewarding process. The keys to success lie in attention to temperature, careful mixing, and proper baking and cooling techniques. Let’s walk through the full method — from crust to final garnish — in exact detail.
Step 1: Gather and Measure Ingredients
Before you begin, gather and measure all ingredients. Baking is a science, and precision matters — especially with cheesecake, where texture and structure depend on balance.
For the Crust:
-
1 cup (100g) graham cracker crumbs (or chocolate cookie crumbs)
-
2 tablespoons granulated sugar
-
4 tablespoons (60g) unsalted butter, melted
-
¼ teaspoon ground cinnamon (optional)
For the Coffee Cheesecake Filling:
-
16 oz (450g) full-fat cream cheese, softened to room temperature
-
½ cup (100g) granulated sugar
-
¼ cup (60ml) sour cream, room temperature
-
2 large eggs, room temperature
-
2 teaspoons vanilla extract
-
2 tablespoons instant espresso powder OR ¼ cup (60ml) strongly brewed coffee, cooled
-
1 tablespoon all-purpose flour (optional, helps with structure)
Optional Toppings:
-
Whipped cream
-
Chocolate shavings or cocoa powder
-
Espresso beans
-
Caramel or chocolate drizzle
Step 2: Prepare Your Equipment
You’ll need:
-
A standard 12-cup muffin tin
-
Paper or foil cupcake liners
-
Hand mixer or stand mixer with paddle attachment
-
Mixing bowls
-
Spatula
-
Fine mesh strainer or sifter (optional)
Prep Instructions:
-
Line each cup of your muffin tin with paper liners. This makes removal easier and maintains shape.
-
Preheat your oven to 325°F (163°C). A lower baking temperature ensures smooth, even baking without cracks.
-
Bring cream cheese, sour cream, and eggs to room temperature. Cold ingredients don’t mix well and can cause lumps in the batter.
Step 3: Make the Crust
A firm, flavorful crust gives each mini cheesecake structure and contrast.
Instructions:
-
Combine graham cracker crumbs, sugar, cinnamon (if using), and melted butter in a small bowl. Stir with a fork until evenly moistened and resembles wet sand.
-
Scoop 1 to 1½ tablespoons of the crust mixture into each prepared muffin liner. Press down firmly with the bottom of a small glass or spoon to pack tightly and create an even base.
-
Pre-bake the crusts for 5–7 minutes. This helps set them and prevents sogginess later.
-
Remove from oven and let cool while you prepare the filling.
Tip: Chocolate cookie crumbs (like Oreos without filling) make a bolder base that pairs beautifully with coffee flavor.
Step 4: Prepare the Coffee Cheesecake Filling
Creamy, smooth, and richly flavored, the filling is the heart of your cheesecake. Don’t rush this step.
Instructions:
-
In a large mixing bowl, beat the softened cream cheese using a hand or stand mixer on medium speed for 2–3 minutes, until smooth and free of lumps.
-
Add the sugar and continue mixing for another minute until fully incorporated and creamy.
-
Add the sour cream, vanilla, and espresso powder or brewed coffee.
Beat until smooth, scraping down the bowl as needed to avoid streaks. -
Add the eggs, one at a time, mixing on low speed.
Beat just until combined. Do not overmix, as this can introduce air and cause cracking during baking. -
Optional: Sift in 1 tablespoon of flour to slightly thicken the batter and help with firmness.
-
Gently tap the bowl on the counter a few times to release any large air bubbles in the batter.
Step 5: Fill and Bake
Now it’s time to fill your tins and bake the cheesecakes low and slow for the best texture.
Instructions:
-
Divide the filling evenly among the 12 muffin cups, filling each about ¾ full.
-
Place the pan in the preheated oven on the center rack.
-
Bake for 18–22 minutes, or until the centers are mostly set but still slightly jiggly. They will finish setting as they cool.
-
Turn off the oven and crack the oven door open. Let the cheesecakes rest inside for 10–15 minutes. This gentle cooling prevents sudden temperature changes that can lead to cracks.
-
Remove from oven and let cool in the pan on a wire rack for 30–60 minutes.
Step 6: Chill Thoroughly
Cheesecake texture depends on proper chilling. This step is essential for firmness and flavor development.
Instructions:
-
Cover the cooled cheesecakes loosely with plastic wrap or foil.
-
Refrigerate for at least 4 hours, preferably overnight.
This allows the filling to firm up and the flavors to meld. -
Optional: For perfectly clean sides when serving, peel off the paper liners after the cheesecakes are fully chilled.
Pro Tip: If you’re short on time, you can chill the cheesecakes in the freezer for 60–90 minutes, but the texture is best when slowly chilled in the fridge.
Step 7: Add Toppings and Serve
Toppings not only enhance flavor but also make your mini cheesecakes visually stunning.
Topping Ideas:
-
Whipped Cream: Pipe or dollop on top just before serving.
-
Chocolate Drizzle: Melt dark or milk chocolate and drizzle in zigzag patterns.
-
Espresso Dust or Cocoa Powder: Lightly sift over the tops.
-
Caramel Sauce: Adds sweetness and a rich finish.
-
Mini Espresso Beans or Chocolate Shavings: For texture and garnish.
Serving Instructions:
-
Serve chilled, straight from the fridge for the best texture.
-
Use a small spatula or butter knife to gently lift them from the pan.
-
Garnish just before serving for the freshest presentation.
Step 8: Store and Freeze
Refrigerator:
Store mini cheesecakes in an airtight container in the fridge for up to 5 days.
Freezer:
Freeze cheesecakes (without toppings) on a baking sheet until solid, then transfer to a freezer-safe bag or container. Freeze for up to 2 months. Thaw overnight in the refrigerator before serving.
Mini Coffee Cheesecakes Recipe
Cheesecake has long held a special place in the world of desserts — rich, creamy, and indulgent, it straddles the line between elegance and comfort food. Add coffee into the equation, and you’ve got a decadent, aromatic twist that elevates this classic dessert to an entirely new level. Enter Mini Coffee Cheesecakes: bite-sized treats that deliver the full intensity of a traditional cheesecake, enhanced with the bold, slightly bitter complexity of coffee. Individually portioned and beautifully presentable, these little delights offer the perfect combination of convenience, flavor, and sophistication.
Ingredients
- Crust:
- 1 cup graham cracker crumbs (about 8 squares)
- 2 tablespoons sugar
- 4 tablespoons unsalted butter, melted
- Filling:
- 2 (8 oz) blocks cream cheese, softened
- ½ cup granulated sugar
- 2 tablespoons sour cream
- 2 tablespoons all-purpose flour
- 1 teaspoon vanilla extract
- 1 tablespoon instant espresso or strong instant coffee
- 2 large eggs
- Optional Toppings:
- Whipped cream
- Chocolate shavings or cocoa powder
- Chocolate-covered espresso beans
Instructions
1. Preheat Oven:
- Preheat to 325°F (160°C). Line a 12-cup muffin pan with cupcake liners.
2. Make the Crust:
- In a bowl, mix graham cracker crumbs, sugar, and melted butter until combined.
- Spoon about 1 tablespoon into each liner. Press down firmly (use the bottom of a small glass).
- Bake for 5 minutes, then remove from oven. Keep oven on.
3. Prepare the Filling:
- In a large bowl, beat softened cream cheese and sugar until smooth and creamy (no lumps).
- Mix in sour cream, flour, vanilla, and espresso powder until well combined.
- Add eggs one at a time, mixing just until incorporated (do not overmix).
4. Bake the Cheesecakes:
- Pour filling evenly over the baked crusts (fill each cup almost to the top).
- Bake for 18–22 minutes, or until centers are just set and slightly jiggly.
- Let cool in the pan for 10–15 minutes, then transfer to a wire rack.
5. Chill:
- Refrigerate at least 2–3 hours (or overnight) before serving.
6. Serve:
- Top with whipped cream and your favorite toppings like chocolate curls or espresso beans.
Notes
- No espresso powder? Dissolve 1 tablespoon instant coffee in 1 tablespoon hot water and let cool before adding.
- For extra richness: Add ¼ cup melted dark chocolate to the filling.
- Crust variations: Try crushed Oreos, chocolate graham crackers, or Biscoff cookies for a twist.

