No-Bake Peanut Butter Oat Cups Recipe
In today’s fast-paced world, finding snacks that are both delicious and convenient can be a challenge. Enter the No-Bake Peanut Butter Oat Cups — a perfect blend of wholesome ingredients and mouthwatering flavor, made without turning on the oven. These no-bake treats have become a favorite for busy individuals and families alike, offering a quick, satisfying, and nutritious option that fits effortlessly into any lifestyle.
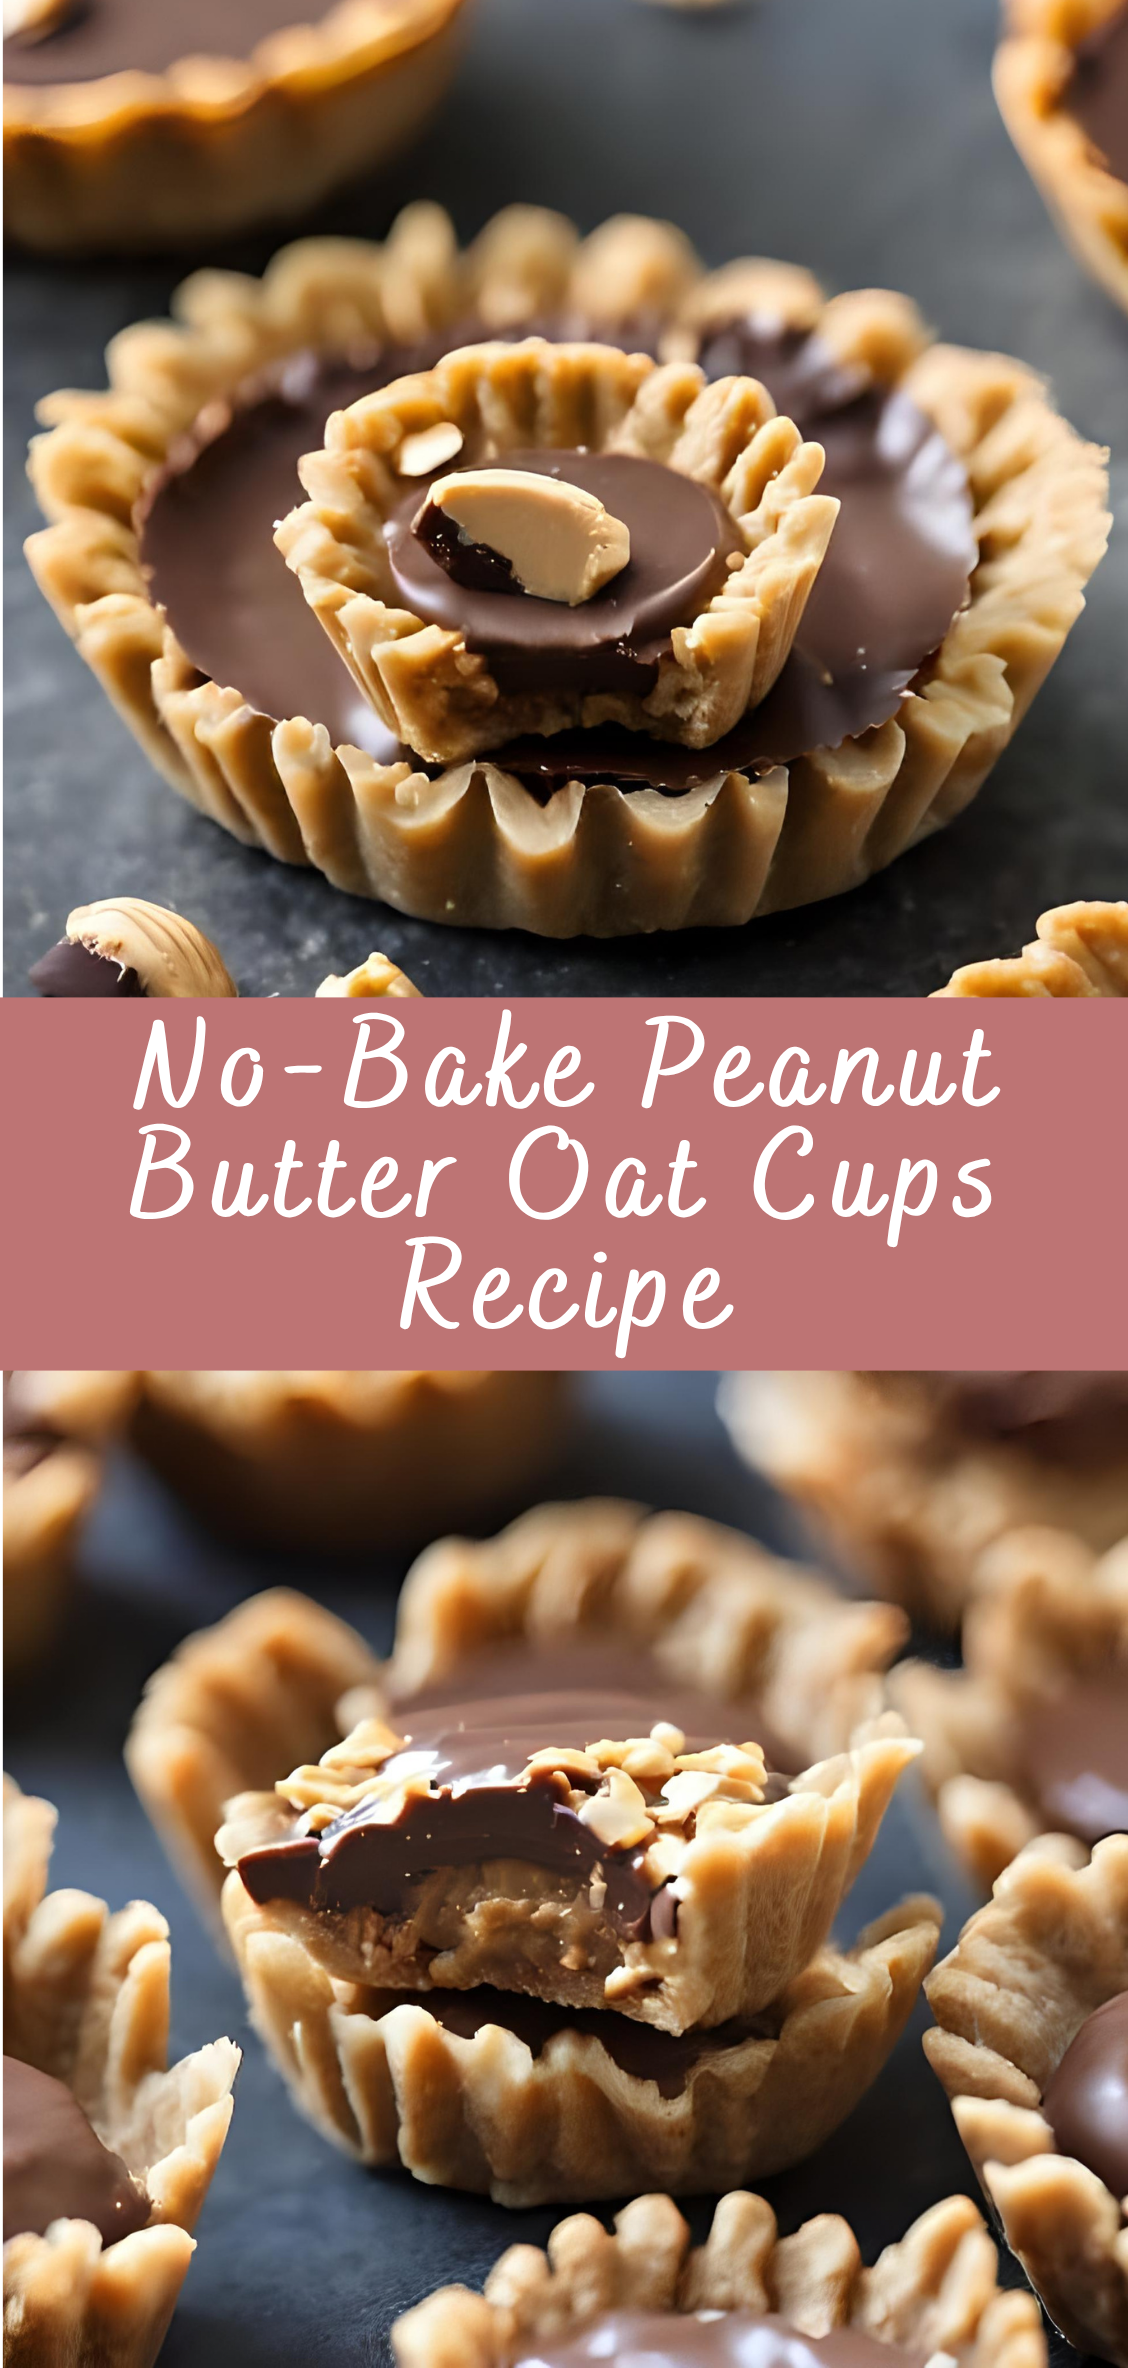
What makes these oat cups so special? At their heart, they combine the creamy richness of peanut butter with the hearty texture of oats, creating a snack that is not only indulgent but also packed with protein, fiber, and healthy fats. The absence of baking means they can be whipped up in a fraction of the time it takes to prepare traditional baked goods, making them ideal for last-minute cravings, meal prep, or even a quick breakfast on the go.
Beyond their convenience, these peanut butter oat cups are highly versatile. You can customize them to suit your taste preferences and dietary needs — adding chocolate chips, nuts, seeds, dried fruits, or even a touch of natural sweeteners like honey or maple syrup. Whether you’re looking for a pre-workout energy boost, a post-school snack for kids, or a guilt-free dessert, these cups fit the bill perfectly.
The recipe also appeals to a broad range of eaters, from health-conscious individuals seeking clean-label snacks to those following specific diets such as vegetarian, gluten-free (when using certified oats), or dairy-free versions. Plus, their portability makes them perfect for lunchboxes, picnics, or an easy pick-me-up during a busy day.
In this comprehensive guide, we’ll walk you through everything you need to know to master the art of making No-Bake Peanut Butter Oat Cups. From ingredient selection and preparation tips to variations and storage advice, you’ll gain all the tools necessary to create delicious, nutritious snacks that everyone will love. We’ll also explore the nutritional benefits, troubleshoot common issues, and suggest creative serving ideas to keep your snack game fresh and exciting.
Whether you’re a seasoned home cook or a beginner looking for simple, wholesome recipes, No-Bake Peanut Butter Oat Cups offer a delightful combination of flavor, nutrition, and ease. Get ready to embrace a snack that’s as satisfying as it is convenient — a perfect little cup of peanut butter goodness.
Detailed Step-by-Step Instructions for No-Bake Peanut Butter Oat Cups
Step 1: Gather and Prepare Your Ingredients
Core Ingredients:
-
Rolled oats — 2 cups (use gluten-free oats if needed)
-
Natural peanut butter — 1 cup (creamy or chunky, based on preference)
-
Honey or maple syrup — ½ cup (acts as a natural sweetener and binder)
-
Vanilla extract — 1 teaspoon
-
Salt — ¼ teaspoon (to balance sweetness)
-
Optional mix-ins: mini chocolate chips, chopped nuts, chia seeds, flaxseed, shredded coconut, dried fruit, or puffed quinoa
Preparation Tips:
-
Use natural peanut butter without added sugar or hydrogenated oils for the best flavor and nutrition.
-
If your peanut butter is thick, warm it slightly in the microwave (about 15 seconds) to soften for easier mixing.
-
Measure your oats carefully. Rolled oats work best as they hold texture; avoid quick oats which can turn mushy.
-
If using honey, ensure it’s runny enough to mix well; if too thick, warm slightly.
Step 2: Mixing the Wet Ingredients
-
In a large mixing bowl, combine the peanut butter and honey or maple syrup.
-
Add the vanilla extract and salt.
-
Using a sturdy spoon or a spatula, stir until the mixture is smooth, glossy, and fully blended.
-
If your peanut butter and honey are too stiff, warming the bowl slightly (place over warm water or microwave briefly) will help achieve a uniform texture.
Step 3: Adding the Dry Ingredients
-
Gradually add the rolled oats to the wet mixture.
-
Stir thoroughly to coat all the oats with the peanut butter mixture.
-
The texture should be sticky but manageable — you want the oats well-coated so the cups will hold their shape.
-
Fold in any optional mix-ins like mini chocolate chips, nuts, or seeds at this stage to evenly distribute.
Step 4: Preparing Your Molding Method
There are a few options for shaping your oat cups:
-
Mini muffin tin: Line with paper liners or grease lightly to prevent sticking.
-
Silicone muffin molds: Great for easy removal and no need for liners.
-
Small ramekins or bowls: If you want larger “cups” or bars.
-
Freeform on a parchment-lined tray: For no-mold versions (flatten and cut into squares after chilling).
For classic peanut butter oat cups, mini muffin tins are preferred for uniform size and presentation.
Step 5: Filling the Molds
-
Using a spoon or small cookie scoop, portion the mixture into each muffin cup.
-
Press down firmly with your fingers or the back of a spoon to compact the mixture. This helps the cups hold together after chilling.
-
Make sure each cup is evenly packed and level at the top for consistent size and appearance.
Step 6: Chilling and Setting
-
Place the filled muffin tin or molds into the refrigerator.
-
Chill for at least 1-2 hours to allow the mixture to firm up completely.
-
For quicker setting, you can freeze the cups for 30–45 minutes, but keep in mind freezing may change the texture slightly.
Step 7: Removing and Serving
-
Once fully set, gently remove the peanut butter oat cups from the molds.
-
If using liners, peel them off carefully.
-
Serve immediately or store for later.
Step 8: Storage and Shelf Life
-
Refrigerator: Store oat cups in an airtight container for up to 1 week.
-
Freezer: For longer storage, place in a freezer-safe container and freeze for up to 2 months. Thaw in the fridge before eating.
-
Keep refrigerated especially in warm climates to prevent melting or softening.
Step 9: Optional Enhancements
-
Drizzle melted chocolate over the tops for extra indulgence.
-
Roll the bottoms in crushed nuts or shredded coconut before chilling for texture contrast.
-
Add a sprinkle of sea salt on top before chilling to enhance flavor.
-
For a protein boost, mix in a scoop of your favorite protein powder with the oats (adjust wet ingredients accordingly).
No-Bake Peanut Butter Oat Cups Recipe
In today’s fast-paced world, finding snacks that are both delicious and convenient can be a challenge. Enter the No-Bake Peanut Butter Oat Cups — a perfect blend of wholesome ingredients and mouthwatering flavor, made without turning on the oven. These no-bake treats have become a favorite for busy individuals and families alike, offering a quick, satisfying, and nutritious option that fits effortlessly into any lifestyle.
Ingredients
- 1 cup natural peanut butter (creamy or chunky)
- ½ cup honey or maple syrup
- 2 cups old-fashioned rolled oats
- ½ cup mini chocolate chips (optional)
- 1 teaspoon vanilla extract
- ¼ teaspoon salt
Instructions
- Mix Wet Ingredients
In a large bowl, combine peanut butter, honey, and vanilla extract. Stir until smooth. - Add Dry Ingredients
Stir in oats, salt, and chocolate chips (if using) until everything is evenly coated. - Form Cups
Line a muffin tin with paper liners. Spoon the mixture into each cup, pressing down firmly to compact. - Chill
Refrigerate for at least 30 minutes until set. - Serve
Remove from muffin tin and enjoy! Store leftovers in an airtight container in the fridge.
Notes
- Make it nut-free: Substitute peanut butter with sunflower seed butter.
- Add-ins: Mix in chopped nuts, dried fruit, or seeds for extra texture.
- Sweetness: Adjust honey or syrup amount to taste.

