No Bake Strawberry Lasagna Recipe
There are few desserts that can strike the perfect balance between elegance, flavor, and ease of preparation quite like a no-bake strawberry lasagna. A delightful medley of creamy layers, fresh strawberries, and a buttery crust, this dessert offers a refreshing twist on traditional lasagna — minus the pasta, and with plenty of indulgent sweetness. It’s a crowd-pleaser, ideal for warm-weather gatherings, potlucks, holidays, or simply as a satisfying treat at the end of a long day.
No-bake desserts have gained popularity in recent years, and for good reason. They eliminate the need for oven time, making them ideal for summer months or when you’re short on time or equipment. In particular, no-bake layered desserts offer not only convenience but also visual appeal, often resembling intricate confections with minimal effort. The strawberry lasagna is one such dessert that checks every box: it’s easy to assemble, aesthetically pleasing, and bursting with flavor.
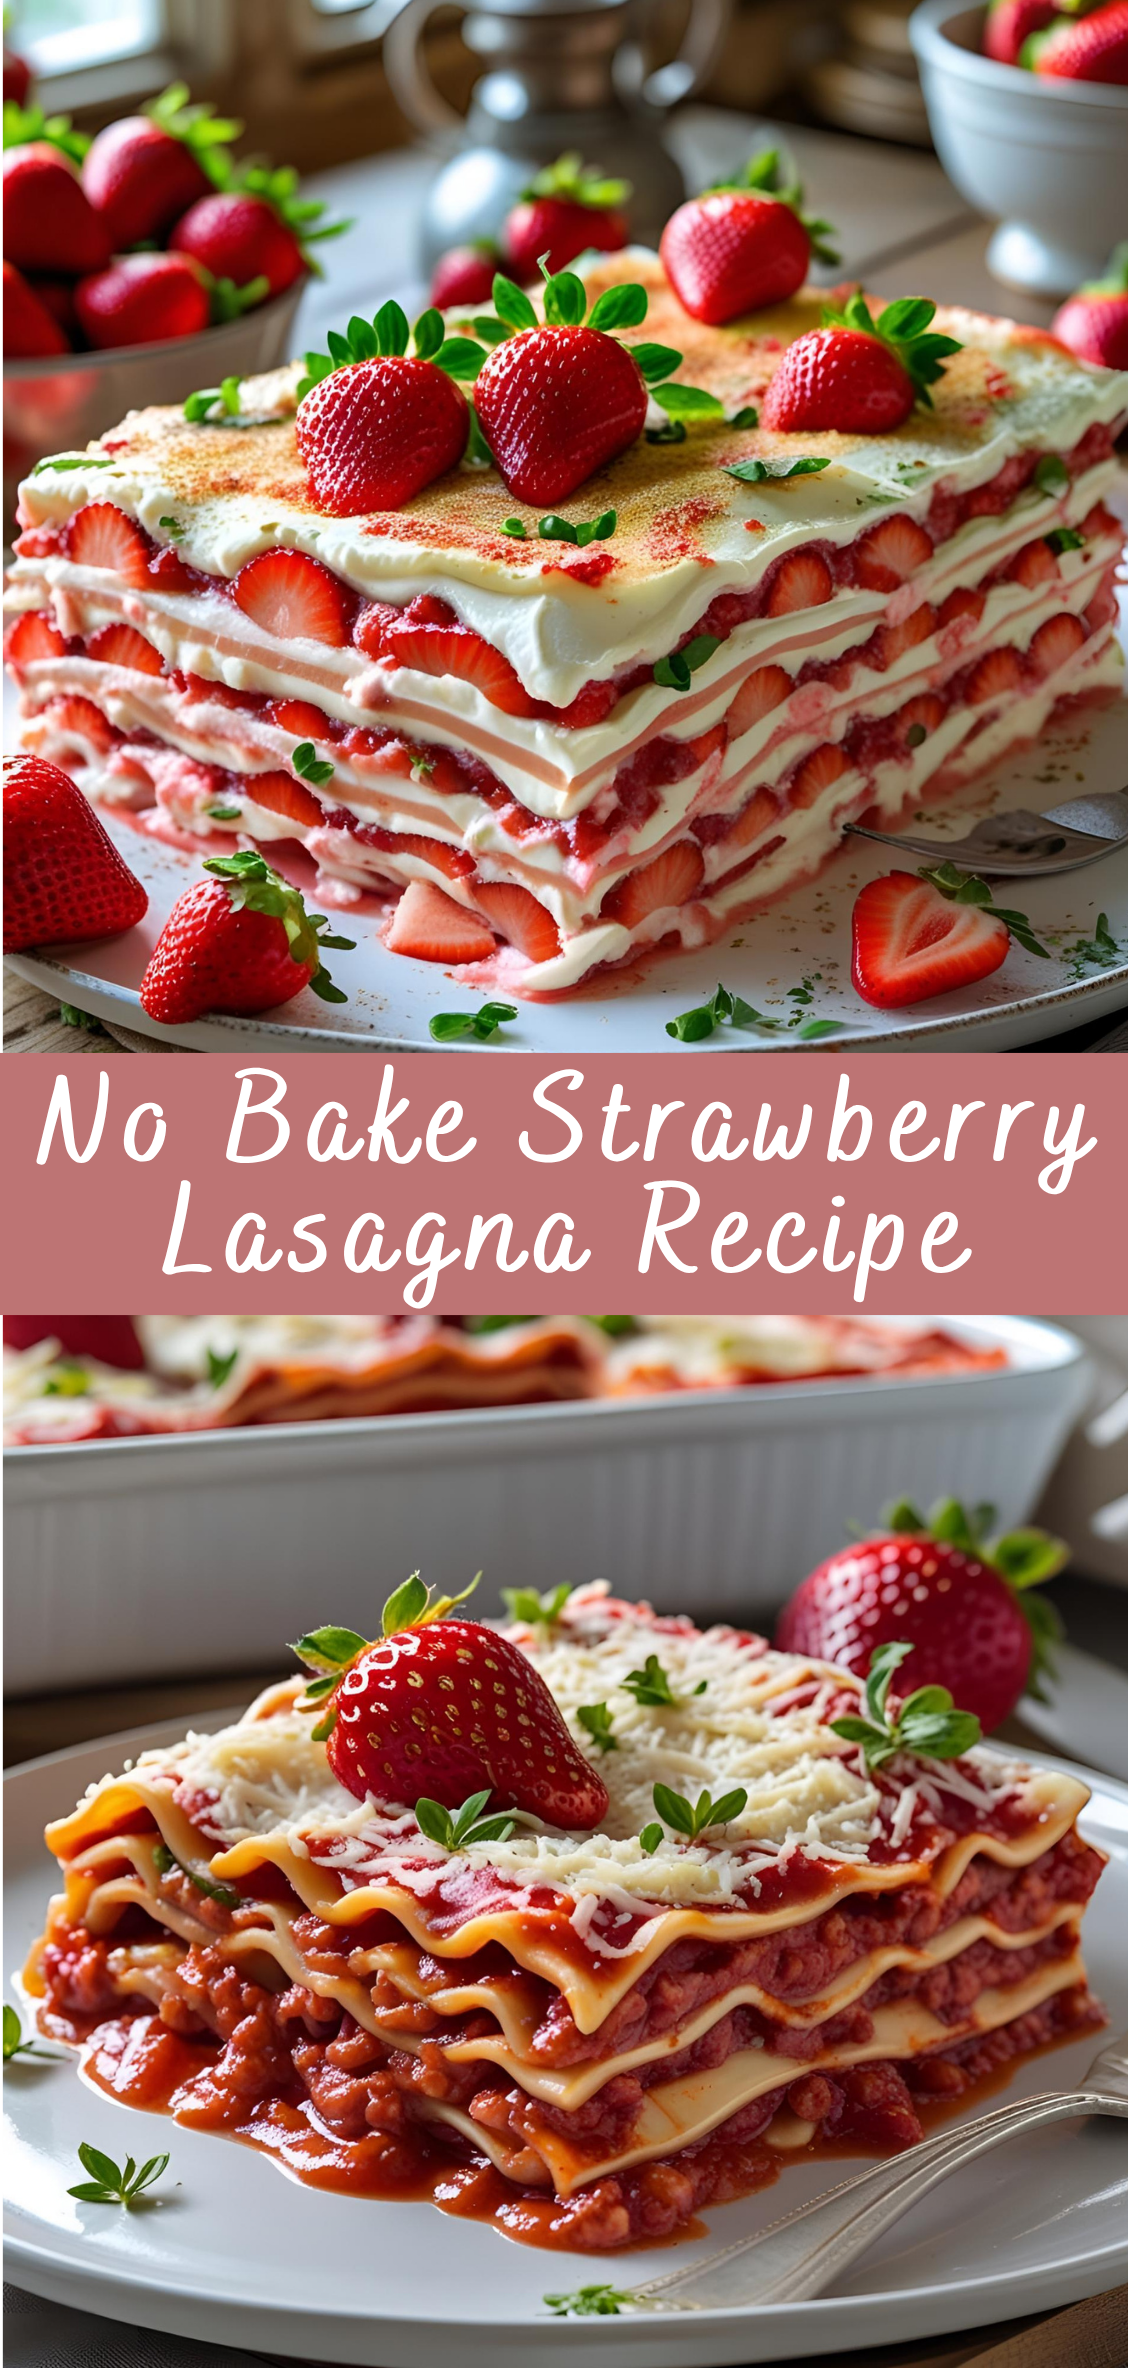
Strawberries, the star of this dessert, bring a bright, juicy sweetness that complements rich layers of cream cheese, whipped topping, and sweetened gelatin. Whether you’re using fresh strawberries at their seasonal peak or frozen berries for convenience, the fruit’s vibrant color and natural acidity elevate the dish, cutting through the richness of the other ingredients and adding complexity to each bite.
Structurally, this dessert mimics the familiar layout of a lasagna — layered components stacked together to create depth and texture. But instead of noodles and meat sauce, you’ll find a crisp, buttery crust made from crushed cookies or graham crackers, followed by luscious cream cheese filling, strawberry gelatin infused with fruit, and a cloud-like topping of whipped cream. Each layer is distinct, yet they come together harmoniously in every spoonful.
This recipe also allows for a great deal of customization. It can be adapted to suit dietary preferences, seasonal ingredients, or creative variations. From using a chocolate cookie crust to incorporating a layer of pudding or mascarpone, there are countless ways to make this dessert your own. Additionally, it’s a fantastic make-ahead option, as the flavors meld and improve with a few hours (or overnight) of chilling.
In this guide, we’ll delve deep into each aspect of the no-bake strawberry lasagna. We’ll start by exploring the ingredients in detail, discuss variations and substitutions, provide step-by-step instructions, offer storage tips, and answer frequently asked questions. By the end of this comprehensive recipe walkthrough, you’ll be fully equipped to create a show-stopping dessert that tastes as beautiful as it looks — with no oven required.
Whether you’re an experienced home baker looking for a new favorite, or a beginner hoping to impress guests without the stress of complicated baking techniques, this no-bake strawberry lasagna is a delicious and dependable choice. Prepare to enjoy layer upon layer of creamy, fruity goodness in what may soon become your go-to dessert for any occasion.
Step-by-Step Instructions: How to Make No-Bake Strawberry Lasagna
Creating a no-bake strawberry lasagna involves layering various textures and flavors in a specific sequence to achieve a beautifully structured, delicious dessert. While the steps are simple, attention to detail at each stage ensures the final product is both visually stunning and perfectly balanced in taste.
Before you begin, it’s helpful to gather all your ingredients and prepare your workspace. You’ll need a 9×13-inch baking dish, mixing bowls, a hand or stand mixer, a spatula, and plastic wrap or a lid for chilling the dessert. Once your tools and ingredients are ready, follow these steps:
Step 1: Prepare the Crust
Ingredients for the crust:
-
2 ½ cups crushed graham crackers or golden Oreos (about 1 standard package)
-
½ cup unsalted butter, melted
-
2 tablespoons granulated sugar (optional, depending on cookie sweetness)
Instructions:
-
Crush the cookies or graham crackers:
Using a food processor, pulse the cookies or graham crackers until they become fine crumbs. If you don’t have a food processor, place them in a zip-top bag and crush them with a rolling pin. Aim for a sand-like texture. -
Mix with melted butter:
In a medium-sized mixing bowl, combine the crumbs with the melted butter and optional sugar. Stir until all the crumbs are evenly coated and the mixture resembles wet sand. -
Press into the dish:
Transfer the mixture into a 9×13-inch baking dish. Press it firmly and evenly into the bottom of the dish using the back of a spoon, a spatula, or the bottom of a glass. Make sure it is well-packed to help the crust hold together when sliced. -
Chill the crust:
Place the crust in the refrigerator or freezer for at least 15–20 minutes while you prepare the next layer. This allows the butter to solidify, helping to bind the crust.
Step 2: Make the Cream Cheese Layer
Ingredients:
-
1 (8 oz) block of cream cheese, softened to room temperature
-
1 cup powdered sugar
-
1 teaspoon pure vanilla extract
-
1 container (8 oz) whipped topping (like Cool Whip), thawed
Instructions:
-
Beat the cream cheese:
In a large mixing bowl, beat the softened cream cheese with a hand or stand mixer on medium speed until smooth and creamy, about 2–3 minutes. Make sure there are no lumps. -
Add powdered sugar and vanilla:
Gradually add the powdered sugar and vanilla extract. Beat until fully incorporated and smooth, scraping down the sides of the bowl as needed. -
Fold in whipped topping:
Gently fold in the whipped topping using a spatula. Do this slowly to preserve the light texture. Continue folding until the mixture is uniformly creamy. -
Spread over crust:
Remove the crust from the refrigerator. Carefully spread the cream cheese mixture over the crust, using a spatula to smooth it into an even layer. Be careful not to disturb the crust underneath.
Step 3: Prepare the Strawberry Layer
Ingredients:
-
2 cups fresh strawberries, hulled and sliced
-
1 (6 oz) package strawberry-flavored gelatin (Jell-O)
-
2 cups boiling water
-
1 cup cold water
-
Optional: ½ cup chopped strawberries to stir into the gelatin
Instructions:
-
Prepare gelatin mixture:
In a medium bowl, combine the strawberry gelatin powder with 2 cups of boiling water. Stir continuously for about 2 minutes, or until the gelatin is fully dissolved. -
Add cold water:
Stir in 1 cup of cold water. Allow the mixture to cool slightly — it should still be pourable but no longer hot. This is important to avoid melting the cream cheese layer. -
Add fruit (optional):
If you’d like added texture, stir in ½ cup of chopped fresh strawberries to the cooled gelatin. -
Layer over cream cheese filling:
Slowly and gently pour the cooled gelatin mixture over the cream cheese layer. You can do this by spooning it over in small amounts to ensure it doesn’t sink into the lower layer. -
Chill until set:
Refrigerate the dish for at least 2–3 hours, or until the gelatin is fully set. For best results, chill overnight.
Step 4: Prepare the Topping Layer
Ingredients:
-
1 container (8 oz) whipped topping, thawed
-
½ cup finely chopped fresh strawberries (optional)
-
Optional garnish: additional sliced strawberries, white chocolate shavings, mint leaves
Instructions:
-
Spread final whipped layer:
Once the gelatin is completely set, spread the remaining container of whipped topping over the surface. Use a spatula to create soft peaks or smooth swirls for a finished look. -
Add chopped strawberries (optional):
If desired, fold in chopped fresh strawberries into the whipped topping before spreading. This adds color and freshness. -
Garnish:
Top with thin slices of fresh strawberries arranged in a decorative pattern. Optional additions include white chocolate curls, a dusting of crushed cookies, or a few mint leaves for color contrast.
Step 5: Final Chill and Serve
-
Chill before serving:
Once assembled, cover the dessert tightly with plastic wrap or a lid. Chill for at least 1 more hour before slicing and serving. This helps the layers hold their shape when cut. -
Slice with care:
Use a sharp knife dipped in warm water and wiped dry to slice cleanly through the layers. A pie server or offset spatula helps lift pieces cleanly from the pan. -
Serve chilled:
This dessert is best served cold. Store leftovers in the refrigerator, covered, for up to 3–4 days.
No Bake Strawberry Lasagna Recipe
There are few desserts that can strike the perfect balance between elegance, flavor, and ease of preparation quite like a no-bake strawberry lasagna. A delightful medley of creamy layers, fresh strawberries, and a buttery crust, this dessert offers a refreshing twist on traditional lasagna — minus the pasta, and with plenty of indulgent sweetness. It's a crowd-pleaser, ideal for warm-weather gatherings, potlucks, holidays, or simply as a satisfying treat at the end of a long day.
Ingredients
- Crust:
- 36 Golden Oreos (or vanilla sandwich cookies), crushed
- 6 tablespoons unsalted butter, melted
- Cream Cheese Layer:
- 8 oz cream cheese, softened
- 1 cup powdered sugar
- 1 teaspoon vanilla extract
- 1 ½ cups whipped topping (like Cool Whip)
- Strawberry Layer:
- 1 package (3 oz) strawberry Jell-O
- ½ cup boiling water
- 1 ½ cups chopped fresh strawberries
- 1 cup whipped topping
- Pudding Layer:
- 1 package (3.4 oz) instant cheesecake or vanilla pudding mix
- 1 ½ cups cold milk
- 1 cup whipped topping
- Topping:
- 1 ½ cups whipped topping
- Fresh sliced strawberries (for garnish)
- Optional: Crushed Golden Oreos or white chocolate shavings
Instructions
- Prepare the Crust:
In a food processor, crush the Golden Oreos into fine crumbs.
Mix with melted butter until well combined.
Press into the bottom of a 9x13 inch pan. Place in fridge to set while you make the next layers. - Cream Cheese Layer:
Beat the cream cheese, powdered sugar, and vanilla extract until smooth.
Fold in 1 ½ cups whipped topping.
Spread evenly over the crust. Chill for 10 minutes. - Strawberry Layer:
Dissolve strawberry Jell-O in boiling water. Let it cool slightly.
Stir in chopped strawberries and 1 cup whipped topping.
Pour over the cream cheese layer. Chill for 20–30 minutes to slightly firm up. - Pudding Layer:
Whisk pudding mix and cold milk until thick (about 2 minutes).
Fold in 1 cup whipped topping.
Gently spread over the strawberry layer. - Final Topping:
Spread the remaining whipped topping on top.
Garnish with sliced strawberries and optional crushed cookies or white chocolate. - Chill:
Refrigerate for at least 4 hours or overnight to set completely before serving.
Notes
- Make Ahead: This is perfect for making a day in advance.
- Fresh Strawberries: Ensure strawberries are dry before mixing to avoid watering down layers.
- Whipped Topping Sub: Homemade whipped cream can be used (stabilized is best).
- Flavor Variations: Swap strawberry Jell-O and fresh strawberries for raspberry or cherry for a twist.

