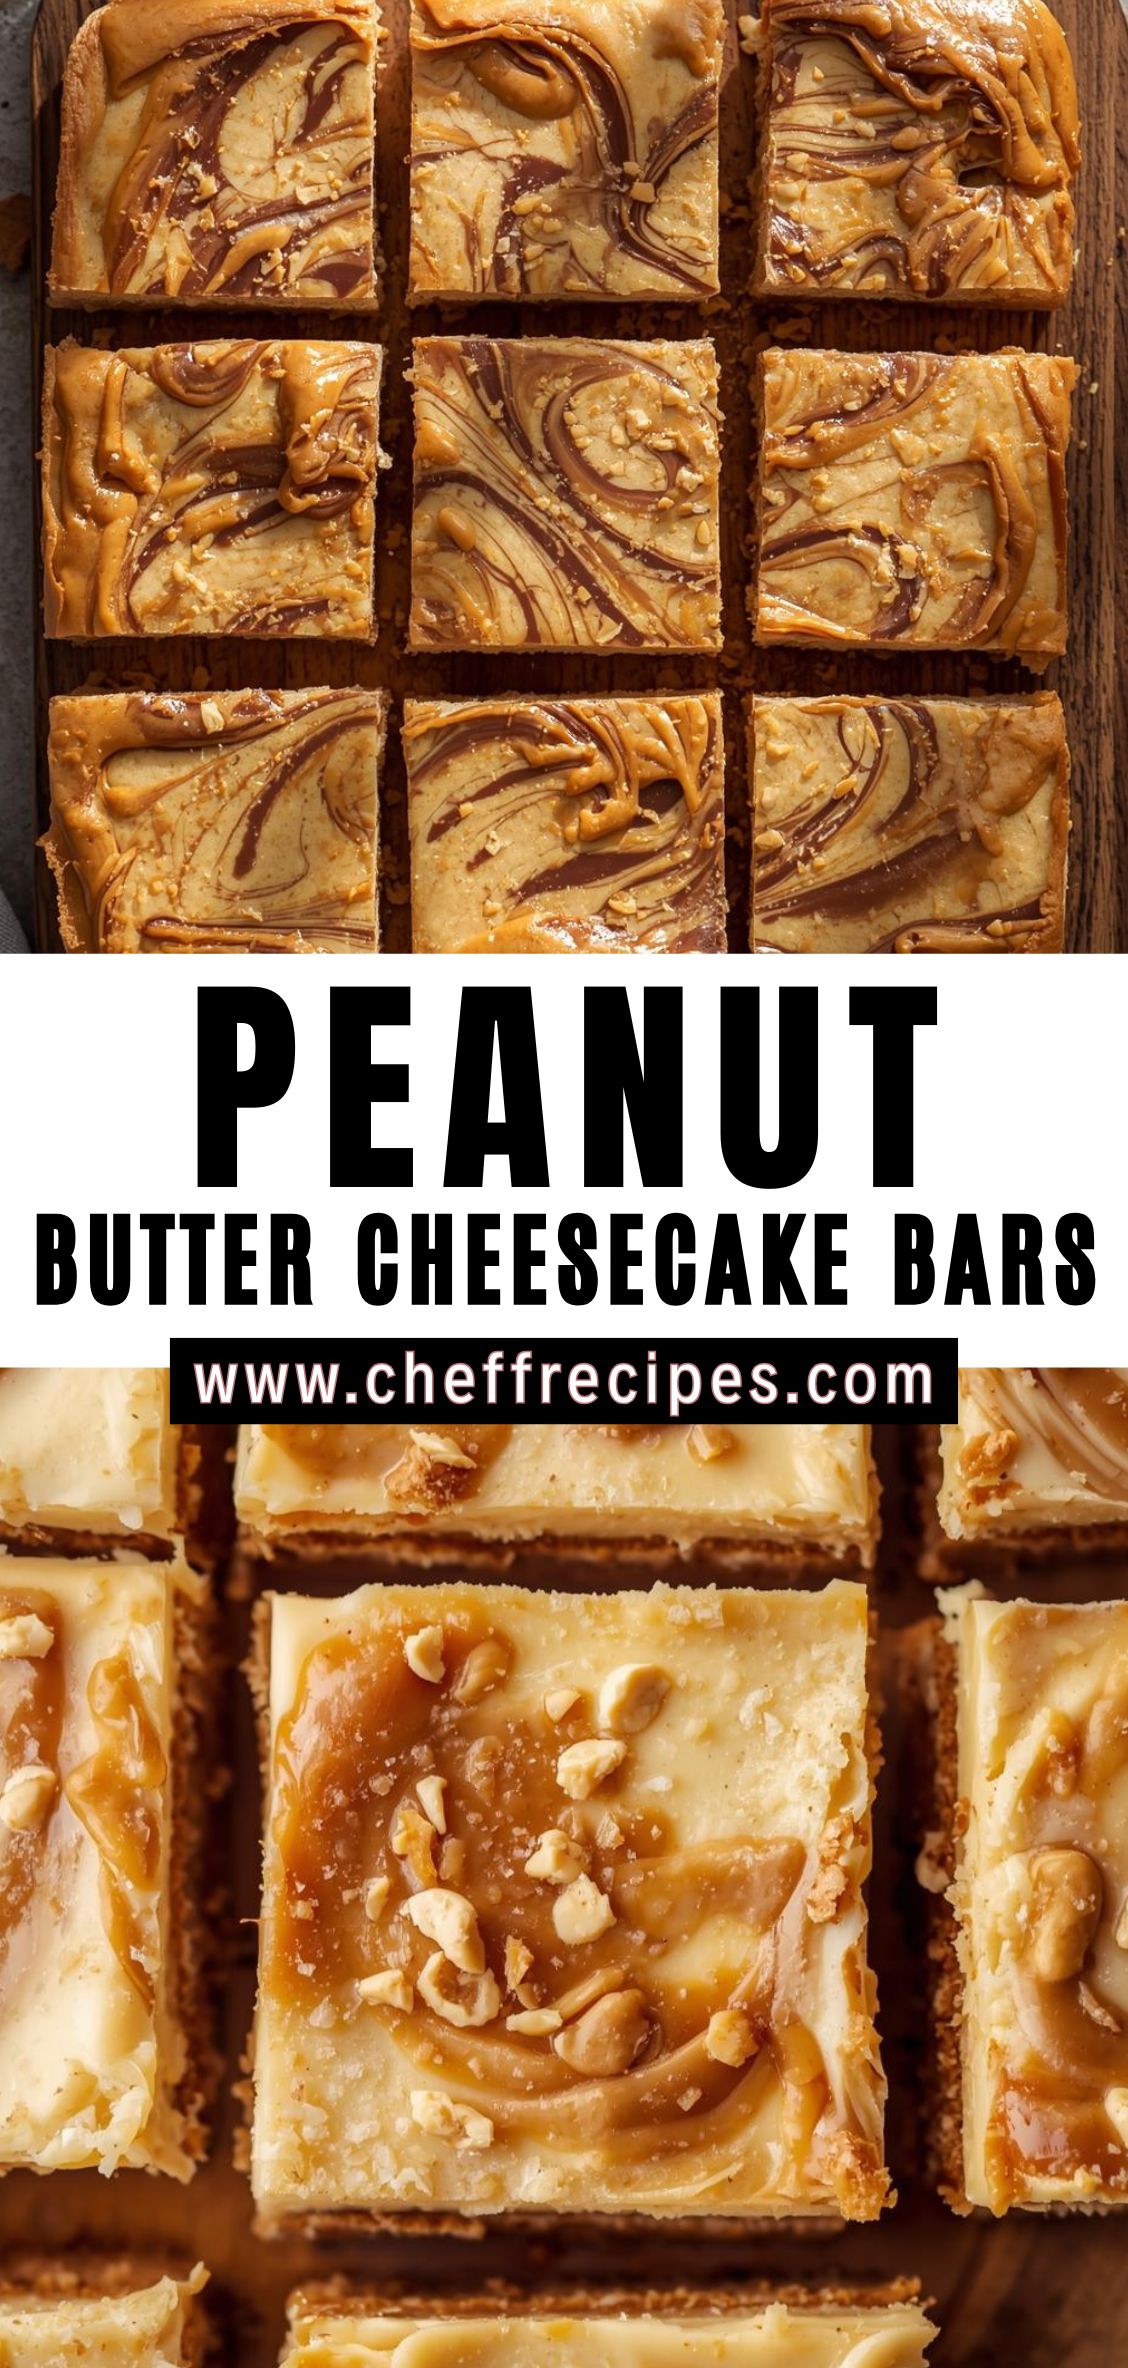
Cheesecake has long been celebrated as one of the most indulgent and versatile desserts, offering a creamy, rich texture and a flavor profile that ranges from delicately sweet to luxuriously decadent. Among the many variations of this classic dessert, peanut butter cheesecake bars occupy a particularly special place. They combine the velvety smoothness of cheesecake with the nutty, slightly salty richness of peanut butter, creating a dessert that is simultaneously comforting and sophisticated. Peanut butter lovers find in these bars a concentrated version of everything they adore about the ingredient, perfectly balanced with the creamy tang of cheesecake and the satisfying texture of a buttery crust.
One of the reasons peanut butter cheesecake bars are so beloved is their versatility. Unlike traditional round cheesecakes, which require careful slicing and often serve as formal desserts, cheesecake bars are approachable and convenient. Their rectangular or square shape makes them perfect for casual gatherings, potlucks, and holiday parties. Each bar is a self-contained portion, easy to serve and satisfying to eat. Despite their simplicity in presentation, these bars offer layers of flavor and texture: a firm, slightly crumbly base, a creamy peanut butter-infused filling, and optional toppings that can range from chocolate ganache to chopped peanuts or swirls of caramel.
The combination of peanut butter and cheesecake is more than just a flavor pairing—it is a marriage of textures and structural elements. Peanut butter provides density, moisture, and a slightly nutty chewiness, while the cream cheese filling contributes smoothness, tang, and a luxurious mouthfeel. Achieving the perfect balance requires understanding the interaction of ingredients, from the fat content in the peanut butter and cream cheese to the role of eggs in providing structure. When these components are harmonized, the result is a dessert that is rich and indulgent without being overly heavy, sweet without being cloying, and visually appealing with its clean layers.
Peanut butter cheesecake bars also allow for creativity and adaptation. Different types of peanut butter—creamy, crunchy, or natural—can change the texture and intensity of flavor. The crust can vary from a classic graham cracker base to chocolate cookie crumbs or even a nut-based crust for extra crunch. Sweeteners can be adjusted to taste, and toppings such as chocolate drizzle, caramel sauce, or even a sprinkle of sea salt can elevate the bars to a gourmet level. This flexibility makes the recipe approachable for both beginner bakers and experienced dessert makers who enjoy experimenting with flavors and presentation.
Another appeal of these bars is the relative ease of preparation. Unlike traditional cheesecake, which often requires water baths, careful oven temperature management, and extended cooling periods, cheesecake bars can be baked more straightforwardly. The ingredients are simple and accessible: cream cheese, peanut butter, sugar, eggs, and a base for the crust. Yet the final product feels complex, indulgent, and highly rewarding. The process is forgiving enough to allow bakers to achieve a successful result on the first attempt while also offering room for refinement and personalization with each subsequent batch.
The sensory experience of peanut butter cheesecake bars is as compelling as their convenience. The moment they emerge from the oven, the aroma of baked peanut butter mingled with the sweet, tangy fragrance of cheesecake fills the kitchen, creating an irresistible allure. The first bite offers a balance of creamy and dense textures, a slight hint of salt to enhance the sweetness, and a lingering richness that makes it impossible to stop at just one piece. These bars cater not only to a sweet tooth but also to the desire for a dessert that is satisfying in flavor, texture, and visual appeal.
In this comprehensive guide, we will explore every aspect of making peanut butter cheesecake bars from start to finish. You will learn how to select the best ingredients, create a perfectly balanced crust, prepare a smooth and creamy filling, and bake the bars to perfection. We will also delve into tips for troubleshooting common issues, adjusting flavor and sweetness, creating variations with chocolate or caramel swirls, and presenting the bars for maximum appeal. Additional guidance will cover storage, freezing, and serving suggestions, ensuring that every batch of peanut butter cheesecake bars is a consistent success.
By the end of this guide, you will not only have a reliable, foolproof recipe but also a deeper understanding of how to adapt it to your taste preferences and occasions. Peanut butter cheesecake bars are more than just a dessert—they are a celebration of flavor, texture, and indulgence, and this guide ensures that every bite delivers the rich, creamy, and nutty satisfaction that makes them such a cherished treat.
Detailed Instructions
Step 1: Prepare Your Baking Pan and Workspace
Begin by organizing your kitchen so that all tools and ingredients are within easy reach. For peanut butter cheesecake bars, you will need an 8×8-inch or 9×9-inch baking pan, parchment paper, a mixing bowl, a hand mixer or stand mixer, a spatula, and a measuring set.
Line the pan with parchment paper, leaving an overhang on two sides. This allows you to lift the bars out easily after baking and ensures clean edges. Lightly grease the parchment with butter or a neutral oil to prevent sticking. Preheating the oven is crucial; set it to 325°F (163°C) to allow even baking. A moderate temperature prevents the filling from cracking while ensuring the crust does not burn.
Step 2: Prepare the Crust
The crust serves as the foundation for your bars, providing structure, texture, and flavor contrast. Common crust options include graham crackers, chocolate cookies, or peanut butter cookies.
-
Crush the chosen cookies or crackers into fine crumbs using a food processor or by placing them in a resealable bag and rolling with a rolling pin.
-
Combine the crumbs with melted butter (or a non-dairy substitute if desired) in a medium bowl. Mix until the texture resembles wet sand. This ensures the crumbs will hold together during baking.
-
Press the mixture firmly and evenly into the bottom of the prepared pan using the back of a spoon or a flat-bottomed glass. Applying even pressure helps create a stable crust that will not crumble when bars are sliced.
-
Optional: lightly bake the crust for 8–10 minutes to set it and enhance its flavor. Allow it to cool slightly before adding the filling.
Step 3: Prepare the Creamy Peanut Butter Filling
The filling is the heart of peanut butter cheesecake bars. For a smooth, creamy filling:
-
In a large mixing bowl, combine cream cheese and peanut butter at room temperature. Allowing the cream cheese and peanut butter to soften prevents lumps and promotes a silky texture.
-
Beat the mixture using a hand mixer or stand mixer on medium speed until fully combined and smooth. The goal is a uniform mixture without streaks.
-
Add sugar gradually while continuing to mix. Gradually incorporating sugar ensures even sweetness and prevents graininess in the filling.
-
Beat in eggs one at a time, allowing each to fully integrate before adding the next. Eggs provide structure and help the cheesecake set while baking. Overbeating at this stage can introduce excess air, leading to cracks on the surface, so mix only until incorporated.
-
Optionally, add a teaspoon of vanilla extract to enhance flavor and balance the richness of peanut butter. For an extra layer of complexity, a pinch of salt can help contrast the sweetness and intensify the peanut flavor.
Step 4: Assemble the Bars
Once the crust is ready and slightly cooled, pour the peanut butter cheesecake filling evenly over the crust. Use a spatula to smooth the top, ensuring an even layer. Smoothness aids in even baking and gives a polished appearance to the finished bars.
Optional: for added visual and flavor interest, create swirls using melted chocolate or caramel. Drop small spoonfuls on top of the filling and gently swirl with a knife or skewer. Avoid over-mixing; the swirls should remain distinct.
Step 5: Bake the Bars
Place the pan in the preheated oven. Bake for 30–40 minutes, depending on oven calibration and pan size. The edges should be set and slightly golden, while the center should still have a slight jiggle when gently nudged.
Avoid overbaking, which can cause cracks and a dry texture. If unsure, use a toothpick inserted near the center; it should come out with a few moist crumbs attached, not completely wet batter.
For a smooth top and even baking, you can place a water bath in the oven: wrap the pan in foil and place it in a larger baking dish with an inch of hot water. This prevents the top from cracking and ensures uniform cooking.
Step 6: Cool the Bars Properly
After baking, remove the bars from the oven and allow them to cool at room temperature for at least 1 hour. Cooling gradually prevents cracking and helps the filling firm up.
Once cooled, cover the pan with plastic wrap or aluminum foil and refrigerate for at least 2–3 hours, or preferably overnight. Chilling allows the cheesecake to fully set, making it easier to cut clean bars and enhancing the flavors.
Step 7: Slice the Bars
Lift the bars out of the pan using the parchment overhang. Place on a cutting board. Using a sharp knife, preferably warmed under hot water and wiped dry, cut the bars into uniform squares or rectangles. Wiping the knife between cuts ensures clean edges and prevents the filling from sticking.
Serving sizes can be adjusted depending on occasion: smaller squares for parties or larger bars for indulgent desserts.
Step 8: Optional Toppings and Garnishes
Peanut butter cheesecake bars can be customized with a variety of toppings:
-
Drizzled chocolate or ganache for added richness
-
Chopped peanuts or crushed cookie crumbs for texture
-
Caramel drizzle for sweet contrast
-
Light dusting of powdered sugar for a decorative touch
Apply toppings after the bars have fully chilled to maintain visual appeal and prevent melting.
Step 9: Storage and Shelf Life
Store the bars in an airtight container in the refrigerator for up to 5–7 days. To maintain freshness and texture, separate layers with parchment or wax paper.
For longer storage, bars can be frozen for up to 2 months. Wrap individually or in layers, then place in a freezer-safe container. Thaw in the refrigerator overnight before serving. Avoid microwaving frozen bars directly, as the texture may become grainy.
Step 10: Serving Suggestions
Peanut butter cheesecake bars can be enjoyed on their own or paired with accompaniments:
-
Fresh berries or berry compote to balance richness
-
Whipped cream for added indulgence
-
A cup of coffee or milk to complement peanut butter flavor
-
Ice cream for a decadent dessert experience
These bars are versatile for holidays, potlucks, or simple family treats, and their balance of creamy, nutty, and slightly sweet flavors ensures they appeal to a wide range of palates.
Peanut Butter Cheesecake Bars
Cheesecake has long been celebrated as one of the most indulgent and versatile desserts, offering a creamy, rich texture and a flavor profile that ranges from delicately sweet to luxuriously decadent. Among the many variations of this classic dessert, peanut butter cheesecake bars occupy a particularly special place. They combine the velvety smoothness of cheesecake with the nutty, slightly salty richness of peanut butter, creating a dessert that is simultaneously comforting and sophisticated. Peanut butter lovers find in these bars a concentrated version of everything they adore about the ingredient, perfectly balanced with the creamy tang of cheesecake and the satisfying texture of a buttery crust.
Ingredients
- For the crust:
- 1 ½ cups graham cracker crumbs (or digestive biscuits)
- ½ cup unsalted butter, melted
- ¼ cup granulated sugar
- For the peanut butter cheesecake filling:
- 16 oz (450 g) cream cheese, softened
- ½ cup creamy peanut butter
- ½ cup granulated sugar
- 2 large eggs
- 1 teaspoon vanilla extract
- For the topping (optional):
- ¼ cup semi-sweet chocolate chips, melted
- 2 tablespoons peanut butter, melted
Instructions
1. Prepare the Oven and Pan
- Preheat your oven to 350°F (175°C).
- Line a 9×9-inch baking pan with parchment paper, leaving an overhang for easy removal.
2. Make the Crust
- In a medium bowl, combine graham cracker crumbs, melted butter, and sugar.
- Press the mixture firmly into the bottom of the prepared pan to form an even layer.
- Bake the crust for 8–10 minutes, then let it cool slightly.
3. Make the Peanut Butter Cheesecake Filling
- In a large bowl, beat the softened cream cheese and peanut butter together until smooth.
- Add sugar and vanilla extract, mixing until combined.
- Beat in the eggs, one at a time, until fully incorporated.
4. Assemble and Bake
- Pour the peanut butter cheesecake filling over the baked crust and spread evenly.
- Bake for 20–25 minutes, or until the edges are set and the center is slightly jiggly.
- Remove from oven and allow to cool to room temperature.
5. Add Optional Topping
- Drizzle melted chocolate and peanut butter over the cooled cheesecake bars.
- Use a toothpick to swirl the chocolate and peanut butter for a marbled effect.
6. Chill and Serve
- Refrigerate the bars for at least 2 hours or until fully set.
- Lift bars out using the parchment overhang and cut into squares.
Notes
- For a gluten-free version, use gluten-free graham crackers or almond flour crust.
- To make it extra creamy, don’t overbake; the center should jiggle slightly when done.
- Store bars in an airtight container in the refrigerator for up to 5 days.
- Can be frozen for up to 2 months—thaw in the fridge before serving.

