Red Velvet Valentine’s Day Cinnamon Rolls Recipe
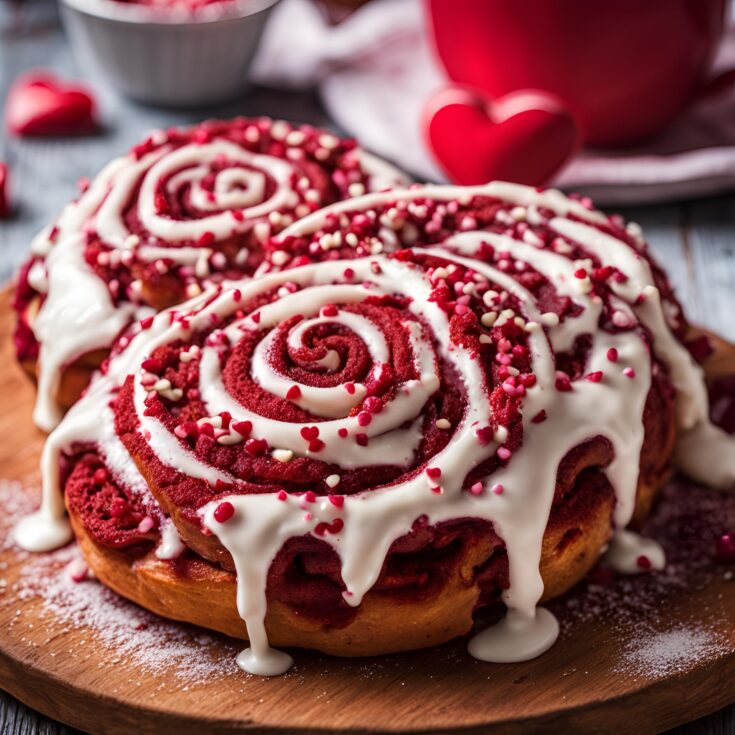
Valentine’s Day is a time to express love and appreciation, and what better way to do so than with a batch of homemade Red Velvet Cinnamon Rolls? These soft, fluffy rolls are infused with the distinctive flavors of red velvet cake—chocolate, vanilla, and buttermilk—wrapped around a cinnamon-sugar filling, and topped with a creamy cream cheese glaze.
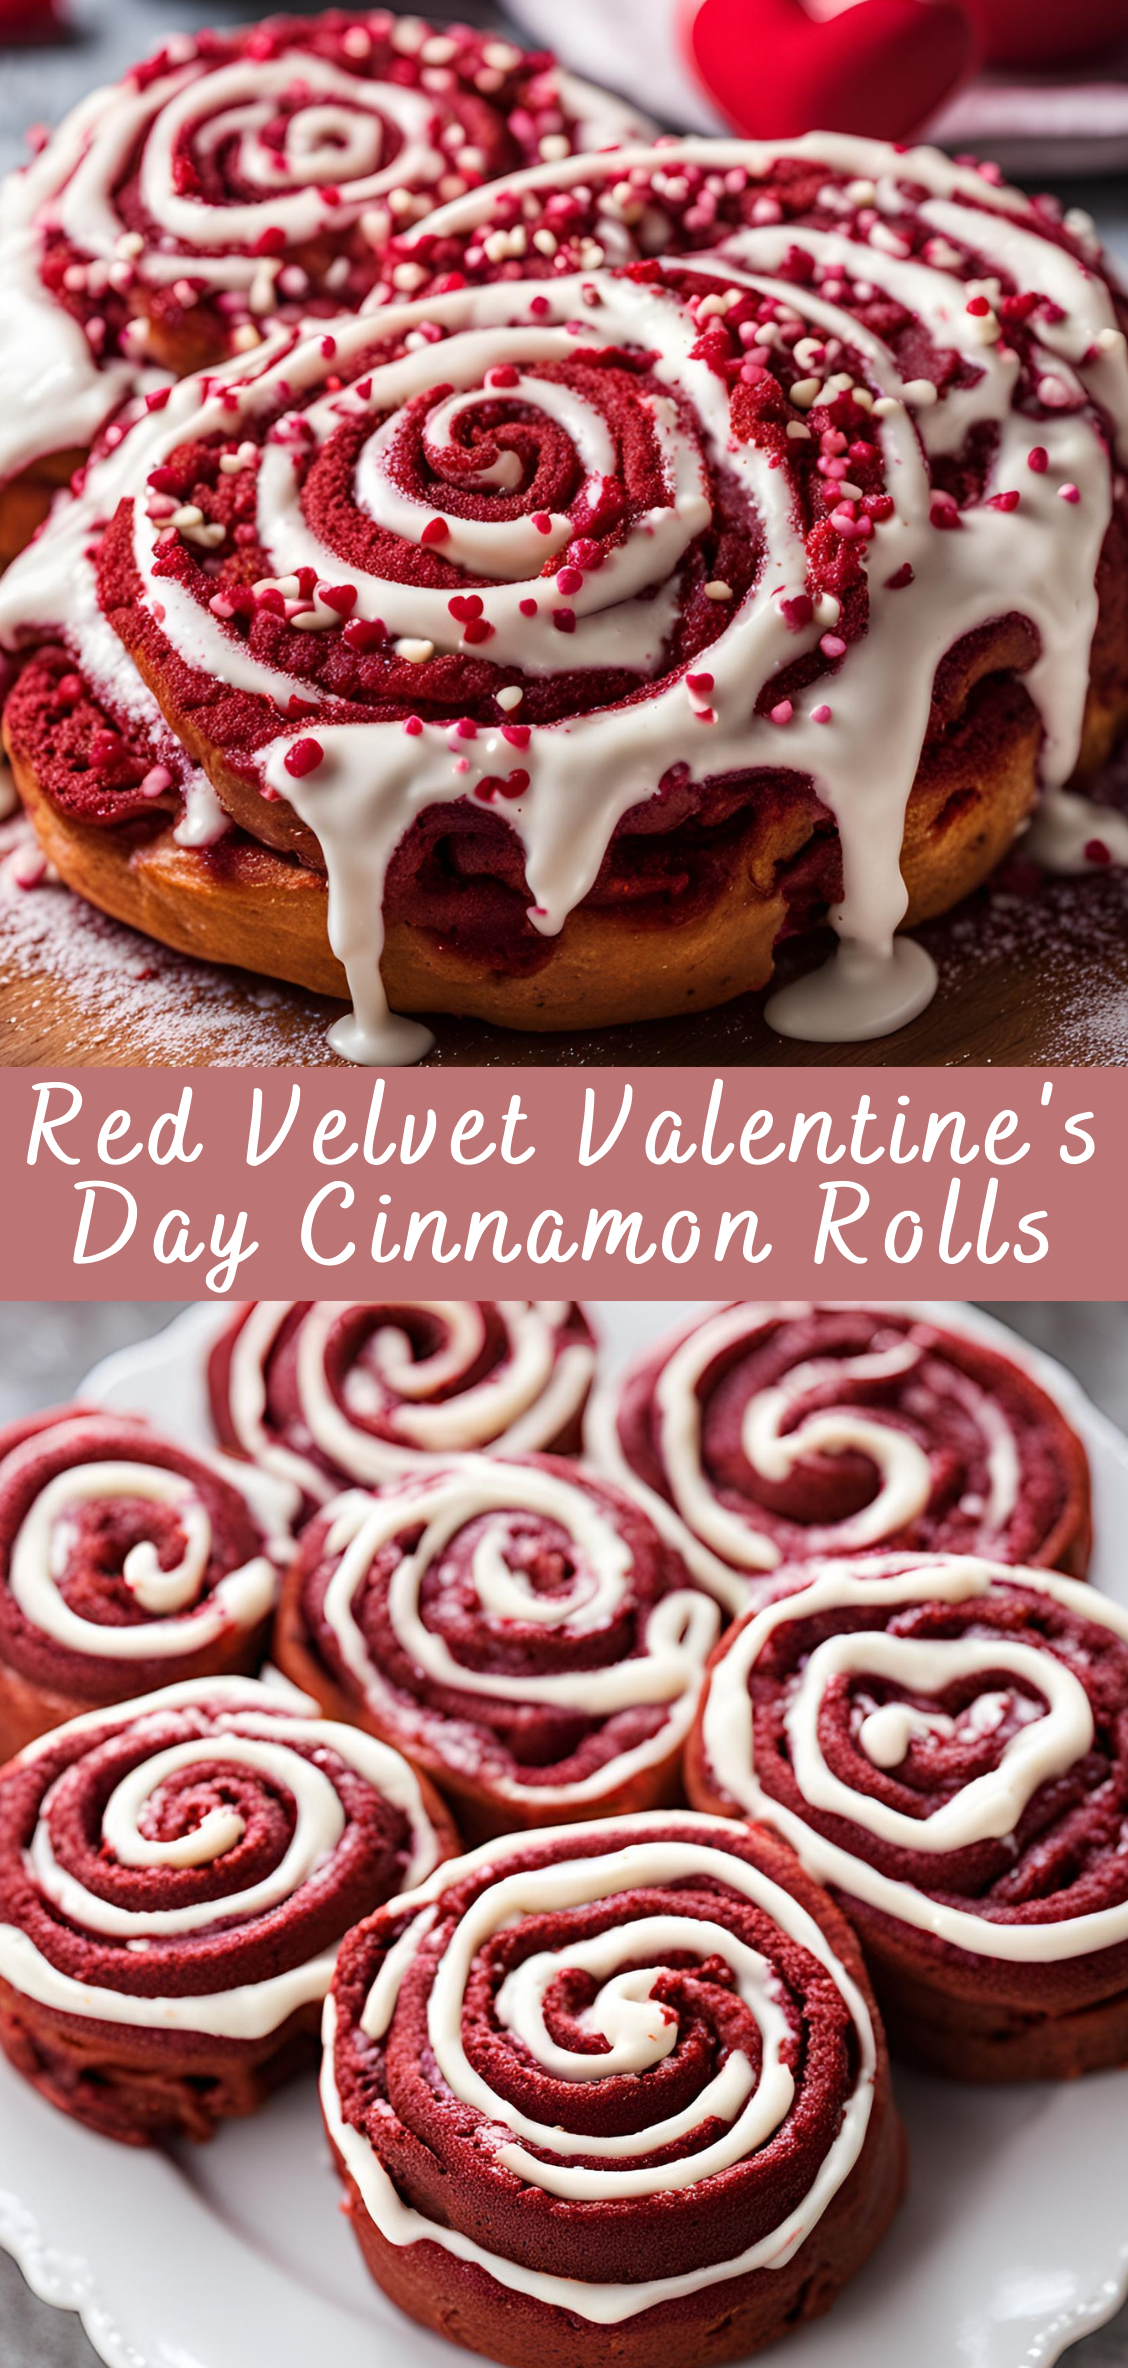
The vibrant red color makes these rolls the perfect treat for the holiday of love, adding both beauty and deliciousness to your celebration. In this comprehensive guide, we’ll cover everything you need to know—from ingredients and step-by-step instructions to tips for perfecting your cinnamon rolls and customizing them for different tastes.
Introduction to Red Velvet Cinnamon Rolls
Cinnamon rolls are a beloved breakfast and dessert item, often served warm with a gooey glaze. These Red Velvet Cinnamon Rolls take the classic roll to the next level by combining the richness of red velvet cake with the comforting cinnamon filling. The result is a sweet, decadent treat perfect for celebrating Valentine’s Day or any special occasion.
The tradition of red velvet cake dates back to the 1920s, known for its rich flavor, moist crumb, and signature red color. By adapting this beloved cake into a cinnamon roll format, you can enjoy all the familiar tastes of red velvet while indulging in the buttery, spiced goodness of cinnamon rolls. The visual appeal of these rolls—topped with a smooth cream cheese glaze—adds to their charm, making them perfect for a Valentine’s brunch or a romantic breakfast in bed.
Essential Tools and Equipment
Before diving into the preparation process, it’s important to have the right tools on hand. Here’s what you’ll need to make your Red Velvet Valentine’s Day Cinnamon Rolls:
- Mixing Bowls: At least two—one for the dough and one for the filling—plus a third for the glaze.
- Measuring Cups and Spoons: To ensure accurate measurements for all your ingredients.
- Stand Mixer or Hand Mixer: A stand mixer with a dough hook will make the kneading process easier. If you don’t have one, a hand mixer or mixing by hand works as well.
- Rolling Pin: To roll out the dough into a large rectangle.
- Baking Dish or Pan: A 9×13-inch baking dish works perfectly for this recipe. Alternatively, you can use a round cake pan or a large baking sheet.
- Plastic Wrap: For covering the dough as it rises and proofing.
- Pastry Brush: For brushing melted butter onto the dough and filling.
- Sharp Knife or Dental Floss: To cut the dough into even rolls, use a sharp knife or unscented dental floss for a clean cut without squashing the dough.
- Small Bowls for Filling: One to hold the cinnamon-sugar mixture and one for the melted butter.
Preparation Steps
Making the Dough
- Activate the Yeast: In a small bowl, combine the whole milk and sugar. Heat the milk to about 110°F (43°C)—it should be warm but not hot to the touch. Sprinkle the active dry yeast over the milk and let it sit for 5-10 minutes, or until it becomes foamy. This step ensures the yeast is active and will help the dough rise properly.
- Mix Wet Ingredients: In the bowl of a stand mixer or a large mixing bowl, add the yeast mixture, eggs, melted butter, vanilla extract, and red food coloring. Stir until well combined.
- Add Dry Ingredients: In a separate bowl, whisk together the flour, cocoa powder, and salt. Gradually add the dry ingredients to the wet ingredients while mixing on low speed. Once the dough begins to come together, increase the speed to medium and knead for 8-10 minutes, or until the dough is smooth and elastic. If the dough is too sticky, add a little more flour, one tablespoon at a time.
- Proof the Dough: Transfer the dough to a lightly greased bowl and cover it with a damp cloth or plastic wrap. Place the bowl in a warm, draft-free area to rise for about 1 hour, or until the dough has doubled in size. This step is crucial for creating fluffy rolls.
Preparing the Cinnamon-Sugar Filling
- Mix the Filling: While the dough is rising, prepare the filling. In a small bowl, combine the brown sugar, granulated sugar, and cinnamon. Mix well and set aside.
- Prepare the Butter: Melt the butter for the filling in a microwave-safe bowl or on the stovetop, then set aside to cool slightly.
Rolling and Cutting the Dough
- Roll the Dough: After the dough has risen, punch it down to release the air. Turn it out onto a lightly floured surface and roll it into a 12×18-inch rectangle. Use a rolling pin to ensure the dough is even.
- Spread the Butter and Filling: Brush the melted butter evenly over the rolled-out dough, then sprinkle the cinnamon-sugar mixture over the butter. Make sure the filling covers the dough completely.
- Roll the Dough: Starting at one long edge of the rectangle, carefully roll the dough up into a tight log. Use a sharp knife or dental floss to cut the dough into 12 even pieces.
- Arrange in the Pan: Grease a 9×13-inch baking dish and arrange the rolls in the dish, placing them close together but not touching. Cover the dish with plastic wrap and let the rolls rise for another 30-45 minutes, or until they’ve puffed up.
Baking the Cinnamon Rolls
- Preheat the Oven: Preheat your oven to 350°F (175°C).
- Bake: Once the rolls have finished rising, place the dish in the oven and bake for 25-30 minutes, or until the rolls are golden brown and the filling is bubbling. If you notice the tops are browning too quickly, cover the rolls loosely with aluminum foil and continue baking.
- Cool: Remove the rolls from the oven and allow them to cool for a few minutes before glazing.
Preparing the Cream Cheese Glaze
- Make the Glaze: In a mixing bowl, beat the softened cream cheese, powdered sugar, and vanilla extract until smooth and creamy. Gradually add milk to thin the glaze to your desired consistency.
- Glaze the Rolls: Once the rolls are slightly cooled, drizzle the cream cheese glaze over the top, allowing it to drip down the sides.
Baking Tips and Tricks
- Proofing in a Warm Place: To ensure the dough rises well, place it in a warm environment, such as an oven with the light on or near a warm stovetop. If your kitchen is cold, you can also place the bowl on a heating pad set to low.
- Don’t Overheat the Milk: When activating the yeast, be careful not to overheat the milk. Too much heat can kill the yeast, preventing the dough from rising properly. Aim for 110°F (43°C), which is the ideal temperature for yeast activation.
- Resting Between Steps: Give the dough ample time to rise during each stage—this ensures your rolls will be fluffy and light. Don’t rush through the proofing process.
- Roll Tightly: When rolling the dough, make sure it is rolled tightly to prevent the filling from spilling out during baking. However, don’t roll it so tightly that the dough becomes difficult to cut.
- Glaze While Warm: The rolls should be slightly warm when you add the cream cheese glaze. This allows the glaze to melt into the rolls and soak into every bite.
Troubleshooting Common Mistakes
- Dough Too Sticky: If your dough is too sticky to handle, add a little more flour, but be careful not to add too much. Dough that’s too dry will result in dense rolls.
- Dough Not Rising: If your dough isn’t rising, it may be due to inactive yeast, a cold environment, or expired yeast. Always check the yeast’s expiration date and make sure the environment is warm enough for proofing.
- Filling Leaking: If your cinnamon filling leaks out during baking, ensure the rolls are tightly rolled up. If the dough isn’t sealed well enough, the filling can escape.
Customizing Your Cinnamon Rolls
While the red velvet cinnamon roll is delicious as-is, you can get creative by adding various fillings or flavors.
Adding Different Fillings:
- Nutella: Spread a layer of Nutella on top of the cinnamon-sugar mixture for a chocolate-hazelnut twist.
- Berries: Fresh berries like raspberries, strawberries, or blueberries can be added to the cinnamon-sugar mixture for a burst of fruity flavor.
- Cream Cheese Filling: For an extra indulgent treat, consider using a sweetened cream cheese filling instead of the traditional cinnamon-sugar mixture.
Flavor Variations:
- Carrot Cake: Substitute the cocoa powder with finely grated carrot and a touch of cinnamon and nutmeg for a carrot cake-inspired cinnamon roll.
- Chocolate Chip: Add semi-sweet chocolate chips to the filling for a decadent chocolate cinnamon roll.
Gluten-Free Options:
To make these cinnamon rolls gluten-free, simply substitute the all-purpose flour with a gluten-free flour blend that includes xanthan gum or guar gum to provide structure.
Serving and Storing Your Cinnamon Rolls
- Serving: Red velvet cinnamon rolls are best served warm, fresh out of the oven, topped with the creamy glaze. They can also be enjoyed the next day when reheated.
- Storing: Store leftover rolls in an airtight container at room temperature for up to 2-3 days. If you’d like to keep them longer, store them in the fridge for up to a week.
- Freezing: You can freeze the rolls both before and after baking. If freezing before baking, roll up the dough and freeze the unbaked rolls. Once frozen solid, transfer them to a freezer bag and store for up to 2 months. To bake, allow the rolls to thaw and rise before baking.
Conclusion
These Red Velvet Valentine’s Day Cinnamon Rolls are a delicious, festive way to celebrate love and create lasting memories. Their soft, buttery dough, aromatic cinnamon-sugar filling, and rich cream cheese glaze make them irresistible to everyone who tries them. Whether you’re preparing them for breakfast, brunch, or as a sweet surprise, they are sure to add joy to your celebration.
By following the detailed instructions in this guide, you’ll be able to create the perfect batch of red velvet cinnamon rolls every time. And don’t forget—these rolls are easily customizable to suit your personal tastes, so feel free to experiment with fillings, glazes, and flavor variations. Enjoy the process and, most importantly, the delicious results!
Advanced Tips for Perfect Red Velvet Cinnamon Rolls
While the basic recipe for Red Velvet Cinnamon Rolls is easy to follow, there are several advanced tips that can elevate the texture, flavor, and overall experience of these rolls. Let’s dive into some tricks and techniques that will help you achieve bakery-quality cinnamon rolls right in your own kitchen.
1. Make-Ahead Method
If you’re short on time or want to enjoy fresh cinnamon rolls without waking up early, you can prepare the dough the night before and let it rise in the fridge. This overnight method deepens the flavor of the dough and ensures a soft, fluffy texture.
Here’s how to do it:
- Prepare the dough as usual: Follow the instructions until the dough has been mixed and kneaded. Once the dough is smooth, instead of letting it rise at room temperature, cover the bowl tightly with plastic wrap and place it in the refrigerator overnight.
- Next morning: In the morning, take the dough out and let it rest at room temperature for about 30 minutes to 1 hour before continuing with the shaping, filling, and final rise. This extra time helps the dough come to room temperature and ensures the rolls puff up perfectly.
- Bake as usual: Once you’ve completed the final rise, bake the rolls as instructed.
This method allows you to enjoy freshly baked cinnamon rolls without having to start everything from scratch in the morning.
2. How to Ensure Even Baking
Baking large cinnamon rolls can sometimes result in uneven cooking, with the edges browning too quickly while the middle stays raw. To ensure even baking, follow these steps:
- Check the Oven Temperature: Make sure your oven is preheated to the right temperature. Invest in an oven thermometer to ensure your oven is accurately heated. If it’s too hot or cold, it can affect the cooking time and texture.
- Use a Light-Colored Pan: Dark pans can cause the bottom of the rolls to over-brown before the rest of the rolls are cooked through. Opt for a light-colored or glass pan, which helps heat distribute more evenly.
- Leave Space Between Rolls: When placing the rolls in the baking dish, make sure they are close but not tightly packed. Crowded rolls may not bake evenly. Leaving enough room allows them to expand and bake uniformly.
- Cover the Rolls: If you notice the tops of your cinnamon rolls getting too dark while the inside isn’t fully cooked, loosely cover the dish with aluminum foil for the last 5-10 minutes of baking. This will prevent over-browning while giving the inside time to cook.
3. For Extra Soft Rolls, Use the Tangzhong Method
The Tangzhong method is a technique used in bread baking to create ultra-soft and fluffy rolls. It involves cooking a small portion of flour and liquid before adding it to the dough. This pre-gelatinizes the starches, allowing the dough to retain more moisture and creating a tender texture.
Here’s how to incorporate this technique into your Red Velvet Cinnamon Rolls:
- Make the Tangzhong: In a small saucepan, combine 3 tablespoons of flour and ½ cup of milk (from the total milk used in the recipe). Whisk over medium heat until the mixture thickens and forms a paste. This will only take about 2-3 minutes. Let it cool before adding it to the dough mixture.
- Add the Tangzhong to the Dough: When you add the wet ingredients to the dry ingredients in the recipe, also add the tangzhong mixture. Continue following the recipe as usual.
This extra step ensures a soft, pillowy texture that will take your Red Velvet Cinnamon Rolls to the next level. The rolls will stay fresh longer and have a delightful softness.
4. Keep the Filling from Leaking
Cinnamon rolls can sometimes suffer from filling leakage, which can make a mess in the pan and prevent the dough from holding together. To minimize this, here are a few strategies:
- Spread the Butter Evenly: Make sure the butter for the filling is spread evenly over the dough. You want to cover the entire surface with a thin layer, but don’t apply it too thickly. Excess butter can cause the sugar to seep out.
- Seal the Edges Properly: After rolling up the dough, ensure the seam is pinched tightly to prevent any filling from escaping during baking. You can even brush a small amount of water along the edge before sealing it to make it stick better.
- Let the Rolls Rest Before Baking: After slicing and arranging your rolls in the pan, let them rest for another 15-20 minutes before baking. This rest period helps the dough absorb some of the filling, preventing it from leaking out too easily.
Creative Variations and Additions
While the red velvet cinnamon roll is a classic favorite, you can customize the recipe in several creative ways to suit different preferences. Here are some fun variations:
1. Stuffed Red Velvet Cinnamon Rolls
If you want to take these rolls to the next level, try stuffing them with different ingredients that complement the red velvet and cinnamon flavor:
- Chocolate Chips: Add a handful of semi-sweet chocolate chips or white chocolate chips to the cinnamon-sugar mixture for a melty chocolate center.
- Cream Cheese Filling: Create an even richer filling by spreading a layer of sweetened cream cheese inside the rolls along with the cinnamon-sugar mix.
- Berries: Fresh raspberries, strawberries, or even blueberries can be placed in the center before rolling up the dough for a fruity twist. Berries also pair beautifully with the tangy cream cheese glaze.
2. Vegan Red Velvet Cinnamon Rolls
For a dairy-free and egg-free version of these rolls, you can easily substitute the following:
- Milk: Use almond milk, coconut milk, or oat milk instead of whole milk.
- Butter: Replace the butter with plant-based margarine or coconut oil.
- Eggs: Substitute eggs with a flaxseed egg replacement (1 tablespoon of flaxseed meal mixed with 3 tablespoons of water, left to sit for 5 minutes).
- Cream Cheese Glaze: For the cream cheese glaze, substitute regular cream cheese with a plant-based version like Daiya or Tofutti, and use powdered sugar, vanilla extract, and a splash of non-dairy milk.
By making these substitutions, you can enjoy the same soft, fluffy cinnamon rolls without any animal products.
3. Red Velvet Cinnamon Rolls with Cream Cheese Swirl
For a creamier, tangier twist, you can add a cream cheese swirl to the dough before baking. To do this:
- Prepare the Cream Cheese Filling: In a bowl, mix softened cream cheese with a little sugar, vanilla extract, and a pinch of salt. Spread this mixture onto the dough before rolling it up, along with the cinnamon-sugar filling. This creates a swirled effect inside the cinnamon rolls.
- Bake: Follow the same baking process. The cream cheese will melt into the dough, adding a rich and tangy filling that makes each bite even more decadent.
4. Cinnamon Roll Cake
If you’re looking for an alternative to traditional rolls, consider turning the dough into a cinnamon roll cake. To do this:
- Spread the Dough: Roll out the dough as usual, but instead of cutting it into rolls, simply spread it into a large, greased baking dish.
- Add the Filling: Spread the cinnamon-sugar mixture evenly over the dough.
- Roll and Slice: Roll the dough into a log, then slice it into 1-inch pieces and lay them flat in the baking dish.
- Bake as Usual: Bake the “cinnamon roll cake” in a round cake pan, ensuring that it rises and bakes evenly.
This cake-like version has all the flavor of the rolls but in a shareable, easy-to-slice form.
Perfect Pairings for Red Velvet Cinnamon Rolls
Red Velvet Cinnamon Rolls are sweet and indulgent on their own, but you can elevate the experience by pairing them with complementary beverages or side dishes. Here are a few ideas:
Beverages:
- Coffee: A warm cup of freshly brewed coffee balances the sweetness of the rolls. Try pairing it with a light roast for a contrasting flavor or a rich espresso for something bolder.
- Milk: A glass of cold milk is the classic pairing for cinnamon rolls. If you’re serving these rolls to kids or anyone with a sweet tooth, milk makes the perfect complement.
- Hot Chocolate: If you want to go all out, serve these cinnamon rolls with a cup of rich hot chocolate. Add a dash of cinnamon to the hot chocolate for extra flavor.
Side Dishes:
- Fruit Salad: A light, refreshing fruit salad made with fresh berries, pineapple, and citrus fruits is a perfect balance to the richness of the rolls.
- Bacon or Sausages: For a savory element, serve your cinnamon rolls with crispy bacon or sausage links. The saltiness of the bacon or sausage contrasts beautifully with the sweetness of the rolls.
Red Velvet Valentine's Day Cinnamon Rolls Recipe
Ingredients
- For the Dough:
- 2 1/4 cups all-purpose flour
- 1/4 cup granulated sugar
- 1 packet active dry yeast (2 1/4 tsp)
- 1/2 cup whole milk (warmed to 110°F or 43°C)
- 2 tbsp unsalted butter (melted)
- 1 large egg
- 2 tbsp cocoa powder (unsweetened)
- 1 tbsp red food coloring (liquid or gel)
- 1/2 tsp vanilla extract
- 1/4 tsp salt
- For the Filling:
- 1/2 cup unsalted butter (softened)
- 1/2 cup brown sugar (packed)
- 2 tbsp cinnamon
- 1/4 cup cocoa powder (unsweetened)
- 1/4 tsp salt
- For the Cream Cheese Frosting:
- 4 oz cream cheese (softened)
- 2 tbsp unsalted butter (softened)
- 1 1/2 cups powdered sugar
- 1/2 tsp vanilla extract
- 1-2 tbsp heavy cream or milk (to achieve desired frosting consistency)
Instructions
1. Make the Dough:
- In a large bowl, combine the warm milk, sugar, and yeast. Stir to combine and let it sit for 5-10 minutes until the yeast becomes foamy.
- In another bowl, whisk together the flour, cocoa powder, and salt. Once the yeast mixture is ready, add the melted butter, egg, red food coloring, and vanilla extract to the bowl.
- Gradually add the dry ingredients to the yeast mixture, stirring until a dough forms.
- Turn the dough onto a lightly floured surface and knead for about 5-7 minutes until the dough is smooth and elastic. If the dough feels sticky, add a little more flour, but be careful not to add too much.
- Shape the dough into a ball, place it in a greased bowl, and cover with a clean towel or plastic wrap. Allow the dough to rise for about 1-1.5 hours, or until it doubles in size.
2. Prepare the Filling:
- While the dough is rising, mix together the softened butter, brown sugar, cinnamon, cocoa powder, and salt in a small bowl until smooth and well combined. Set aside.
3. Roll Out the Dough:
- Once the dough has risen, punch it down to release any air bubbles. Transfer it to a floured surface and roll it out into a rectangle approximately 12 inches by 18 inches.
4. Assemble the Rolls:
- Spread the prepared filling evenly over the rolled-out dough, leaving about a 1-inch border on the edges. Be sure to spread it all the way to the edges for even flavor.
- Starting from the long side of the rectangle, carefully roll the dough into a tight log. Pinch the seam closed at the end.
- Slice the rolled dough into 12 even pieces using a sharp knife or dental floss (this helps avoid squishing the dough).
5. Second Rise:
- Place the cinnamon rolls into a greased 9x13-inch baking dish, leaving a little space between each roll. Cover the dish loosely with plastic wrap or a clean towel and let the rolls rise for an additional 30-45 minutes, or until puffed up.
6. Bake the Rolls:
- Preheat the oven to 350°F (175°C). Once the rolls have risen, bake them in the preheated oven for 20-25 minutes, or until the rolls are golden brown on top and cooked through. You can check for doneness by inserting a toothpick into the center of a roll; it should come out clean.
7. Prepare the Cream Cheese Frosting:
- While the rolls are baking, make the cream cheese frosting. In a medium bowl, beat together the softened cream cheese and butter until smooth and creamy. Gradually add the powdered sugar, vanilla extract, and heavy cream (if needed to adjust the consistency) until the frosting is smooth and spreadable.
8. Frost and Serve:
- Once the cinnamon rolls have finished baking, remove them from the oven and let them cool for 5-10 minutes. Then, generously spread the cream cheese frosting over the warm rolls.
- Serve immediately and enjoy!

