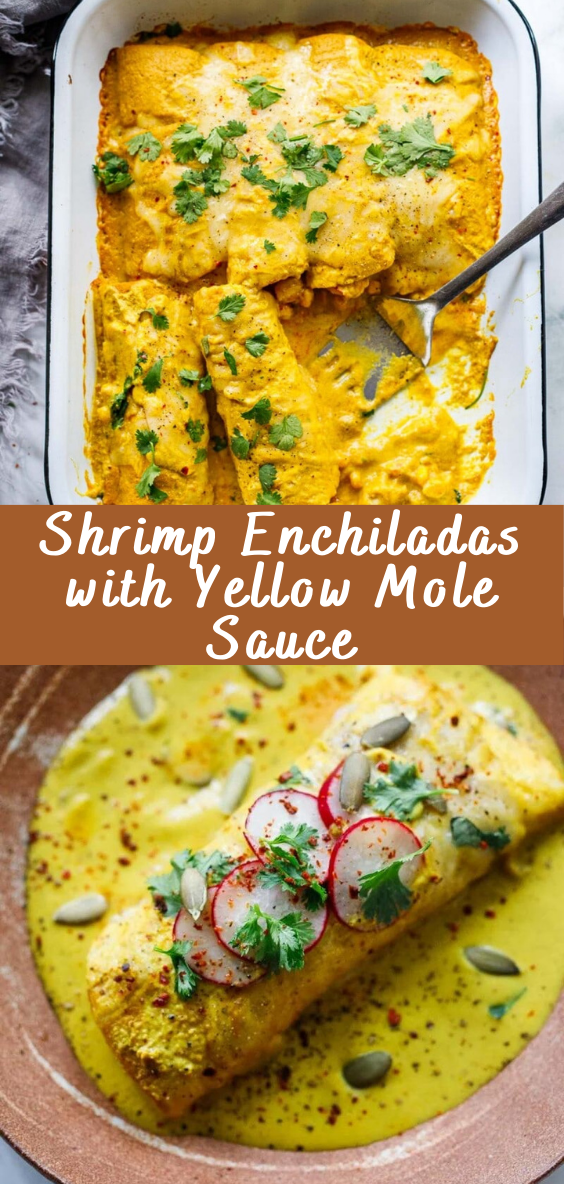
Shrimp Enchiladas with Yellow Mole Sauce Recipe
Shrimp enchiladas with yellow mole sauce offer a delightful twist on traditional enchiladas, infusing them with the rich flavors of Mexican cuisine. This recipe combines succulent shrimp, vibrant vegetables, and aromatic spices, all enveloped in a luscious yellow mole sauce. Whether you’re cooking for a special occasion or simply craving a flavorful meal, these enchiladas are sure to impress your taste buds.

What is Yellow Mole Sauce?
Yellow mole sauce, also known as “mole amarillo,” is a traditional Mexican sauce made from a blend of various ingredients, including chili peppers, tomatoes, tomatillos, onions, garlic, and spices such as cumin and cinnamon. It’s characterized by its vibrant yellow color and complex flavor profile, which balances tanginess, sweetness, and heat. Yellow mole sauce adds depth and richness to dishes, making it a versatile addition to your culinary repertoire.
Ingredients for Shrimp Enchiladas with Yellow Mole Sauce
To make shrimp enchiladas with yellow mole sauce, you will need the following ingredients:
- Shrimp (peeled and deveined)
- Yellow mole sauce
- Corn tortillas
- Onion
- Bell peppers (red, yellow, and green)
- Garlic
- Cilantro
- Lime
- Olive oil
- Salt and pepper
- Optional toppings: avocado, sour cream, queso fresco
Step-by-step Instructions for Making Shrimp Enchiladas
Making the Yellow Mole Sauce
- Heat olive oil in a skillet over medium heat.
- Add chopped onions, garlic, and diced chili peppers to the skillet.
- Cook until the onions are translucent and the peppers are softened.
- Stir in the tomatoes, tomatillos, and spices, and simmer for 15-20 minutes until the sauce thickens.
- Once the sauce has thickened, remove it from the heat and let it cool slightly before blending until smooth.
Preparing the Shrimp Filling
- In a separate skillet, heat olive oil over medium heat.
- Add chopped onions and bell peppers to the skillet and sauté until softened.
- Add the shrimp to the skillet and cook until pink and opaque.
- Season with salt, pepper, and chopped cilantro, and squeeze fresh lime juice over the mixture.
Assembling the Enchiladas
- Preheat the oven to 350°F (175°C).
- Warm the corn tortillas in the microwave or on a skillet to make them pliable.
- Spread a layer of yellow mole sauce on the bottom of a baking dish.
- Fill each tortilla with the shrimp filling and roll it tightly before placing it seam-side down in the baking dish.
- Pour the remaining yellow mole sauce over the enchiladas, ensuring they are evenly coated.
- Sprinkle grated cheese on top if desired.
- Bake in the preheated oven for 20-25 minutes until the enchiladas are heated through and the cheese is melted and bubbly.
Tips for Perfect Shrimp Enchiladas
- Use fresh shrimp for the best flavor and texture.
- Customize the level of spice in the yellow mole sauce to suit your taste preferences.
- Don’t overfill the enchiladas to prevent them from bursting open during baking.
- Garnish with fresh cilantro and a squeeze of lime juice before serving for a burst of freshness.
Serving Suggestions
Serve shrimp enchiladas with yellow mole sauce alongside Mexican rice, refried beans, and a crisp green salad for a complete and satisfying meal. Pair with a refreshing margarita or agua fresca for the perfect beverage accompaniment.
Health Benefits of Shrimp Enchiladas
Shrimp is a lean source of protein that’s rich in nutrients such as vitamin D, selenium, and omega-3 fatty acids. Additionally, the vegetables and spices in the yellow mole sauce provide vitamins, minerals, and antioxidants, making this dish both flavorful and nutritious.
Variations of Shrimp Enchiladas
- Substitute chicken or tofu for the shrimp to cater to different dietary preferences.
- Experiment with different types of mole sauce, such as red or green mole, for unique flavor profiles.
- Add extra vegetables such as spinach, mushrooms, or zucchini to boost the nutritional content of the enchiladas.
Frequently Asked Questions (FAQs)
What is the difference between red and yellow mole sauce?
Red mole sauce, or “mole rojo,” typically contains dried chili peppers such as ancho, pasilla, or chipotle, which give it a deep red color and a smoky flavor. Yellow mole sauce, on the other hand, is milder in heat and has a bright yellow color due to the inclusion of ingredients like tomatoes and tomatillos.
Can I use chicken instead of shrimp in this recipe?
Yes, you can easily substitute chicken for the shrimp in this recipe. Simply cook diced chicken breast in place of the shrimp and follow the same steps for preparing the filling and assembling the enchiladas.
How spicy is yellow mole sauce?
The spiciness of yellow mole sauce can vary depending on the type and amount of chili peppers used in the recipe. However, compared to red mole sauce, yellow mole sauce tends to be milder in heat, making it suitable for those who prefer a less spicy option.
Can I make this dish vegetarian?
Yes, you can make vegetarian shrimp enchiladas by omitting the shrimp and replacing them with additional vegetables such as diced bell peppers, onions, and mushrooms. You can also add protein-rich ingredients like black beans or tofu to make the enchiladas more filling.
How long do shrimp enchiladas with yellow mole sauce last in the fridge?
Shrimp enchiladas with yellow mole sauce can be stored in an airtight container in the refrigerator for up to 3-4 days. To reheat, simply microwave individual portions until heated through or warm them in the oven at 350°F (175°C) for 15-20 minutes.
Conclusion
Shrimp enchiladas with yellow mole sauce are a delicious and satisfying dish that brings together the vibrant flavors of Mexican cuisine. With a perfect balance of sweetness, tanginess, and heat, these enchiladas are sure to become a favorite in your recipe repertoire. Whether you’re cooking for a special occasion or a weeknight dinner, this recipe is bound to impress both family and friends alike.
Source: feastingathome.com
Butterfinger Cheesecake Recipe

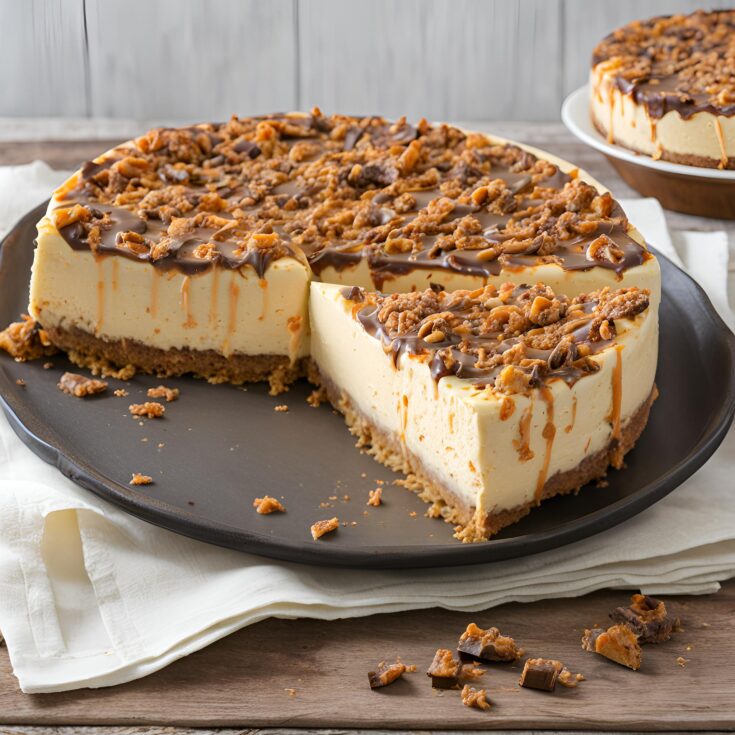
Butterfinger Cheesecake is a delightful fusion of rich, creamy cheesecake and the crunchy, peanut buttery goodness of Butterfinger candy bars. The combination of these two beloved desserts creates a treat that's both indulgent and satisfying, making it a perfect choice for special occasions or whenever you're craving something sweet and decadent.
Ingredients
- Crust
- 2 1/4 cups (302g) Oreo crumbs
- 4 tbsp (56g) salted butter, melted
- Filling
- 24 ounces (678g) cream cheese, room temperature
- 1 cup (207g) sugar
- 3 tbsp (24g) all purpose flour
- 3/4 cup (173g) sour cream, room temperature
- 1/2 cup (140g) peanut butter
- 1 tsp vanilla extract
- 4 large eggs, room temperature
- 1 1/2 cups (12 fun sized bars) chopped Butterfingers
- Chocolate Ganache
- 6 oz semi-sweet chocolate chips
- 1/2 cup heavy whipping cream
- Peanut Butter Whipped Cream
- 3/4 cup heavy whipping cream
- 1/2 cup (58g) powdered sugar
- 2 tbsp (35g) peanut butter
- 1/4 tsp vanilla extract
- Chopped Butterfingers
Instructions
Crust
- Preheat oven to 325°F (163°C). Line a 9-inch (23cm) springform pan with parchment paper in the bottom and grease the sides.
- Combine the crust ingredients in a small bowl. Press the mixture into the bottom of the springform pan.
- Bake the crust for 10 minutes, then set aside to cool.
- Cover the outsides of the pan with aluminum foil so that water from the water bath cannot get in (see how I prepare a pan for a water bath). Set prepared pan aside.
Cheesecake
- Reduce oven temperature to 300°F (148°C).
- Chop Butterfingers and set aside.
- In a large bowl, beat the cream cheese, sugar and flour on low speed until well combined and completely smooth. Be sure to use low speed to reduce the amount of air added to the batter, which can cause cracks. Scrape down the sides of the bowl.
- Add the sour cream, peanut butter and vanilla extract and mix on low speed until well combined.
- Add the eggs one at a time, mixing slowly to combine after each addition. Scrape down the sides of the bowl as needed to make sure everything is well combined.
- Stir in chopped Butterfingers.
- Pour the cheesecake batter evenly into the crust.
- Place the springform pan inside another larger pan. Fill the outside pan with enough warm water to go about halfway up the sides of the springform pan. The water should not go above the top edge of the aluminum foil on the springform pan.
- Bake for 1 hour 25 minutes. The center should be set, but still jiggly.
- Turn off the oven and leave the door closed for 30 minutes. The cheesecake will continue to cook, but slowly begin to cool as well.
- Crack the door of the oven for 30 minutes to allow the cheesecake to continue to cool slowly. This process helps prevent cracking.
- Remove the cheesecake from the oven and water bath wrapping. Refrigerate until firm, 5-6 hours or overnight.
- When the cheesecake is cool and firm, remove from the springform pan and set on a serving plate.
To Decorate the Cheesecake
- Make the chocolate ganache by putting the chocolate chips in a heat proof bowl and set them aside.
- Pour the heavy whipping cream into another heat proof bowl and microwave it until it just begins to boil, then pour it over the chocolate chips.
- Allow chocolate and cream to sit for 2-3 minutes, then whisk until smooth.
- Pour the ganache onto the cheesecake and spread into an even layer.
- Next make the whipped cream. Add the heavy whipping cream, powdered sugar, peanut butter and vanilla extract to a large mixer bowl and whip on high speed until stiff peaks form.
- Fill a piping bag fitted with a piping tip with whipped cream. I used Ateco tip #847. Pipe shells of whipped cream around the edge of the cheesecake.
- Chop Butterfingers for the topping and sprinkle over the cheesecake.
- Refrigerate cheesecake until ready to serve. Best when stored well-covered and eaten within 3-4 days.