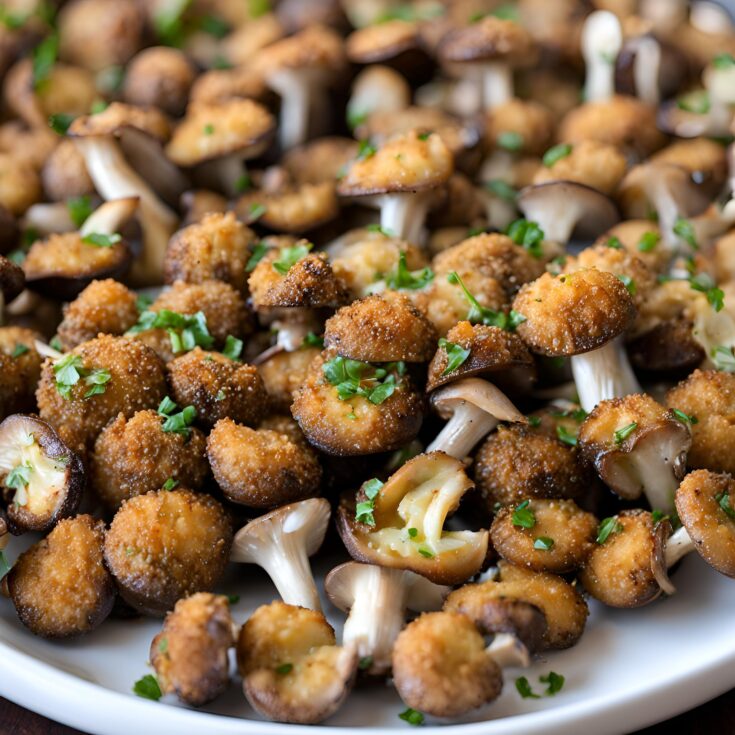
Crispy Oven Fried Garlic Mushrooms Recipe
Mushrooms are a versatile and flavorful ingredient, cherished by vegetarians and meat-eaters alike. Their rich umami flavor and satisfying texture make them an ideal choice for a variety of dishes—from soups and salads to pastas and stir-fries. But one of the most beloved ways to enjoy mushrooms is when they’re crispy, golden, and bursting with flavor.
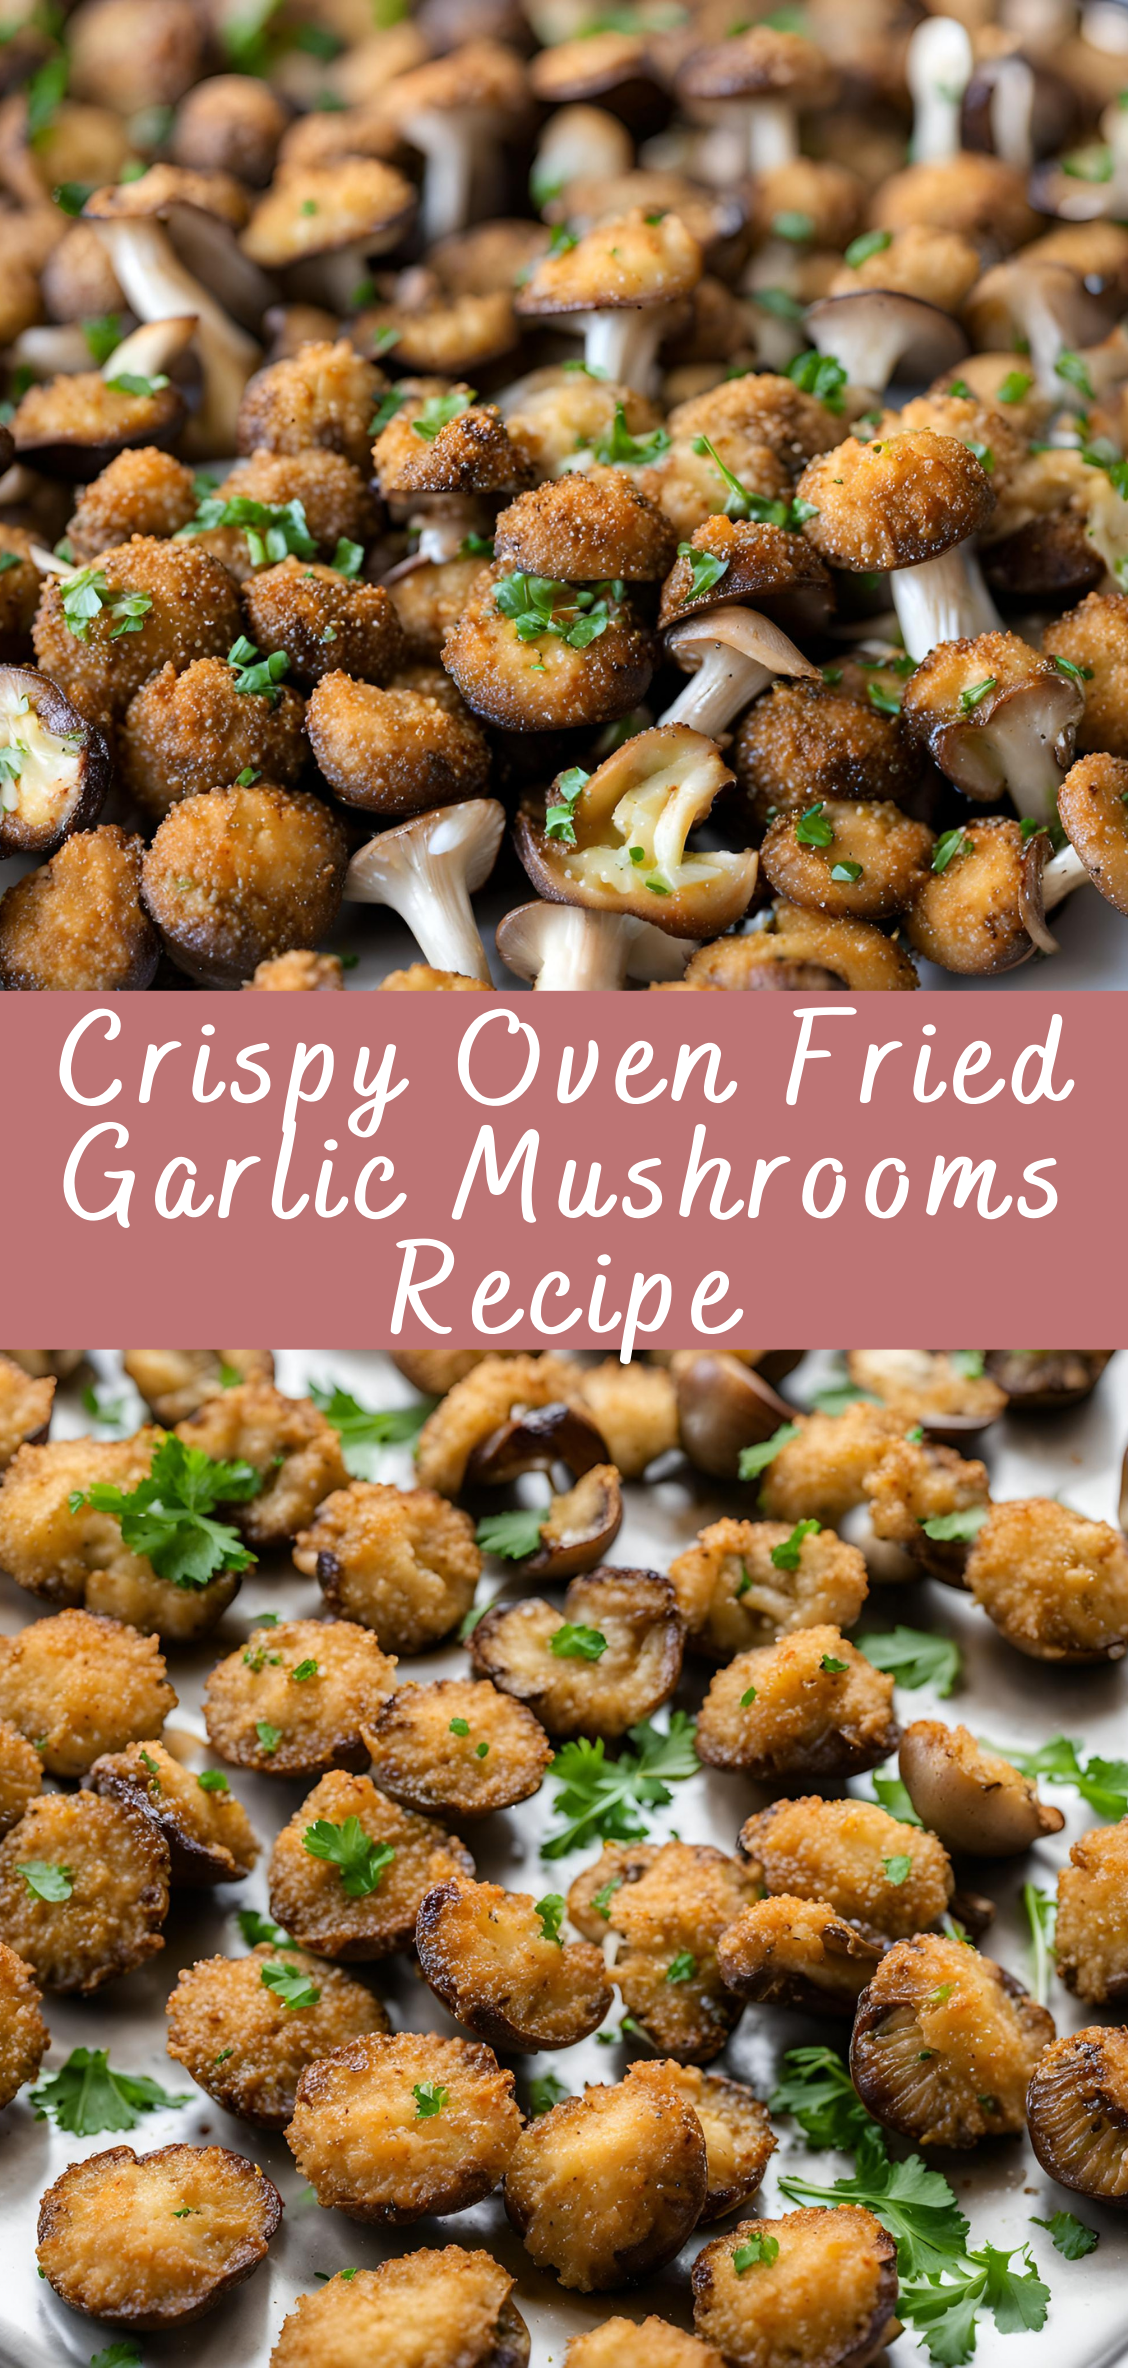
Crispy Oven Fried Garlic Mushrooms are a perfect snack or appetizer for any occasion. These mushrooms are coated in a crispy, golden breadcrumb mixture that’s seasoned with garlic and other savory spices, then baked to perfection in the oven. This cooking method eliminates the need for deep-frying, making the dish much healthier while still delivering that satisfying crunch.
The garlic flavor infuses each mushroom, and the crispy coating adds a delightful crunch, making every bite irresistible. Whether you’re serving them as a starter for a dinner party or as a snack for movie night, these crispy garlic mushrooms are sure to become a favorite in your recipe repertoire.
In this comprehensive guide, we will cover everything you need to know to make perfect Crispy Oven Fried Garlic Mushrooms, including the ingredients, detailed instructions, tips for achieving the crispiest coating, and variations for different tastes. By the end of this recipe, you will have mastered the art of making these mushrooms perfectly crispy on the outside while tender and juicy on the inside.
Instructions
Step 1: Prepare the Mushrooms
- Clean the Mushrooms: Gently wipe each mushroom with a damp paper towel to remove any dirt. Avoid rinsing the mushrooms under water as they absorb moisture, which can result in a soggy texture. Trim the stems of the mushrooms if necessary, especially if you’re using larger mushrooms, like cremini or portobello. You can leave the mushrooms whole or cut them in half, depending on the size and your preference.
- Season the Mushrooms: Place the cleaned mushrooms in a large mixing bowl. Drizzle them with 2 tablespoons of olive oil and toss them gently to coat. Season with a pinch of salt and black pepper. This ensures that the mushrooms are flavorful even before they are breaded.
Step 2: Prepare the Wet Coating
- Make the Egg Mixture: In a shallow bowl or plate, whisk together 1 large egg, 2 tablespoons of milk, and 1 tablespoon of freshly minced garlic. This will create a smooth, flavorful wet mixture that helps the breadcrumb coating stick to the mushrooms. Make sure the garlic is finely minced to prevent large chunks that may not stick well.
Step 3: Prepare the Breadcrumb Coating
- Mix the Dry Coating Ingredients: In another shallow bowl or plate, combine the 1 cup of panko breadcrumbs, 1/2 cup of grated Parmesan cheese, 2 teaspoons of garlic powder, 1 teaspoon of Italian seasoning, 1/2 teaspoon of smoked paprika, 1/4 teaspoon of salt, and 1/4 teaspoon of black pepper. Stir everything together to ensure the spices and seasonings are evenly distributed throughout the breadcrumbs.
Step 4: Coat the Mushrooms
- Dip in Wet Coating: Take each seasoned mushroom and dip it into the egg mixture, making sure it’s fully coated. Allow any excess egg mixture to drip off.
- Coat with Breadcrumbs: Next, roll the wet mushroom in the breadcrumb mixture. Press the breadcrumbs onto the mushroom to ensure they stick well and form a thick coating. Repeat this process with each mushroom.
- Place on Baking Sheet: After each mushroom is coated, place it in a single layer on a baking sheet lined with parchment paper or lightly greased. Be sure to leave space between the mushrooms to allow the hot air to circulate around them, ensuring even crisping.
Step 5: Bake the Mushrooms
- Preheat the Oven: Preheat your oven to 400°F (200°C). This high temperature is ideal for achieving a crispy, golden crust without drying out the mushrooms.
- Bake the Mushrooms: Place the baking sheet in the preheated oven and bake the mushrooms for 20-25 minutes. Halfway through the baking time (around the 12-15 minute mark), gently flip the mushrooms using tongs or a spatula to ensure they brown evenly on both sides.
- Check for Crispiness: The mushrooms are done when they are golden brown and crispy on the outside. The interior should be tender and juicy. If you prefer them extra crispy, you can bake them for an additional 5 minutes, keeping a close eye to avoid burning.
Step 6: Serve and Enjoy
- Garnish: Once the mushrooms are done baking, remove them from the oven and allow them to cool for a few minutes. You can garnish them with a sprinkle of freshly chopped parsley or additional grated Parmesan cheese for an extra burst of flavor.
- Serve: Serve the crispy oven fried garlic mushrooms immediately while they are still warm. They can be enjoyed on their own or served with a dipping sauce such as ranch dressing, marinara sauce, or a garlic aioli.
Tips for Perfect Crispy Oven Fried Garlic Mushrooms
Achieving the perfect balance of crispy coating and tender mushrooms can be a bit tricky, but with the following tips, you’ll be able to make these Crispy Oven Fried Garlic Mushrooms to perfection every time:
- Use Panko Breadcrumbs: Panko breadcrumbs are key to achieving the ultimate crispiness. Regular breadcrumbs tend to be denser and don’t crisp up as well, so panko is the better choice if you’re aiming for that extra crunch.
- Don’t Overcrowd the Baking Sheet: Make sure the mushrooms are spaced out on the baking sheet. If they are too close together, the mushrooms will steam instead of crisping, and you’ll lose the desired texture.
- Flip Halfway Through: Flipping the mushrooms halfway through baking ensures they cook evenly on both sides. This step is crucial for achieving that golden, crispy exterior all over.
- Try a Little Olive Oil Spray: If you want extra crispiness without adding more oil, lightly spray the coated mushrooms with olive oil spray before baking. This will help the breadcrumbs crisp up even further.
- Use Fresh Garlic: While garlic powder works well, fresh garlic adds an extra punch of flavor. Be sure to mince it finely so it doesn’t burn during baking.
Variations
One of the best parts about Crispy Oven Fried Garlic Mushrooms is that they are highly customizable. Here are a few variations to suit different tastes and dietary needs:
1. Parmesan and Herb Variations
Add extra herbs to the breadcrumb mixture for a fresh twist. You can try adding:
- Chopped fresh basil
- Thyme
- Rosemary
- Sage These herbs will infuse the coating with an aromatic flavor that pairs perfectly with mushrooms.
2. Spicy Garlic Mushrooms
For those who love a bit of heat, add some cayenne pepper or crushed red pepper flakes to the breadcrumb mixture. You can also mix a bit of sriracha or hot sauce into the egg mixture for an added kick.
3. Vegan Option
To make this recipe vegan, simply swap the egg with a plant-based alternative, such as flaxseed meal mixed with water or unsweetened non-dairy milk. Use vegan breadcrumbs and vegan Parmesan cheese (or nutritional yeast) for the coating.
4. Cheesy Garlic Mushrooms
For an extra cheesy version, mix some shredded mozzarella cheese into the breadcrumb coating. The cheese will melt and create even more flavor and texture in each bite.
5. Gluten-Free Mushrooms
To make this dish gluten-free, simply replace the panko breadcrumbs with gluten-free breadcrumbs or almond flour. Be sure to use a gluten-free coating for the Parmesan cheese or skip it entirely.
Conclusion
These Crispy Oven Fried Garlic Mushrooms are a mouthwatering snack or appetizer that everyone will love. The perfect balance of garlic, crispiness, and mushroom flavor makes them irresistible. Whether you’re serving them at a dinner party, as a side dish, or just as a tasty snack, this recipe is sure to impress.
With a few simple ingredients, you can create a dish that’s both healthy and indulgent, without the mess or excess calories of deep-frying. Try experimenting with the variations to make this dish your own, and don’t forget to share with friends and family—they won’t be able to resist going back for more!
Serving Suggestions
These Crispy Oven Fried Garlic Mushrooms are incredibly versatile and can be paired with a variety of sauces and dishes. Here are a few ideas to elevate the experience:
1. Dipping Sauces
The right dipping sauce can take these crispy mushrooms from delicious to extraordinary. Here are a few sauce ideas to serve alongside your mushrooms:
- Garlic Aioli: A rich, creamy aioli made with mayonnaise, garlic, lemon juice, and a touch of olive oil. It complements the garlic flavor of the mushrooms and adds a luxurious touch.
- Ranch Dressing: A classic and popular choice for dipping, ranch’s creamy and herbaceous flavor pairs beautifully with the crispy coating of the mushrooms.
- Marinara Sauce: If you’re looking for something with a tangy kick, marinara sauce is a fantastic option. The acidity of the tomatoes balances the richness of the crispy mushrooms.
- Spicy Sriracha Mayo: For those who like it hot, mix sriracha with mayo to create a spicy, creamy dip that will add an extra layer of excitement to the mushrooms.
- Lemon Herb Dip: A lighter option, this can be made with Greek yogurt, lemon juice, and fresh herbs like dill or parsley. It adds a fresh and zesty contrast to the richness of the mushrooms.
2. Pairing with Other Dishes
These crispy garlic mushrooms can easily be served as a side dish or appetizer to accompany a variety of main dishes. Some of the best pairings include:
- Pasta: Serve alongside a hearty pasta dish, such as spaghetti aglio e olio (garlic and olive oil) or a creamy fettuccine Alfredo. The mushrooms add an earthy crunch to complement the smooth textures of pasta.
- Salads: These crispy mushrooms can be added to a green salad, such as a Caesar salad or mixed greens. Their crispy texture and garlicky flavor will enhance any salad.
- Grilled Meats or Veggies: Pair the mushrooms with grilled meats like chicken, steak, or even vegetarian skewers. They also make a great side dish for a barbecue, adding crunch and flavor.
- Sandwiches and Burgers: Use these crispy mushrooms as a topping for sandwiches or burgers. They work wonderfully on vegetarian burgers, chicken sandwiches, or even a vegan burger made from black beans or lentils.
3. Serving as a Snack
These mushrooms also make a fantastic snack for movie night or casual gatherings. Serve them in a bowl or on a platter, and let everyone enjoy these bite-sized delights. You could even set up a dipping station with various sauces and let guests mix and match their favorite flavors.
Crispy Oven Fried Garlic Mushrooms are a delightful, crispy, and garlicky treat that everyone will love. This dish strikes the perfect balance between indulgence and health, offering a delicious alternative to traditional deep-fried appetizers. With their golden, crunchy coating and savory garlic flavor, they are sure to be a hit at your next gathering or meal.
This recipe is easy to customize, whether you want to spice things up, make them vegan, or add a cheesy twist. With the right technique, you’ll get perfectly crispy mushrooms every time, and the leftovers (if any) can be stored or reheated without sacrificing flavor or texture.
Whether you serve them as an appetizer, side dish, or snack, Crispy Oven Fried Garlic Mushrooms will soon become one of your favorite go-to recipes. So grab your mushrooms, preheat the oven, and get ready for a crunchy, garlicky, and utterly delicious experience!
Crispy Oven Fried Garlic Mushrooms Recipe
Ingredients
- For the Mushrooms:
- 16 oz (about 1 lb) fresh white or cremini mushrooms (preferably whole, cleaned and trimmed)
- 2 tablespoons olive oil (or vegetable oil for a more neutral flavor)
- Salt and black pepper, to taste
- For the Breadcrumb Coating:
- 1 cup panko breadcrumbs (for maximum crunch; can substitute with regular breadcrumbs for a softer texture)
- 1/2 cup grated Parmesan cheese (adds richness and a savory depth of flavor)
- 2 teaspoons garlic powder (for that signature garlic flavor)
- 1 teaspoon dried Italian seasoning (or use a combination of dried oregano and basil)
- 1/2 teaspoon smoked paprika (for a smoky undertone; optional but highly recommended)
- 1/4 teaspoon salt (or more, depending on your preference)
- 1/4 teaspoon black pepper
- For the Wet Coating:
- 1 large egg (acts as a binding agent to hold the breadcrumbs onto the mushrooms)
- 2 tablespoons milk (any kind of milk works, but whole milk or plant-based milk adds richness)
- 1 tablespoon fresh minced garlic (for extra garlicky goodness)
Instructions
Step 1: Prepare the Mushrooms
- Clean the Mushrooms:
Gently wipe each mushroom with a damp paper towel to remove any dirt. Avoid rinsing the mushrooms under water as they absorb moisture, which can result in a soggy texture. Trim the stems of the mushrooms if necessary, especially if you're using larger mushrooms, like cremini or portobello. You can leave the mushrooms whole or cut them in half, depending on the size and your preference. - Season the Mushrooms:
Place the cleaned mushrooms in a large mixing bowl. Drizzle them with 2 tablespoons of olive oil and toss them gently to coat. Season with a pinch of salt and black pepper. This ensures that the mushrooms are flavorful even before they are breaded.
Step 2: Prepare the Wet Coating
- Make the Egg Mixture:
In a shallow bowl or plate, whisk together 1 large egg, 2 tablespoons of milk, and 1 tablespoon of freshly minced garlic. This will create a smooth, flavorful wet mixture that helps the breadcrumb coating stick to the mushrooms. Make sure the garlic is finely minced to prevent large chunks that may not stick well.
Step 3: Prepare the Breadcrumb Coating
- Mix the Dry Coating Ingredients:
In another shallow bowl or plate, combine the 1 cup of panko breadcrumbs, 1/2 cup of grated Parmesan cheese, 2 teaspoons of garlic powder, 1 teaspoon of Italian seasoning, 1/2 teaspoon of smoked paprika, 1/4 teaspoon of salt, and 1/4 teaspoon of black pepper. Stir everything together to ensure the spices and seasonings are evenly distributed throughout the breadcrumbs.
Step 4: Coat the Mushrooms
- Dip in Wet Coating:
Take each seasoned mushroom and dip it into the egg mixture, making sure it's fully coated. Allow any excess egg mixture to drip off. - Coat with Breadcrumbs:
Next, roll the wet mushroom in the breadcrumb mixture. Press the breadcrumbs onto the mushroom to ensure they stick well and form a thick coating. Repeat this process with each mushroom. - Place on Baking Sheet:
After each mushroom is coated, place it in a single layer on a baking sheet lined with parchment paper or lightly greased. Be sure to leave space between the mushrooms to allow the hot air to circulate around them, ensuring even crisping.
Step 5: Bake the Mushrooms
- Preheat the Oven:
Preheat your oven to 400°F (200°C). This high temperature is ideal for achieving a crispy, golden crust without drying out the mushrooms. - Bake the Mushrooms:
Place the baking sheet in the preheated oven and bake the mushrooms for 20-25 minutes. Halfway through the baking time (around the 12-15 minute mark), gently flip the mushrooms using tongs or a spatula to ensure they brown evenly on both sides. - Check for Crispiness:
The mushrooms are done when they are golden brown and crispy on the outside. The interior should be tender and juicy. If you prefer them extra crispy, you can bake them for an additional 5 minutes, keeping a close eye to avoid burning.
Step 6: Serve and Enjoy
- Garnish:
Once the mushrooms are done baking, remove them from the oven and allow them to cool for a few minutes. You can garnish them with a sprinkle of freshly chopped parsley or additional grated Parmesan cheese for an extra burst of flavor. - Serve:
Serve the crispy oven fried garlic mushrooms immediately while they are still warm. They can be enjoyed on their own or served with a dipping sauce such as ranch dressing, marinara sauce, or a garlic aioli.
Notes
1. Choose the Right Mushrooms
- White or Cremini Mushrooms: Both types of mushrooms work well for this recipe. White mushrooms are milder in flavor, while cremini mushrooms have a slightly earthier taste. You can also experiment with portobello mushrooms if you prefer a larger, more substantial bite, but be sure to slice them into smaller pieces to maintain the crispy coating.
- Fresh Mushrooms: Always use fresh mushrooms, not pre-sliced ones, as they tend to be more prone to moisture, which can affect the crispiness of the final dish.
2. Clean Mushrooms Properly
- Avoid Rinsing: While it may be tempting to rinse mushrooms under water, mushrooms are like sponges and will absorb water, which can lead to a soggy texture when baked. Instead, gently wipe them with a damp paper towel or use a mushroom brush to remove any dirt.
- Trim Stems if Necessary: If you're using large mushrooms like cremini or portobello, you might want to trim the stems to ensure an even coating of breadcrumbs.
3. Get the Coating Just Right
- Breadcrumbs: Panko breadcrumbs are the best choice for a crispy, airy coating. They create a light, crunchy texture that contrasts perfectly with the tender mushrooms inside. Regular breadcrumbs can be used, but the texture won't be quite as crisp.
- Add Cheese: Parmesan cheese is added to the breadcrumbs not only for flavor but also to help the coating brown and crisp up in the oven. You can use grated Parmesan, shredded Parmesan, or even Pecorino Romano for a sharper flavor.
- Garlic Powder vs. Fresh Garlic: While garlic powder is convenient and mixes easily into the breadcrumb coating, fresh minced garlic can give an extra layer of flavor, especially when mixed into the egg wash. However, be careful not to burn the fresh garlic during baking.
- Seasoning Adjustments: Feel free to adjust the seasoning to your taste. Add a pinch of cayenne pepper for heat, a squeeze of lemon juice for freshness, or fresh herbs like thyme or oregano to customize the flavor.
4. Binding the Coating
- Egg Mixture: The egg and milk mixture helps the breadcrumb coating stick to the mushrooms. If you’re avoiding eggs, you can substitute with flaxseed meal mixed with water, unsweetened almond milk, or cornstarch slurry (cornstarch and water). The consistency should be thick enough to coat the mushrooms but not too runny.
- Coating Technique: Be sure to coat the mushrooms thoroughly in both the wet egg mixture and the dry breadcrumb mixture. Press the breadcrumbs onto the mushrooms for a thick, even coating.
5. Baking Tips for Extra Crispiness
- Preheat the Oven: A preheated oven ensures that the mushrooms start cooking immediately, resulting in a golden, crispy crust. Always preheat the oven to 400°F (200°C).
- Use Parchment Paper or a Silpat Mat: Lining your baking sheet with parchment paper or a Silpat mat prevents the mushrooms from sticking and makes cleanup easier. If you're using a regular baking sheet, lightly grease it with oil or non-stick spray.
- Avoid Overcrowding: Space the mushrooms out evenly on the baking sheet to ensure they cook evenly and get crispy all around. Overcrowding will cause them to steam, which makes the coating soggy.
- Flip Halfway: Flip the mushrooms halfway through the cooking time to ensure both sides become golden brown and crispy. Use tongs or a spatula to carefully flip them to avoid disrupting the breading.
- Oven Temperature: Keep the oven at a high temperature to achieve a crisp, golden exterior. If you're concerned about the mushrooms over-browning, reduce the temperature to 375°F (190°C) for the second half of the baking process.
6. Keep an Eye on the Mushrooms
- Monitor Cooking Time: Depending on the size of your mushrooms, the baking time may vary. Start checking at the 20-minute mark and continue baking until the mushrooms are golden and crispy. You may need to bake for a total of 25-30 minutes, but check frequently toward the end to prevent burning.
- Extra Crispy Option: If you love an extra-crunchy coating, you can lightly spray the mushrooms with olive oil spray before baking. This helps enhance the crispiness without adding extra fat.
7. Customizing the Recipe
- Spicy Variations: Add a pinch of cayenne pepper or red pepper flakes to the breadcrumb mixture if you enjoy spicy foods. You can also dip the finished mushrooms into a spicy sriracha mayo or chipotle aioli for an extra kick.
- Cheese Lovers: Mix shredded cheddar cheese or mozzarella into the breadcrumb mixture for a gooey, cheesy surprise in each bite. Just be mindful that the cheese may melt slightly, so it's better to use a firmer cheese like Parmesan or Pecorino for the coating.
- Herbal Infusions: Fresh or dried herbs like rosemary, thyme, or oregano can be added to the breadcrumb mixture to create a more aromatic and herbaceous version of the mushrooms.

