Mini Cheeseburgers Recipe
Few foods are as universally loved—or as instantly satisfying—as the humble cheeseburger. It’s iconic, timeless, and endlessly customizable. But when you shrink that classic down into a bite-sized version, something magical happens. Mini cheeseburgers aren’t just a scaled-down version of a fast-food favorite; they’re a creative, crowd-pleasing culinary experience that packs all the flavor of a full-sized burger into a fun, manageable, and party-ready package.
Whether you’re planning a game-day spread, a family-friendly dinner, a backyard BBQ, or a late-night snack tray, mini cheeseburgers deliver all the crave-worthy goodness of a traditional burger—but with added convenience and charm. Their small size makes them perfect for entertaining, portion control, and even picky eaters. Plus, because they’re so adaptable, you can tailor them to suit nearly any palate—traditional, spicy, gourmet, or even vegetarian.
At first glance, making mini cheeseburgers may seem straightforward—form small patties, slap them on buns, melt some cheese, and you’re done. But like any deceptively simple dish, the difference between good and great lies in the details. From choosing the right cut of beef, to getting the perfect meat-to-bun ratio, from melting the cheese just right to choosing complementary toppings that won’t overwhelm the bite—every step plays a role in creating a satisfying and memorable mini burger.
This guide isn’t just a recipe—it’s a masterclass in mini burger-making. We’ll break down everything: how to grind or choose your meat, what size to shape your patties, how to season them properly, the ideal cheeses for melt and flavor, the best buns (and how to treat them), and how to keep the final product juicy and flavorful. You’ll learn tips from restaurant chefs and home cooks alike, so your mini cheeseburgers will have that irresistible balance of crispy sear, juicy interior, and melty cheese in every bite.
Beyond the basics, we’ll explore variations that can elevate your sliders to gourmet levels—think caramelized onions, aiolis, artisan cheeses, brioche buns, and custom spice blends. Whether you’re after a classic diner-style burger or something fancier for a dinner party, you’ll find the tools and techniques here to make it happen.
Perhaps best of all, mini cheeseburgers are a great dish to make together—whether with kids learning to cook, friends helping out in the kitchen, or guests customizing their own sliders at a build-your-own burger bar. They’re interactive, fun to assemble, and absolutely delicious.
So, roll up your sleeves, fire up your skillet or grill, and get ready to craft the ultimate mini cheeseburgers from scratch. Because great food doesn’t always come in big packages—and sometimes, the smallest bites make the biggest impressions.
Step-by-Step Instructions for Mini Cheeseburgers
Part 1: Preparing the Burger Patties
Ingredients:
-
1.5 lbs ground beef (80/20 blend is ideal)
-
1 tsp kosher salt
-
½ tsp freshly ground black pepper
-
½ tsp garlic powder (optional)
-
½ tsp onion powder (optional)
-
1 tsp Worcestershire sauce (optional, for umami depth)
-
Olive oil or neutral oil for cooking
Step 1: Choosing the Right Ground Beef
For juicy, flavorful burgers, use ground beef with about 20% fat (often labeled as 80/20). This fat content helps keep the mini patties moist and full of flavor. Leaner blends can become dry and crumbly, especially when cooked quickly at high heat.
Pro Tip: If you’re grinding your own meat at home, use a blend of chuck and brisket or chuck and short rib.
Step 2: Mix and Season the Beef
Place the ground beef in a large bowl. Avoid overmixing, which can make the meat tough. Gently sprinkle the salt, pepper, and optional spices over the meat. Add the Worcestershire sauce if using, then mix just until combined.
Technique Tip: Use your fingertips or a fork to mix instead of squeezing with your palms. This keeps the meat from compacting and preserves tenderness.
Step 3: Form the Patties
Divide the meat into 12–16 equal portions, depending on your bun size (typically 2–2.5 ounces each). Roll each portion into a ball, then flatten gently into a patty about 2.5 inches in diameter and ½ inch thick. Use your thumb to make a small indentation in the center of each patty. This helps them stay flat and cook evenly instead of puffing up.
Pro Tip: If you’re prepping ahead, layer the patties between parchment paper and refrigerate for up to 24 hours.
Part 2: Choosing and Preparing the Buns
Ideal Buns:
-
Mini brioche buns (buttery and soft)
-
Slider rolls or dinner rolls
-
Hawaiian rolls (for a sweet twist)
-
Mini potato buns
Step 1: Cut and Toast the Buns
Slice each bun in half if not already pre-sliced. Toasting the buns adds texture and prevents sogginess when adding sauces or toppings.
To toast:
-
Skillet method: Lightly butter the cut sides and toast them in a dry pan until golden.
-
Oven method: Place cut-side-up on a baking sheet and toast at 375°F (190°C) for 5–7 minutes.
-
Grill method: Toast directly on a clean grill for 30–60 seconds.
Pro Tip: Brushing the inside of each bun with a little melted butter or mayo before toasting adds extra flavor and crispness.
Part 3: Cooking the Patties
Cooking Options:
-
Stovetop (Skillet or Griddle): Classic and controlled
-
Grill: Smoky and great for summer
-
Oven Broil or Air Fryer: Quick, convenient
Stovetop Instructions:
Step 1: Preheat Your Pan
Use a cast-iron skillet or flat griddle for best results. Heat over medium-high until very hot. You want that immediate sizzle for browning.
Step 2: Add a Thin Layer of Oil
Add a light coat of high smoke point oil like avocado or canola oil. Don’t drown the pan—just enough to prevent sticking.
Step 3: Sear the Patties
Place patties in the pan, leaving space between them. Cook for about 2–3 minutes per side. Avoid pressing down on them with a spatula—this squeezes out juices.
Step 4: Add Cheese (Final 30 Seconds)
Top each patty with a slice of cheese in the final 30–60 seconds of cooking. Cover the pan briefly with a lid to help the cheese melt.
Internal Temperature Check:
-
Medium-rare: 130–135°F
-
Medium: 135–145°F
-
Medium-well: 145–155°F
-
Well done: 160°F+
For food safety, USDA recommends 160°F for ground beef.
Pro Tip: Use a meat thermometer to be precise, especially with smaller patties that cook fast.
Part 4: Choosing the Cheese
Best Cheeses for Mini Burgers:
-
American cheese: Melts beautifully and has classic burger flavor
-
Cheddar: Sharp and rich; use thin slices for quick melting
-
Swiss: Milder, nutty flavor
-
Pepper Jack: Great for a spicy version
-
Blue cheese crumbles: Bold flavor (use sparingly)
Slicing Tip: If using block cheese, slice it thinly (or in small squares) to match the mini patty size.
Melt Tip: Covering the pan after adding cheese creates steam, which encourages fast, even melting.
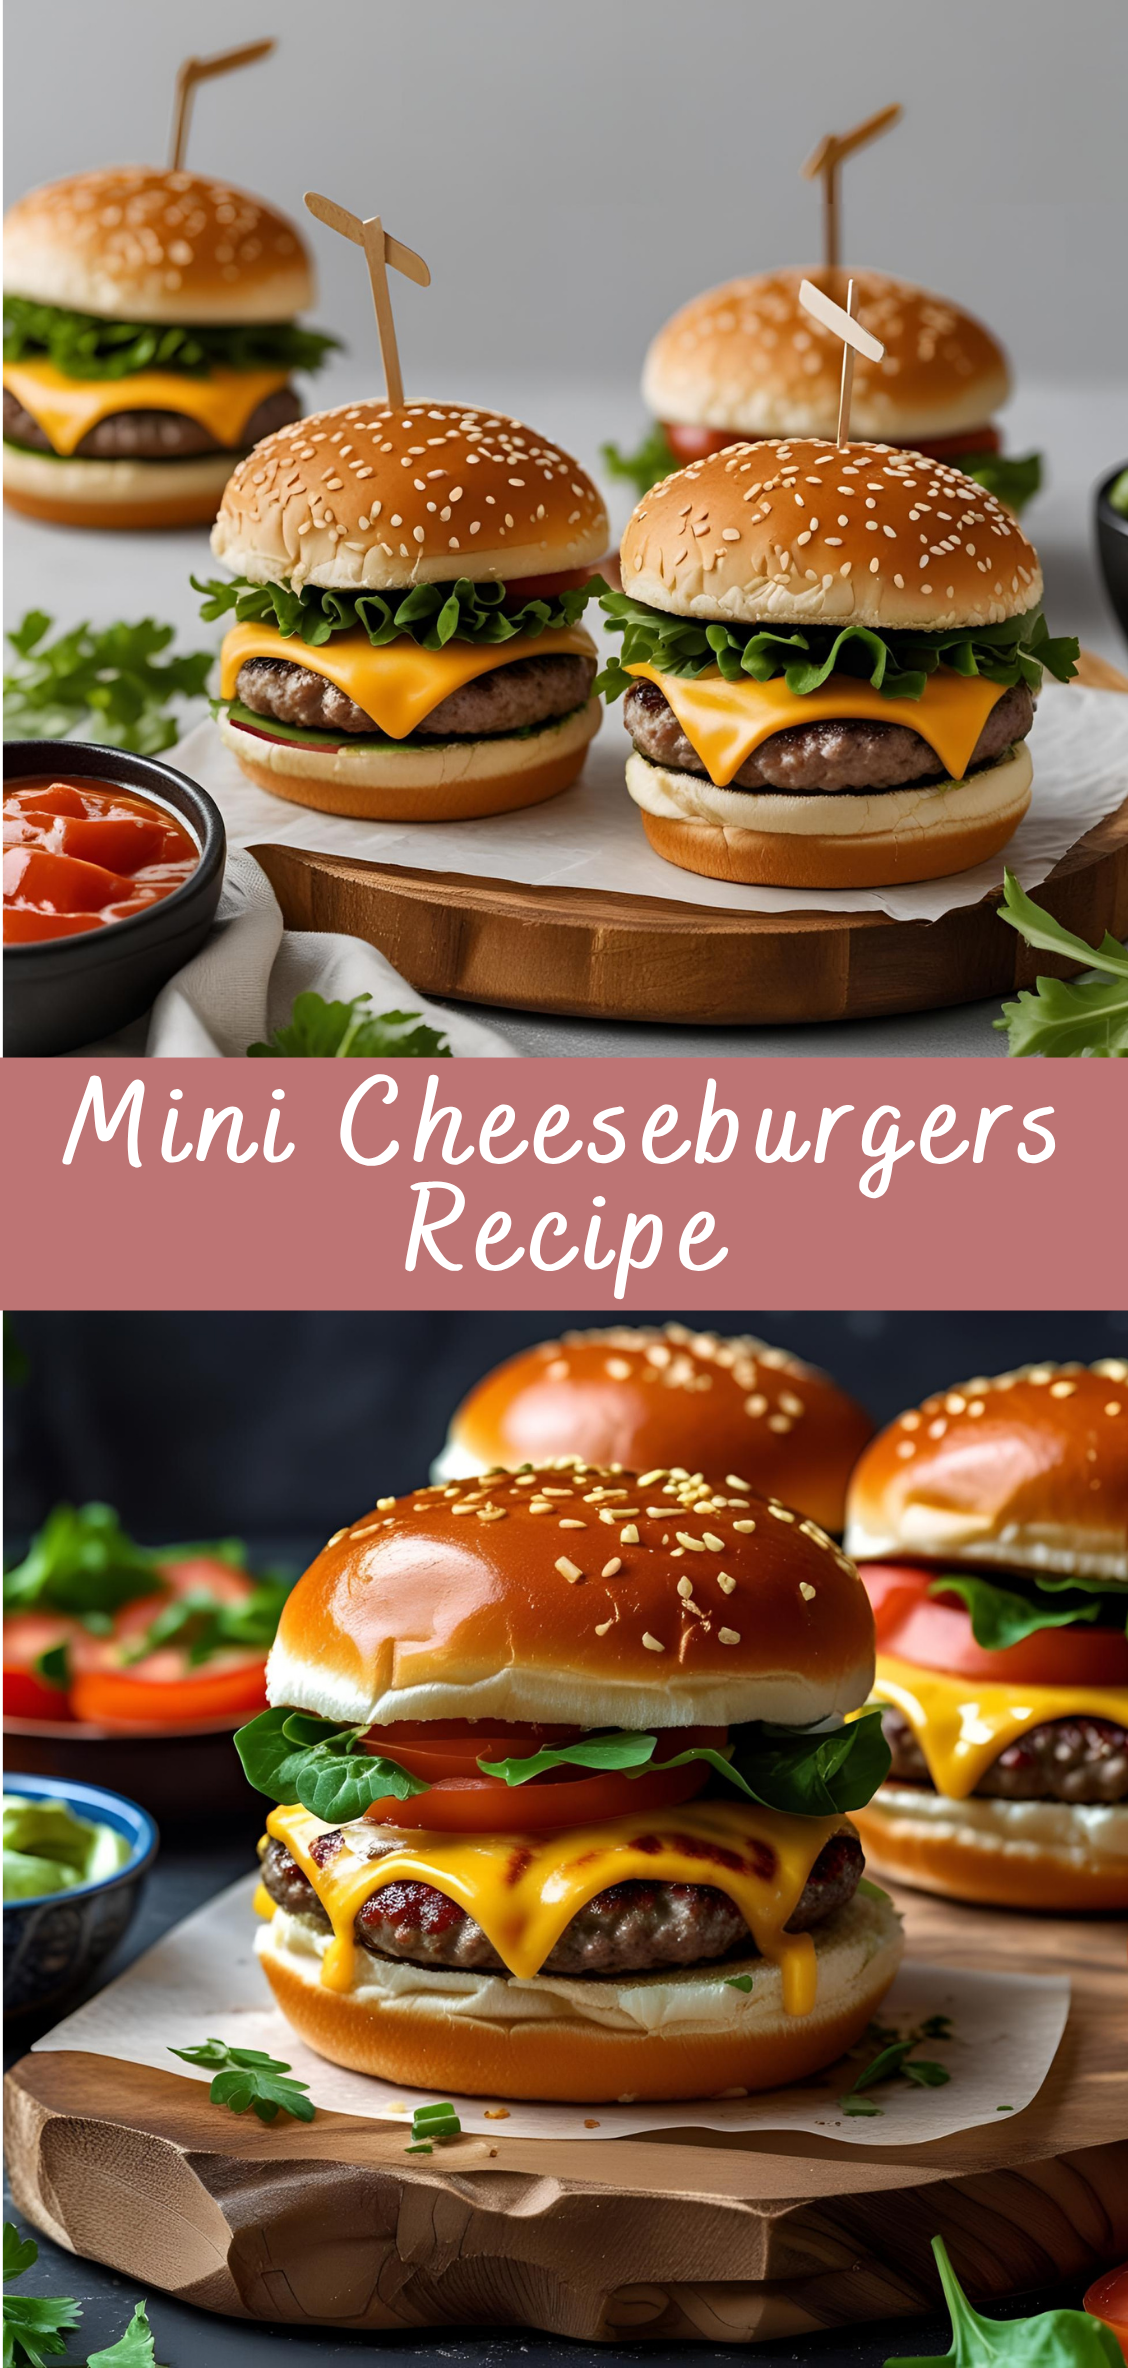
Part 5: Building the Mini Cheeseburgers
Now the fun begins. Assembling the burger is about balance—too many toppings and the mini burger becomes unstable or overly messy. Keep proportions tight.
Step-by-Step Assembly:
-
Bottom Bun: Optionally spread a thin layer of sauce or condiment.
-
Lettuce (optional): Use small pieces of leaf lettuce or butter lettuce.
-
Cheeseburger Patty: Centered and hot, with melted cheese.
-
Toppings (optional): Pickles, tomatoes (thin slices), grilled onions, jalapeños.
-
Sauce: A small dollop of ketchup, mustard, aioli, or burger sauce.
-
Top Bun: Gently press down and secure with a toothpick if serving on a tray.
Part 6: Sauces and Condiments
Great mini burgers often shine with the right sauce. You can go classic or creative.
Classic Sauces:
-
Ketchup
-
Yellow mustard
-
Mayo
Gourmet Options:
-
Garlic aioli
-
Chipotle mayo
-
Spicy Sriracha ketchup
-
BBQ sauce
-
Blue cheese dressing
DIY Burger Sauce Recipe:
Mix:
-
½ cup mayo
-
2 tbsp ketchup
-
1 tbsp relish
-
1 tsp mustard
-
½ tsp smoked paprika
-
Dash of garlic powder
Let it sit in the fridge for 20 minutes for the best flavor.
Part 7: Serving Suggestions
Mini cheeseburgers are excellent on their own, but pairing them with the right sides creates a full meal experience.
Side Ideas:
-
French fries or sweet potato fries
-
Coleslaw
-
Potato salad
-
Pickle chips or spears
-
Mini onion rings
-
Fruit skewers (for balance)
Presentation Tips:
-
Serve on a large wooden platter or tray
-
Secure each burger with a toothpick or skewer
-
Use parchment squares for a restaurant-style feel
Mini Cheeseburgers Recipe
Few foods are as universally loved—or as instantly satisfying—as the humble cheeseburger. It’s iconic, timeless, and endlessly customizable. But when you shrink that classic down into a bite-sized version, something magical happens. Mini cheeseburgers aren’t just a scaled-down version of a fast-food favorite; they’re a creative, crowd-pleasing culinary experience that packs all the flavor of a full-sized burger into a fun, manageable, and party-ready package.
Ingredients
- For the Burger Patties:
- 1 lb (450g) ground beef (80/20 is ideal)
- 1 tsp salt
- ½ tsp black pepper
- ½ tsp garlic powder
- ½ tsp onion powder
- 1 tbsp Worcestershire sauce (optional, for depth)
- For Assembling:
- 12 slider buns or mini burger buns
- 6 slices cheddar cheese, cut in halves or quarters
- 1–2 tbsp butter (for toasting buns)
- Optional toppings:
- Pickles
- Ketchup
- Mustard
- Lettuce
- Tomato slices
- Grilled onions
Instructions
1. Prepare the Burger Mixture:
- In a mixing bowl, combine ground beef with salt, pepper, garlic powder, onion powder, and Worcestershire sauce.
- Mix gently until just combined (do not overmix).
2. Form Mini Patties:
- Divide the mixture into 12 equal portions and roll into balls. Flatten slightly into mini patties (about 2½–3 inches wide).
- Press a small dimple in the center of each to prevent puffing.
3. Cook the Patties:
- Heat a skillet or grill over medium-high heat.
- Cook patties for about 2–3 minutes per side or until browned and cooked through.
- In the last minute of cooking, place cheese slices on top to melt.
4. Toast the Buns (Optional but Recommended):
- While patties cook, melt butter in a pan or on a griddle.
- Place slider buns cut-side down and toast until golden.
5. Assemble the Mini Cheeseburgers:
- Place each cheesy patty on the bottom bun.
- Add desired toppings (pickles, lettuce, ketchup, etc.).
- Cap with top bun and serve warm.
Notes
- Make-Ahead: You can shape the patties in advance and refrigerate them up to 24 hours before cooking.
- Freezing: Freeze uncooked patties between parchment paper and store in a freezer-safe bag for quick meals.
- Party Style: Serve with toothpicks through each slider for easy handling.
- Mini Buns Tip: If you can’t find slider buns, use Hawaiian rolls or cut regular burger buns into smaller rounds.

