Garlic Butter Parmesan Knots are one of those rare baked treats that manage to feel both indulgent and comforting, familiar yet elevated. They are the kind of bread that invites people to gather around the table, reaching for one knot after another, savoring the warmth, aroma, and flavor that only freshly baked dough brushed with garlic butter can provide. They belong to the class of foods that seem simple at first glance—just dough, garlic, butter, herbs, and cheese—yet they deliver a deeply satisfying experience that feels far greater than the sum of their parts.
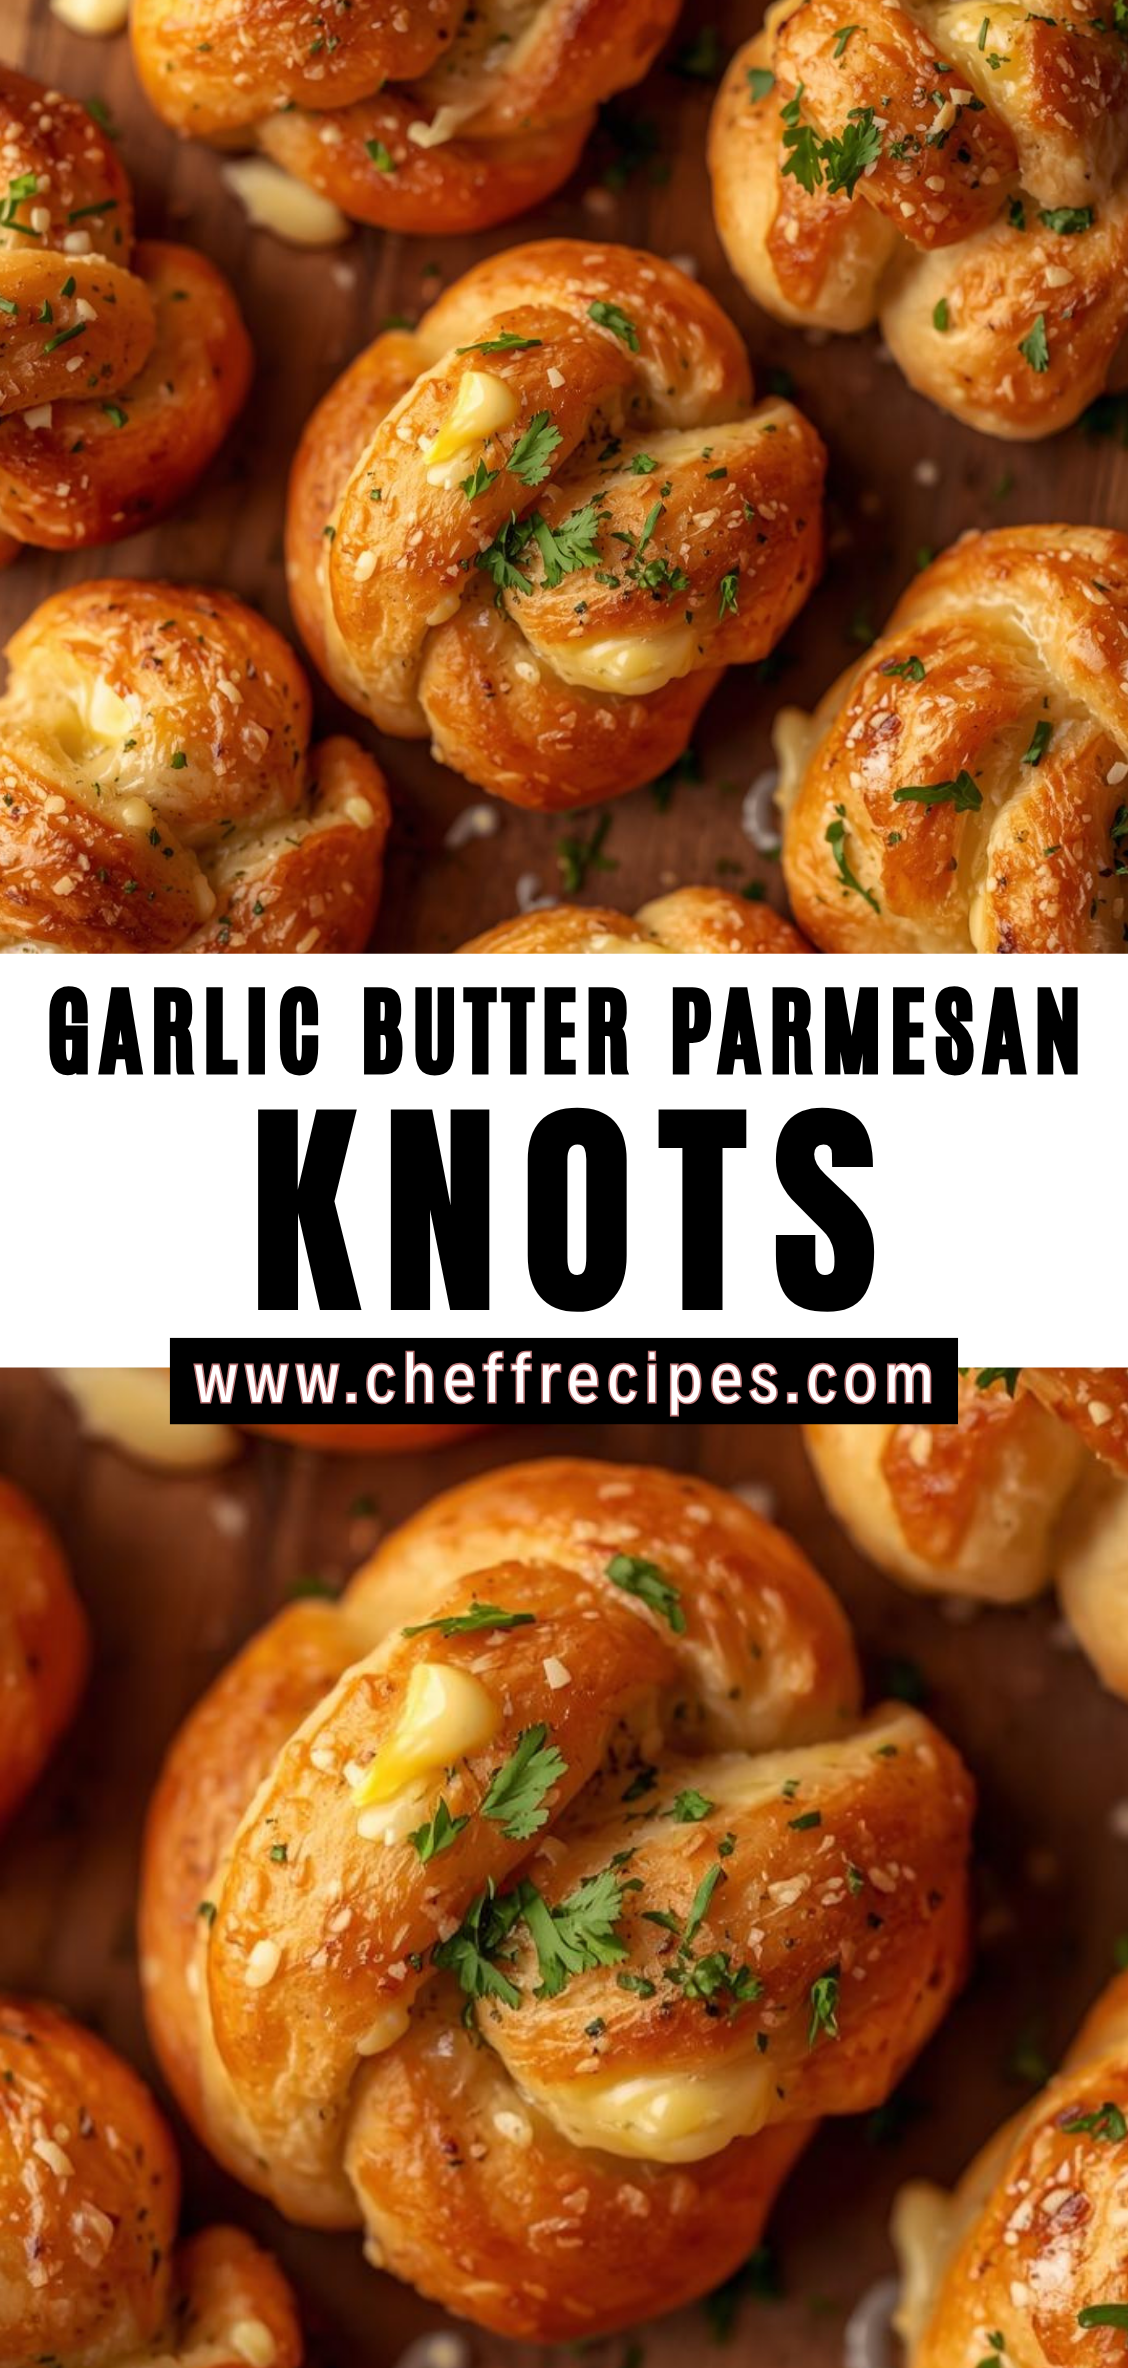
The beauty of these knots lies in the interplay of texture and flavor. The exterior develops a gentle golden crust, lightly crisped from the heat of the oven. The interior remains tender, airy, and slightly chewy, absorbing the melted butter and aromatic garlic like a sponge. Parmesan adds a savory complexity, clinging to every groove and fold of the knot, creating pockets of saltiness and umami that elevate the entire bite. The scent alone—warm bread, melted butter, and fresh garlic—fills the kitchen with an inviting aroma that signals comfort, hospitality, and abundance.
These knots are often associated with pizzerias, Italian-American home kitchens, and family-style gatherings, but they are equally suited to upscale meals or casual dinners. They can be served alongside soups, salads, pasta, roasted meats, or eaten on their own as irresistible little snacks. They can be small and delicate, shaped into tight knots perfect for hors d’oeuvres, or made larger and heartier, transforming them into a more substantial accompaniment to a meal. Their versatility makes them a welcome addition to weeknight dinners, weekend gatherings, holidays, or potlucks.
The simplicity of the ingredients means technique becomes the heart of the recipe. Making garlic knots—especially truly exceptional ones—teaches foundational skills in dough handling, fermentation, shaping, baking, and finishing. The process is tactile and satisfying: kneading the dough, feeling it grow soft and elastic under your hands; watching it rise slowly into a pillowy mound; cutting and rolling it into strips; tying each strip into a knot that holds both structure and charm. Each step brings a sense of craft, something increasingly rare in a world of shortcuts and premade foods.
Though this recipe can be made with homemade dough or store-bought dough, making the dough from scratch offers a deeper connection to the process. You control the hydration, the softness, the flavor, and the rise. Yet even if one chooses store-bought dough for convenience, the garlic butter and Parmesan finishing transforms the knots into something special. The recipe accommodates all skill levels, from beginners experimenting with yeast dough for the first time to seasoned bakers eager to perfect their shaping techniques.
The garlic butter that coats the knots after baking is a study in balance. The butter must be melted gently so it stays silky; the garlic must be sautéed, warmed, or steeped just enough to release its flavor without burning. Fresh herbs—parsley, basil, oregano, thyme—offer a burst of color and fragrance, though the knots are equally delicious with dried herbs. Parmesan, grated finely, melts partially into the warm butter while leaving some of its crystals intact, giving each knot hints of savory crunch. The coating isn’t simply brushed on; it becomes a glaze, seeping into the crevices of each knot and ensuring that every bite is luxuriously flavorful.
Garlic Butter Parmesan Knots also embody the concept of shareable food. They are passed around platters, torn apart by hand, enjoyed in casual bites. They invite conversation, laughter, and warmth. They often become the food people remember long after the meal is over—not because they overshadow the main course, but because they enhance it with comfort and generosity. They represent home cooking at its best: simple ingredients treated with care and turned into something memorable.
This introduction sets the stage for a recipe that goes far beyond assembling bread and garlic butter. In the full version to follow, we will explore the science of yeast dough, the art of shaping knots, the precision of baking times, and the flavor-building techniques that turn a basic bread roll into a culinary centerpiece. We will cover ingredients in depth, breakdown each step with clarity, offer variations ranging from herb-forward to spicy to stuffed versions, and provide troubleshooting guidance for common kitchen challenges.
Garlic Butter Parmesan Knots may appear simple, but their elegance lies in how they elevate everyday ingredients into a dish worthy of gatherings, celebrations, or a quiet evening at home. Whether you are baking them as a side dish, an appetizer, or a standalone indulgence, they hold the power to transform a meal and create an atmosphere of warmth and welcome.
Detailed Instructions for Garlic Butter Parmesan Knots
These instructions focus not only on how to execute each step, but also on why each step matters—ensuring you get tender, beautifully shaped, perfectly golden knots infused with garlic butter and Parmesan.
1. Preparing the Dough
You may use homemade or store-bought pizza dough. These instructions cover the homemade approach, then provide guidance on adapting store-bought dough.
Step 1: Measuring the Ingredients Accurately
Accurate measurement is crucial for yeast dough. Use a kitchen scale if possible. Excess flour makes knots dense; too little makes them sticky and difficult to shape. Measure flour lightly if using cups, never packing it down.
Step 2: Activating the Yeast (if using active dry yeast)
Warm water to about 105–110°F (40–43°C). Too cool and the yeast won’t activate; too hot and it will die. Add the yeast and a small pinch of sugar. Wait 5–10 minutes until bubbles form. A creamy foam on top confirms the yeast is alive.
If using instant yeast, skip this step and mix it directly with the dry ingredients.
Step 3: Combining Dry Ingredients
In a large mixing bowl, whisk together flour, salt, and optional sugar. Salt strengthens gluten and controls fermentation; sugar enhances browning and feeds the yeast.
Step 4: Incorporating Wet Ingredients
Add olive oil and the activated yeast mixture (or water if using instant yeast). Stir with a wooden spoon until a shaggy dough forms. It will look rough and uneven—this is normal at this stage.
Step 5: Kneading the Dough
Turn the dough onto a lightly floured surface. Knead for 8–10 minutes. The dough should transition from sticky and rough to smooth, elastic, and stretchy. Press with a fingertip—if the indentation springs back slowly, the dough is ready. Kneading develops gluten, providing the structure needed for shaping knots.
Step 6: First Rise
Form the dough into a tight ball. Place it in a lightly oiled bowl, turning once to coat the surface. Cover with plastic wrap or a clean towel. Let rise in a warm, draft-free environment until doubled, usually 60–90 minutes. Slow, steady fermentation improves flavor and texture.
Step 7: Using Store-Bought Dough (if preferred)
If using store-bought dough (usually 1 lb packages), let it sit at room temperature for 30–45 minutes before shaping. Cold dough tears when stretched; room-temperature dough relaxes and becomes more pliable.
2. Dividing and Shaping the Dough
Shaping is where the character of the knots emerges. Proper shaping ensures even baking and a beautiful final appearance.
Step 8: Preparing the Work Surface
Lightly flour the counter—not too much, or the dough will slide instead of grip. A bit of stickiness helps you shape ropes cleanly.
Step 9: Punching Down the Dough
Gently deflate the risen dough with your hands. Press out air pockets to create an even texture. Excess trapped air causes uneven swelling during baking.
Step 10: Dividing the Dough
Divide the dough into equal portions for consistent baking. For classic dinner-roll-sized knots, divide into 12 pieces. For larger, bakery-style knots, divide into 8 pieces. Use a bench scraper or sharp knife for clean cuts.
Step 11: Pre-Shaping Each Piece
Roll each piece gently into a small ball. This relaxes the gluten and ensures smoother ropes during shaping.
Step 12: Rolling into Ropes
Take one dough ball and roll it back and forth with your palms and fingertips, moving outward until it forms a rope about 8–10 inches long. Even thickness is key. If the rope shrinks back, allow the dough to rest for 2–3 minutes to relax the gluten.
Step 13: Tying the Knot
To create the classic knot shape:
-
Form a loose overhand knot by looping one end over the other.
-
Pull gently to tighten slightly.
-
Tuck one tail end underneath the knot.
-
Tuck the other tail end over the top or into the center.
The knot should look plump, not overly tight. Over-tightening can lead to tearing or dense centers.
Step 14: Placing Knot Shapes on a Baking Sheet
Line a sheet pan with parchment paper. Arrange the knots with at least 2 inches of space between them—they will expand during proofing and baking.
3. Second Rise (Proofing)
Proofing affects texture dramatically.
Step 15: Covering the Knots
Cover the shaped knots loosely with plastic wrap or a clean towel. Avoid anything too heavy, which might press into the dough.
Step 16: Letting Them Rise
Allow the knots to rise for 20–30 minutes. They should puff slightly, becoming lighter and softer. Overproofing will make them deflate; underproofing will make them dense.
Step 17: Preheating the Oven
While the knots rise, preheat the oven to 375°F (190°C). A fully heated oven ensures proper spring and browning.
4. Baking the Knots
Step 18: Brushing with Optional Egg Wash
If you prefer a glossy, golden exterior, whisk one egg with a tablespoon of water and brush lightly over the knots. For a softer finish, skip this step.
Step 19: Baking Time
Bake knots on the center rack for 14–18 minutes, depending on size. They should be lightly golden and feel firm on the outside while remaining soft inside. Avoid overbaking; garlic knots should not be crusty like rolls.
Step 20: Cooling Slightly
Remove the knots and allow them to cool for 2–3 minutes. They should still be warm enough to absorb the garlic butter, but not piping hot enough to melt it too fast.
5. Making the Garlic Butter Coating
Step 21: Melting the Butter
In a small saucepan or microwave-safe bowl, melt butter gently. Do not brown it unless you prefer a deeper, nutty flavor.
Step 22: Preparing the Garlic
Mince fresh garlic finely. For a more mellow flavor, briefly sauté the garlic in a teaspoon of olive oil before adding it to the butter. Raw garlic adds sharpness; cooked garlic adds sweetness.
Step 23: Adding Herbs
Stir in chopped parsley or Italian herb blends. Fresh parsley adds color and brightness; dried oregano or basil adds savory depth.
Step 24: Incorporating Parmesan
Grate Parmesan finely. Add a portion of it directly into the butter mixture so it clings to the knots. Reserve some for sprinkling after coating.
Step 25: Seasoning
Add salt and pepper to taste. A small pinch of red pepper flakes can provide gentle heat if desired.
6. Coating the Knots
Step 26: Brushing Generously
Use a pastry brush to coat each warm knot thoroughly with garlic butter. Ensure the butter seeps into every fold and groove.
Step 27: Rolling for More Coverage
For an extra-rich finish, place the knots in a large bowl, pour the garlic butter over them, and gently toss until every knot is saturated.
Step 28: Adding Final Parmesan
Sprinkle remaining Parmesan over the knots while the butter is still warm. The cheese will adhere beautifully.
Step 29: Optional Second Coat
For extra flavor, brush on a second layer of garlic butter after the first is absorbed.
7. Final Touches and Presentation
Step 30: Resting Briefly
Allow the knots to rest for 3–5 minutes so the flavors meld and the butter settles.
Step 31: Plating
Arrange on a warmed platter. A scattering of fresh herbs over the top gives an elegant finish.
Step 32: Serving
Serve warm. Garlic knots taste best fresh but can be enjoyed at room temperature as well.
Garlic Butter Parmesan Knots
Garlic Butter Parmesan Knots are one of those rare baked treats that manage to feel both indulgent and comforting, familiar yet elevated. They are the kind of bread that invites people to gather around the table, reaching for one knot after another, savoring the warmth, aroma, and flavor that only freshly baked dough brushed with garlic butter can provide. They belong to the class of foods that seem simple at first glance—just dough, garlic, butter, herbs, and cheese—yet they deliver a deeply satisfying experience that feels far greater than the sum of their parts.
Ingredients
- For the Knots:
- 1 can (11–13 oz) refrigerated pizza dough or 1 pound homemade pizza dough
- 2 tablespoons olive oil (for brushing)
- Garlic Butter Topping:
- 4 tablespoons butter, melted
- 3–4 cloves garlic, minced
- ½ teaspoon salt
- ¼ teaspoon black pepper
- 1 tablespoon fresh parsley, finely chopped (or 1 teaspoon dried)
- ¼–½ cup grated Parmesan cheese
- Optional: pinch of red pepper flakes, extra parsley for garnish
Instructions
- Preheat the oven to 400°F (200°C). Line a baking sheet with parchment paper.
- Prepare the dough: Roll the pizza dough into a rectangle about 10×12 inches. Cut into 12–16 strips (about 1 inch wide).
- Shape the knots: Take each strip, tie it gently into a knot, tuck the ends underneath, and place on the baking sheet.
- Brush with olive oil and bake for 12–15 minutes, or until golden brown.
- Make the garlic butter: In a small bowl, combine melted butter, garlic, salt, pepper, parsley, and Parmesan.
- Coat the knots: While the knots are warm, brush or toss them generously with the garlic butter mixture.
- Serve warm: Add extra Parmesan and parsley on top if desired.
Notes
- Crispier option: Broil for 1–2 minutes after buttering, watching closely.
- Extra fluffy version: Let shaped knots rise 20 minutes before baking.
- Make ahead: Bake plain knots, then reheat and toss with garlic butter just before serving.
- Great with: Marinara sauce, Alfredo, or soup.
- Cheesy variation: Mix ¼ cup mozzarella into the warm knots after baking.

