Firecracker Chicken Stir Fry Recipe
Firecracker chicken stir fry is a delightful dish that combines the bold flavors of spicy chicken with crisp vegetables, all tossed together in a savory sauce. This recipe is perfect for those who enjoy a bit of heat in their meals and love the convenience of stir-fries. With simple ingredients and easy steps, you can whip up this delicious dish in no time.

Ingredients Needed
To make firecracker chicken stir fry, you will need the following ingredients:
Chicken:
- Boneless, skinless chicken breasts or thighs
- Cornstarch
- Salt and pepper
- Oil for cooking
Vegetables:
- Bell peppers (red, green, and/or yellow)
- Broccoli
- Snap peas
- Carrots
- Green onions
Sauce:
- Soy sauce
- Hoisin sauce
- Sriracha sauce
- Honey
- Garlic
- Ginger
- Red pepper flakes (optional)
Preparing the Chicken
Start by cutting the chicken into bite-sized pieces. In a bowl, mix the chicken with cornstarch, salt, and pepper. Let it marinate for at least 15 minutes. Heat oil in a skillet over medium-high heat and cook the chicken until it’s golden brown and cooked through.
Preparing the Vegetables
While the chicken is cooking, prepare the vegetables. Wash and chop the bell peppers, broccoli, snap peas, and carrots into bite-sized pieces.
Making the Sauce
In a small bowl, whisk together soy sauce, hoisin sauce, sriracha sauce, honey, minced garlic, minced ginger, and red pepper flakes (if using).
Cooking the Stir Fry
Once the chicken is cooked, remove it from the skillet and set it aside. In the same skillet, add a bit more oil if needed and stir fry the vegetables until they are crisp-tender. Add the cooked chicken back to the skillet and pour the sauce over everything. Stir well to coat everything evenly.
Serving Suggestions
Firecracker chicken stir fry is best served hot over cooked rice or noodles. Garnish with sliced green onions and sesame seeds for extra flavor and presentation.
Variations and Tips
- You can customize this recipe by adding other vegetables such as mushrooms, snow peas, or water chestnuts.
- Adjust the spice level of the dish by increasing or decreasing the amount of sriracha sauce and red pepper flakes.
- For a healthier option, use low-sodium soy sauce and reduce the amount of honey in the sauce.
- Leftovers can be stored in an airtight container in the refrigerator for up to 3 days.
Health Benefits
This firecracker chicken stir fry is not only delicious but also packed with nutrients. Chicken is a good source of protein, while vegetables provide essential vitamins and minerals. Plus, the spicy sauce adds flavor without adding a lot of extra calories.
Frequently Asked Questions (FAQs)
What makes firecracker chicken stir fry spicy?
The spiciness comes from the sriracha sauce and red pepper flakes in the sauce. You can adjust the amount to suit your taste preferences.
Can I make this dish vegetarian?
Yes, you can make a vegetarian version of this dish by omitting the chicken and using tofu or just sticking with the vegetables.
How do I adjust the spice level?
To make the dish milder, reduce the amount of sriracha sauce and red pepper flakes. For extra heat, increase the amounts or add additional chili sauce.
Can I prepare this dish in advance?
While it’s best enjoyed fresh, you can prepare the components ahead of time and assemble the stir fry just before serving. Keep the cooked chicken, chopped vegetables, and sauce separately in the refrigerator until ready to use.
Is firecracker chicken stir fry suitable for meal prep?
Yes, this dish is great for meal prep. You can cook a big batch and portion it out into containers for easy lunches or dinners throughout the week.
Source: eatyourselfskinny.com
Apple Slab Pie Recipe
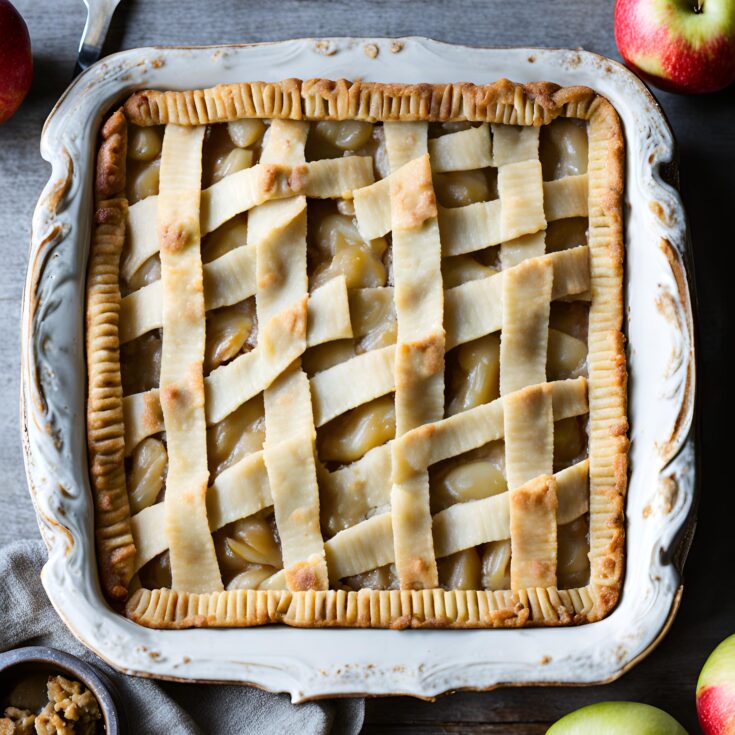
Apple Slab Pie is the perfect dessert for feeding a crowd, offering all the deliciousness of a classic apple pie but in a larger, more shareable format. This dessert is a staple at family gatherings, holiday parties, and potlucks, where it’s sure to be a hit with its buttery crust and sweet, spiced apple filling. The beauty of Apple Slab Pie lies in its simplicity—it’s easy to make, easy to serve, and even easier to enjoy.
Ingredients
- FOR THE CRUST:
- 3 ¾ cups (470 grams) all-purpose flour
- 1 ½ tbsp sugar
- 1 ½ tsp table salt
- 3 sticks (12 oz or 340 grams) unsalted butter, cubed and kept very cold
- ¾ cup very cold water
- FOR THE APPLE FILLING:
- 3 ½ to 4 pounds apples, peeled, cored and chopped into approximately ½-inch chunks (about 10 cups)
- Squeeze of lemon juice
- ⅔ to ¾ cup sugar (depending on how sweet you like your pie and how sweet your apples are)
- 3 tbsp cornstarch
- 1 rounded tsp ground cinnamon
- ¼ tsp ground nutmeg
- ¼ tsp ground allspice
- ⅛ tsp table salt
- TO FINISH:
- 2 tbsp heavy cream or 1 egg beaten with 1 tbsp water
Instructions
- To make the crust: Measure the flour into a large, wide bowl. Whisk in the sugar and salt. Toss in the butter cubes and coat them all with the flour. Using your first 3 fingers of both hands, mash up the butter into smaller pieces, just bigger than the size of peas. You can also do this with two knives or a strong pastry blender. I prefer using my fingers.
- Once the mixture looks sort of uniform, slightly crumbly, and the butter is broken up, stir in ½ cup of water with a rubber spatula until the water is absorbed and the dough starts to come together. If the dough is still dry and crumbly, add up to the remaining ¼ cup of water, 1 tablespoon at a time until the dough just starts to come together. Bring the dough together with your hands until it forms a soft and almost loose ball. Divide the pie dough into two pieces, one slightly larger than the other. You'll need the larger piece for the bottom crust. Transfer one piece to a sheet of plastic wrap and mold it into a rectangular shape, about 1-inch thick. Use the plastic wrap to help bring the dough together, if needed. Repeat with the remaining dough. Chill the dough in the refrigerator for at least 2 hours before using.
- To make the filling: In a very large bowl, toss the apple chunks with the lemon juice. Mix the sugar, cornstarch, cinnamon, nutmeg, allspice, and salt together in a medium bowl. Sprinkle the sugar-spice mixture over the apples and toss them well to coat; set aside.
- To assemble the slab pie: Preheat the oven to 375° F. Line the bottom of a 10×15×1-inch baking sheet or similarly sized jelly roll pan with a piece of parchment paper. If your pan is a little smaller than this (as mine was), don't worry - this recipe will still work fine; you'll just have a little extra dough leftover.
- Roll out the larger piece of dough on a well-floured surface with a rolling pin into a 18x13-inch rectangle. Transfer the piece to the pan and drape the edges of the dough over the sides of the pan while only gently pushing the dough down into the inside and corners of the pan. Slip the pan into the fridge or freezer while you roll out the second piece of dough into a 16x11-inch rectangle (you want to keep the dough in the pan as cold as possible).
- Remove the pan from the fridge/freezer and pour the apples and the juices over the dough in the pan - it may seem like way too many apples, but they will cook down. Drape the second sheet of dough over the apples. Trim the dough to where both top and bottom edges hang about ¾-inch over the edge of the pan. Seal up the edges tightly with your fingers.
- Brush the top of the dough with the heavy cream or egg wash. Using a sharp knife, slice a whole bunch of 1-inch slits in the top of the dough to allow the steam to escape during baking. Place the whole sheet on a larger baking sheet - there will likely be spillage that you'll want to catch on the large pan rather than the bottom of your oven (trust me).
- Bake for 40 to 45 minutes, until the top crust is a nice golden brown and the filling is bubbling through the holes in the crust. Cool the pan on a wire rack for at least 45 minutes before cutting and serving (see note below).