Cheesy Chicken Crescent Rolls Recipe
Looking for an easy, cheesy, and satisfying meal that will please the whole family? Look no further than Cheesy Chicken Crescent Rolls! This simple, crowd-pleasing dish combines tender, flavorful chicken with gooey melted cheese, all wrapped in buttery crescent dough. Perfect for a quick dinner, lunch, or even a party appetizer, cheesy chicken crescent rolls are versatile and delicious. Plus, they’re incredibly easy to make! Let’s dive into how you can make this tasty treat at home.

What Are Cheesy Chicken Crescent Rolls?
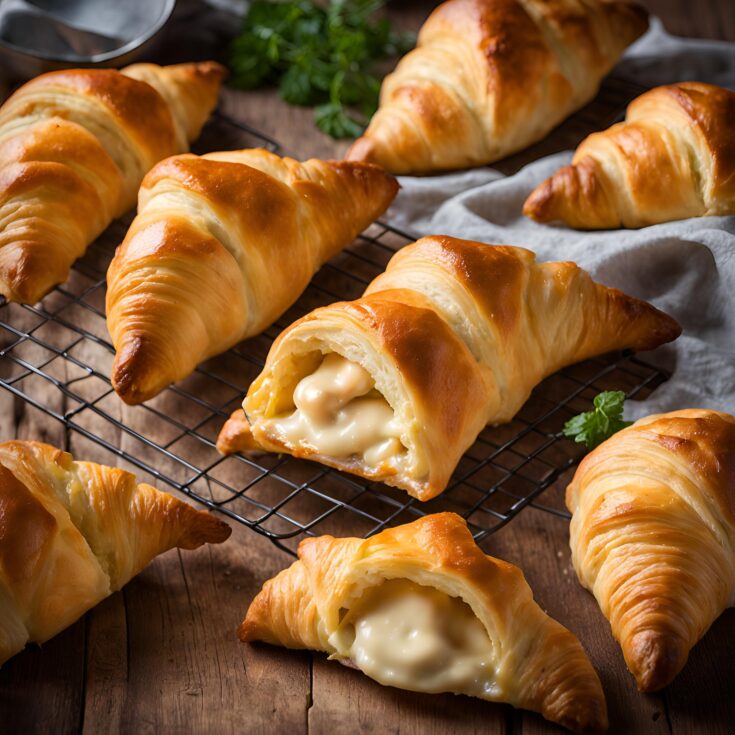
Cheesy Chicken Crescent Rolls are a combination of shredded or diced chicken mixed with cheese and seasonings, all wrapped in pre-made crescent dough and baked to golden perfection. The result? A savory, cheesy roll that’s crispy on the outside and soft on the inside. Think of it as a mini stuffed sandwich—perfect for busy weeknights or when you want to impress guests without spending hours in the kitchen.
The magic of this dish lies in the combination of creamy cheese and tender chicken inside the light and flaky crescent roll. Each bite is packed with flavor, and the melted cheese makes it irresistibly gooey.
The Role of Crescent Dough
Crescent roll dough is the key to making this recipe quick and easy. It’s pre-made, meaning you don’t have to worry about kneading or rising times. The dough is buttery, flaky, and bakes up perfectly golden. You can find crescent roll dough in the refrigerated section of most grocery stores, making it a convenient option for fast meals.
If you’re feeling adventurous, you can make your crescent dough from scratch, but for most busy cooks, the store-bought version is a time-saving lifesaver.
The Perfect Chicken Filling
The chicken filling is the heart of this dish. For the best results, use shredded rotisserie chicken or leftover cooked chicken. If you’re starting from scratch, you can bake or boil chicken breasts until fully cooked, then shred them with a fork.
Mix the chicken with cream cheese, shredded cheese, garlic powder, onion powder, and seasonings. This creamy mixture will melt and ooze with every bite, giving the rolls their cheesy core.
Choosing the Best Cheese
Cheese is what makes these crescent rolls so irresistible! For this recipe, cheddar or mozzarella are excellent choices. Cheddar offers a sharp, tangy flavor that pairs beautifully with chicken, while mozzarella provides that gooey, stretchy cheese pull we all love.
If you’re feeling creative, you can also use a mix of cheeses, like Monterey Jack, Colby, or even a spicy pepper jack for some heat.
Preparation Steps
Follow these steps to prepare the perfect cheesy chicken crescent rolls:
- Preheat your oven to 375°F (190°C).
- In a large mixing bowl, combine the shredded chicken, shredded cheese, cream cheese, garlic powder, onion powder, salt, and pepper. Mix until well combined.
- Open the can of crescent roll dough and separate it into individual triangles.
- Place a heaping tablespoon of the chicken mixture at the wide end of each triangle.
- Roll the dough over the filling, starting from the wide end and tucking the edges as you roll, ensuring the filling is enclosed.
- Place the rolled crescents onto a lined baking sheet.
How to Roll and Shape the Crescent Rolls
Rolling the crescent rolls correctly ensures that the filling stays inside while baking. Start by placing the filling at the wide end of the dough triangle. Carefully roll the dough towards the narrow tip, ensuring the edges are sealed. Tuck in any open sides to prevent the filling from leaking during baking.
Baking Instructions
Once your rolls are ready, brush them with melted butter for added richness. Bake in the preheated oven for 12-15 minutes, or until the crescent rolls are golden brown and crispy.
To ensure the chicken filling is heated through, you can check the internal temperature with a meat thermometer. It should read at least 165°F (74°C).
Tips for Getting Extra Cheesy Rolls
For cheese lovers, you can make your cheesy chicken crescent rolls even cheesier by adding a sprinkle of shredded cheese on top of the rolls before baking. This will create a gooey, melted cheese layer on the outside for an extra indulgent treat.
Side Dishes to Pair with Cheesy Chicken Crescent Rolls
Cheesy chicken crescent rolls pair beautifully with a variety of sides. Some great options include:
- A simple green salad with a tangy vinaigrette.
- Tomato soup for a comforting meal.
- Roasted vegetables, like broccoli or carrots, to add a healthy touch.
- Pasta salad for a cool and refreshing contrast to the warm, cheesy rolls.
Making the Recipe Ahead of Time
These crescent rolls are a great make-ahead option. You can prepare them the night before and store them in the refrigerator. When ready to bake, simply pop them in the oven and follow the baking instructions. You can also freeze the unbaked rolls and bake them directly from frozen—just add a few extra minutes to the cooking time.
Recipe Variations
This recipe is incredibly versatile. You can easily change up the filling by adding veggies like spinach, bell peppers, or mushrooms. Want a bit of spice? Add some jalapeños or a dash of hot sauce to the filling for a kick.
Healthier Options
For a lighter version of cheesy chicken crescent rolls, try using whole wheat crescent roll dough and reduced-fat cheese. You can also swap out the cream cheese for Greek yogurt to cut down on fat while maintaining the creamy texture.
Cheesy Chicken Crescent Rolls Recipe
Looking for an easy, cheesy, and satisfying meal that will please the whole family? Look no further than Cheesy Chicken Crescent Rolls! This simple, crowd-pleasing dish combines tender, flavorful chicken with gooey melted cheese, all wrapped in buttery crescent dough. Perfect for a quick dinner, lunch, or even a party appetizer, cheesy chicken crescent rolls are versatile and delicious. Plus, they’re incredibly easy to make! Let’s dive into how you can make this tasty treat at home.
Ingredients
- 1 (8 oz) can refrigerated crescent rolls (8 rolls)
- 1 1/2 cups cooked, shredded chicken (rotisserie chicken works well)
- 4 oz cream cheese, softened
- 1/2 cup shredded cheddar cheese
- 1/2 teaspoon garlic powder
- 1/2 teaspoon onion powder
- 1/4 teaspoon salt
- 1/4 teaspoon black pepper
- 2 tablespoons chopped fresh parsley (optional for garnish)
- 1 tablespoon melted butter (optional for brushing)
Instructions
- Preheat the oven to 375°F (190°C). Line a baking sheet with parchment paper or lightly grease it.
- Make the filling: In a mixing bowl, combine the shredded chicken, softened cream cheese, shredded cheddar cheese, garlic powder, onion powder, salt, and black pepper. Mix until all the ingredients are well combined.
- Prepare the crescent rolls: Unroll the crescent roll dough and separate it into 8 triangles.
- Fill and roll: Place about 2 tablespoons of the chicken mixture on the wide end of each crescent roll triangle. Roll up the dough, starting from the wide end, tucking in the filling as you go. Place the rolls seam-side down on the prepared baking sheet.
- Optional step: Brush the tops of the crescent rolls with melted butter for a golden, buttery finish.
- Bake: Bake the crescent rolls for 12-15 minutes or until golden brown and fully cooked.
- Serve: Remove from the oven and let them cool for a few minutes. Garnish with fresh parsley if desired and serve warm.

