Crispy Chicken Caesar Wrap Recipe
The Crispy Chicken Caesar Wrap is a contemporary twist on two timeless classics: the Caesar salad and the fried chicken sandwich. This dish brings together the crispness of golden-fried chicken, the tangy bite of Caesar dressing, the crunch of fresh romaine lettuce, and the pliable convenience of a soft tortilla wrap. It’s versatile, satisfying, and brimming with layers of flavor and texture that appeal to both casual eaters and refined palates.
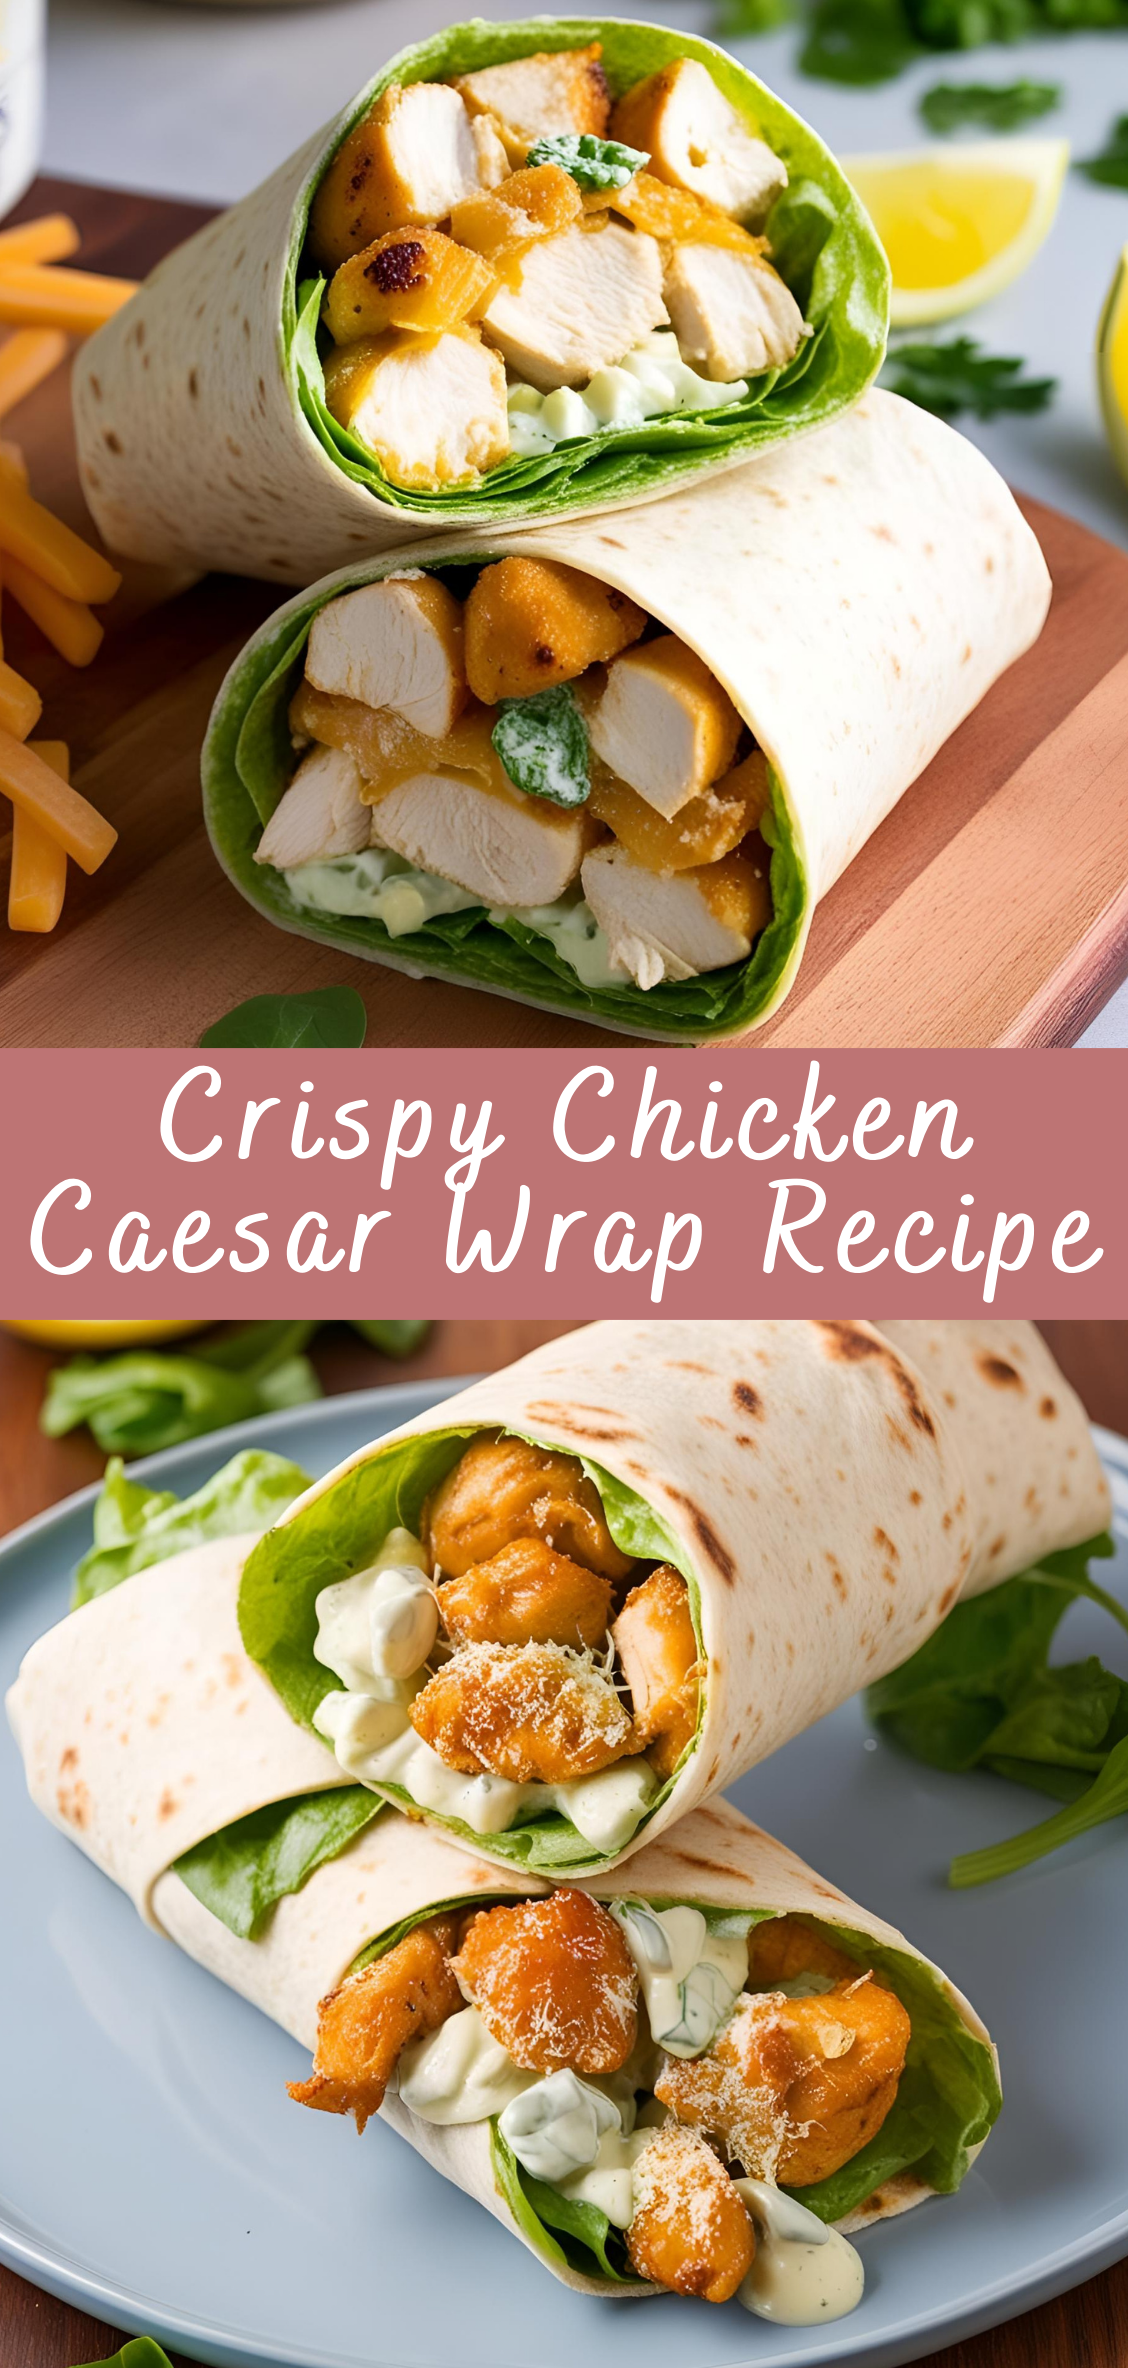
Originating from the genius idea to make Caesar salad more portable and substantial, this wrap has become a staple in bistros, delis, and kitchens worldwide. The combination of Caesar dressing—a creamy blend of Parmesan cheese, anchovies, garlic, egg yolk, lemon juice, and Worcestershire sauce—with crispy chicken and fresh vegetables wrapped in a soft flour tortilla makes this dish a favorite for lunch, dinner, or even a hearty snack.
In this recipe, we’ll guide you through making everything from scratch, including your own Caesar dressing, hand-breaded crispy chicken, and homemade croutons if you want to go the extra mile. Whether you’re preparing a meal for your family, packing a picnic, or meal-prepping for the week, this Crispy Chicken Caesar Wrap delivers every time.
Step 1: Prepare the Chicken
-
Marinate the Chicken: Slice the chicken breasts into strips or cutlets. Place them in a bowl with the buttermilk, garlic powder, onion powder, paprika, salt, and pepper. Mix well to ensure the chicken is evenly coated. Cover and refrigerate for at least 1 hour, preferably overnight for deeper flavor and tenderness.
- Advertisement - -
Prepare the Breading Station: In one shallow bowl, combine flour and cornstarch. In a second bowl, beat one egg with a tablespoon of water. Remove chicken from marinade, letting excess drip off.
-
Bread the Chicken: Dip each piece of marinated chicken into the flour mixture, then into the egg wash, then back into the flour mixture. Press gently to ensure a thick, even coating.
-
Fry the Chicken: Heat about 1.5 to 2 inches of vegetable oil in a large skillet or deep pan to 350°F (175°C). Fry chicken pieces in batches for 4-5 minutes per side, or until golden brown and internal temperature reaches 165°F (75°C). Place on a paper towel-lined tray to drain excess oil.
Step 2: Make Caesar Dressing (Optional Homemade Version)
-
Create Base Emulsion: In a mixing bowl, combine the egg yolk, Dijon mustard, anchovies, garlic, lemon juice, and Worcestershire sauce. Use a whisk or immersion blender to blend until smooth.
-
Add Olive Oil Slowly: While continuously whisking, drizzle the olive oil into the mixture slowly. This emulsifies the dressing, giving it a creamy texture.
-
Incorporate Parmesan: Stir in the Parmesan cheese until fully blended. Season with salt and pepper to taste. Adjust the thickness with a small splash of water if needed.
-
Chill: Refrigerate for at least 30 minutes before use for optimal flavor.
Step 3: Prepare Lettuce and Other Fillings
-
Rinse and Dry Lettuce: Wash romaine lettuce thoroughly under cold water. Use a salad spinner or paper towels to dry completely. Moisture can make the wrap soggy.
-
Chop and Store: Chop into bite-sized pieces and store in the refrigerator until ready to use.
-
Prepare Other Toppings: If using, cut cherry tomatoes and onions into desired sizes. Shred or shave fresh Parmesan for optimal flavor.
Step 4: Assemble the Wraps
-
Warm the Tortillas: Heat tortillas for 10–15 seconds on a dry skillet or in the microwave until soft and pliable.
-
Layer Ingredients: Lay the tortilla flat and start with a bed of chopped romaine. Add a generous portion of crispy chicken strips. Spoon Caesar dressing over the top, followed by Parmesan cheese and optional toppings like croutons or tomatoes.
-
Fold and Roll: Fold in the sides of the tortilla, then roll tightly from bottom to top to form a burrito-style wrap.
-
Grill (Optional): For extra crispness and to seal the wrap, grill it for 1-2 minutes per side in a panini press or skillet over medium heat.
Step 5: Serve
Cut the wrap in half diagonally and serve immediately. Optionally, pair with a side salad, chips, or fresh fruit for a complete meal.
Tips and Tricks for Best Results
Getting the perfect Crispy Chicken Caesar Wrap takes a bit of technique and attention to detail. These tips will help you master the dish:
-
Double Dredge the Chicken: For extra crunch, dip the chicken in the flour mixture, then egg, then back into the flour before frying.
-
Use a Thermometer: Keep the oil at a steady 350°F (175°C) while frying. If it’s too cool, the coating absorbs oil and gets soggy. Too hot, and the exterior burns before the inside cooks.
-
Drain on a Rack: Instead of paper towels, use a cooling rack to keep the chicken crispy after frying.
-
Make Dressing in Advance: Caesar dressing tastes better after a few hours. Make it ahead to allow the flavors to meld.
-
Warm Tortillas Gently: Don’t overheat the wrap, or it can become too stiff or tear. A few seconds on a skillet or microwave is enough.
-
Roll Tightly: Ensure ingredients are distributed evenly and roll the wrap snugly to prevent spillage.
-
Grill the Wrap: A quick sear on a grill or skillet helps seal the wrap and adds a lightly toasted flavor and texture.
Wrap Variations
The beauty of the Crispy Chicken Caesar Wrap lies in its adaptability. Here are several creative takes on the original:
1. Grilled Chicken Caesar Wrap
Instead of frying, season and grill the chicken for a leaner version. Perfect for meal prep or a healthier weekday lunch.
2. Buffalo Chicken Caesar Wrap
Toss the crispy chicken in buffalo sauce before wrapping for a spicy kick. Pair with blue cheese crumbles or ranch dressing for a bold flavor contrast.
3. Vegetarian Caesar Wrap
Use crispy tofu, chickpea patties, or roasted cauliflower instead of chicken. Substitute anchovy-free dressing and dairy-free Parmesan.
4. Bacon Chicken Caesar Wrap
Add crispy bacon bits for an extra savory, smoky element that complements the Caesar dressing beautifully.
5. Southwest Caesar Wrap
Incorporate black beans, corn, avocado, and a spicy Caesar dressing with chipotle in adobo. Serve with a lime wedge.
6. Lettuce-Wrapped Version
For a low-carb version, swap out the tortilla for large romaine leaves or collard greens. Wrap tightly and secure with parchment paper.
History of Caesar Salad and Wrap Evolution
Origins of Caesar Salad:
The Caesar salad was invented in 1924 by Italian-American restaurateur Caesar Cardini in Tijuana, Mexico. During a rush at his restaurant, Cardini improvised with what he had—romaine lettuce, garlic, eggs, croutons, Parmesan, and Worcestershire sauce—and tossed it tableside. The result was an instant classic.
Birth of the Wrap:
The wrap, as a culinary format, gained popularity in the 1980s and 90s in the United States. Rooted in global traditions such as burritos and shawarma, the Western wrap became a go-to option for portable meals. The fusion of Caesar salad with fried chicken inside a wrap came naturally as chefs sought creative, hearty, and convenient combinations.
Today, the Crispy Chicken Caesar Wrap reflects both culinary innovation and the enduring appeal of comfort food.
Pairing Suggestions
Pairing your Crispy Chicken Caesar Wrap with complementary sides and beverages can elevate the meal into a complete experience.
Side Dishes:
-
Sweet Potato Fries
-
Kettle-Cooked Chips
-
Fruit Salad
-
Garlic-Parmesan Roasted Vegetables
-
Classic Tomato Soup
Beverages:
-
Iced Lemon Tea
-
Sparkling Water with Lime
-
Chardonnay (if serving as a lunch entrée)
-
Citrus-Infused Iced Water
-
Craft Beer (such as a pale ale or wheat beer)
Frequently Asked Questions (FAQ)
Can I use frozen chicken tenders?
Yes, pre-cooked frozen chicken tenders are a convenient shortcut. Heat them according to package instructions and use them as the protein in your wrap.
Is Caesar dressing safe to eat with raw egg?
If you’re concerned about food safety, use pasteurized eggs or substitute with store-bought mayonnaise. You can also purchase Caesar dressing from a store for peace of mind.
How do I prevent the wrap from getting soggy?
Keep wet ingredients like dressing and tomatoes separate until serving. Drain lettuce thoroughly and consider adding a thin layer of cheese or lettuce directly on the tortilla to act as a moisture barrier.
Can this be made gluten-free?
Yes. Use gluten-free flour and cornstarch for the chicken coating, gluten-free tortillas, and check labels on your Caesar dressing and other ingredients.
Crispy Chicken Caesar Wrap Recipe
The Crispy Chicken Caesar Wrap is a contemporary twist on two timeless classics: the Caesar salad and the fried chicken sandwich. This dish brings together the crispness of golden-fried chicken, the tangy bite of Caesar dressing, the crunch of fresh romaine lettuce, and the pliable convenience of a soft tortilla wrap. It’s versatile, satisfying, and brimming with layers of flavor and texture that appeal to both casual eaters and refined palates.
Ingredients
- For the Chicken:
- 2 boneless, skinless chicken breasts
- 1 cup buttermilk (optional, for marinating)
- 1 cup all-purpose flour
- 1 cup breadcrumbs (panko for extra crunch)
- 1 tsp garlic powder
- 1 tsp paprika
- ½ tsp salt
- ½ tsp black pepper
- 2 eggs
- Oil for frying (vegetable or canola)
- For the Wrap:
- 4 large flour tortillas
- 2 cups chopped romaine lettuce
- ½ cup Caesar dressing (store-bought or homemade)
- ¼ cup grated Parmesan cheese
- Optional: sliced cherry tomatoes, bacon bits, red onions
Instructions
1. Prepare the Chicken:
(Optional) Marinate the chicken in buttermilk for 1–2 hours for extra tenderness.
Slice the chicken breasts into strips or cutlets.
In a bowl, mix flour, breadcrumbs, garlic powder, paprika, salt, and pepper.
In another bowl, beat the eggs.
Dip each chicken piece in the egg, then coat thoroughly in the flour mixture.
Heat oil in a skillet over medium heat. Fry the chicken for 3–4 minutes per side, until golden brown and cooked through.
Drain on paper towels.
2. Assemble the Wrap:
Warm tortillas slightly for easier rolling.
Lay out each tortilla and layer with:
Chopped romaine lettuce
Crispy chicken strips
Caesar dressing
Parmesan cheese
Any optional toppings
Roll the wrap tightly like a burrito—fold in the sides and then roll up from the bottom.
3. Serve:
Slice in half and serve immediately, or wrap in foil to take on the go.
Notes
- Air Fryer Option: Cook chicken in an air fryer at 400°F (200°C) for 12–15 minutes, flipping halfway.
- Make it Healthier: Use grilled chicken instead of fried.
- Dressing Tip: Use a thick Caesar dressing to prevent the wrap from getting soggy.

