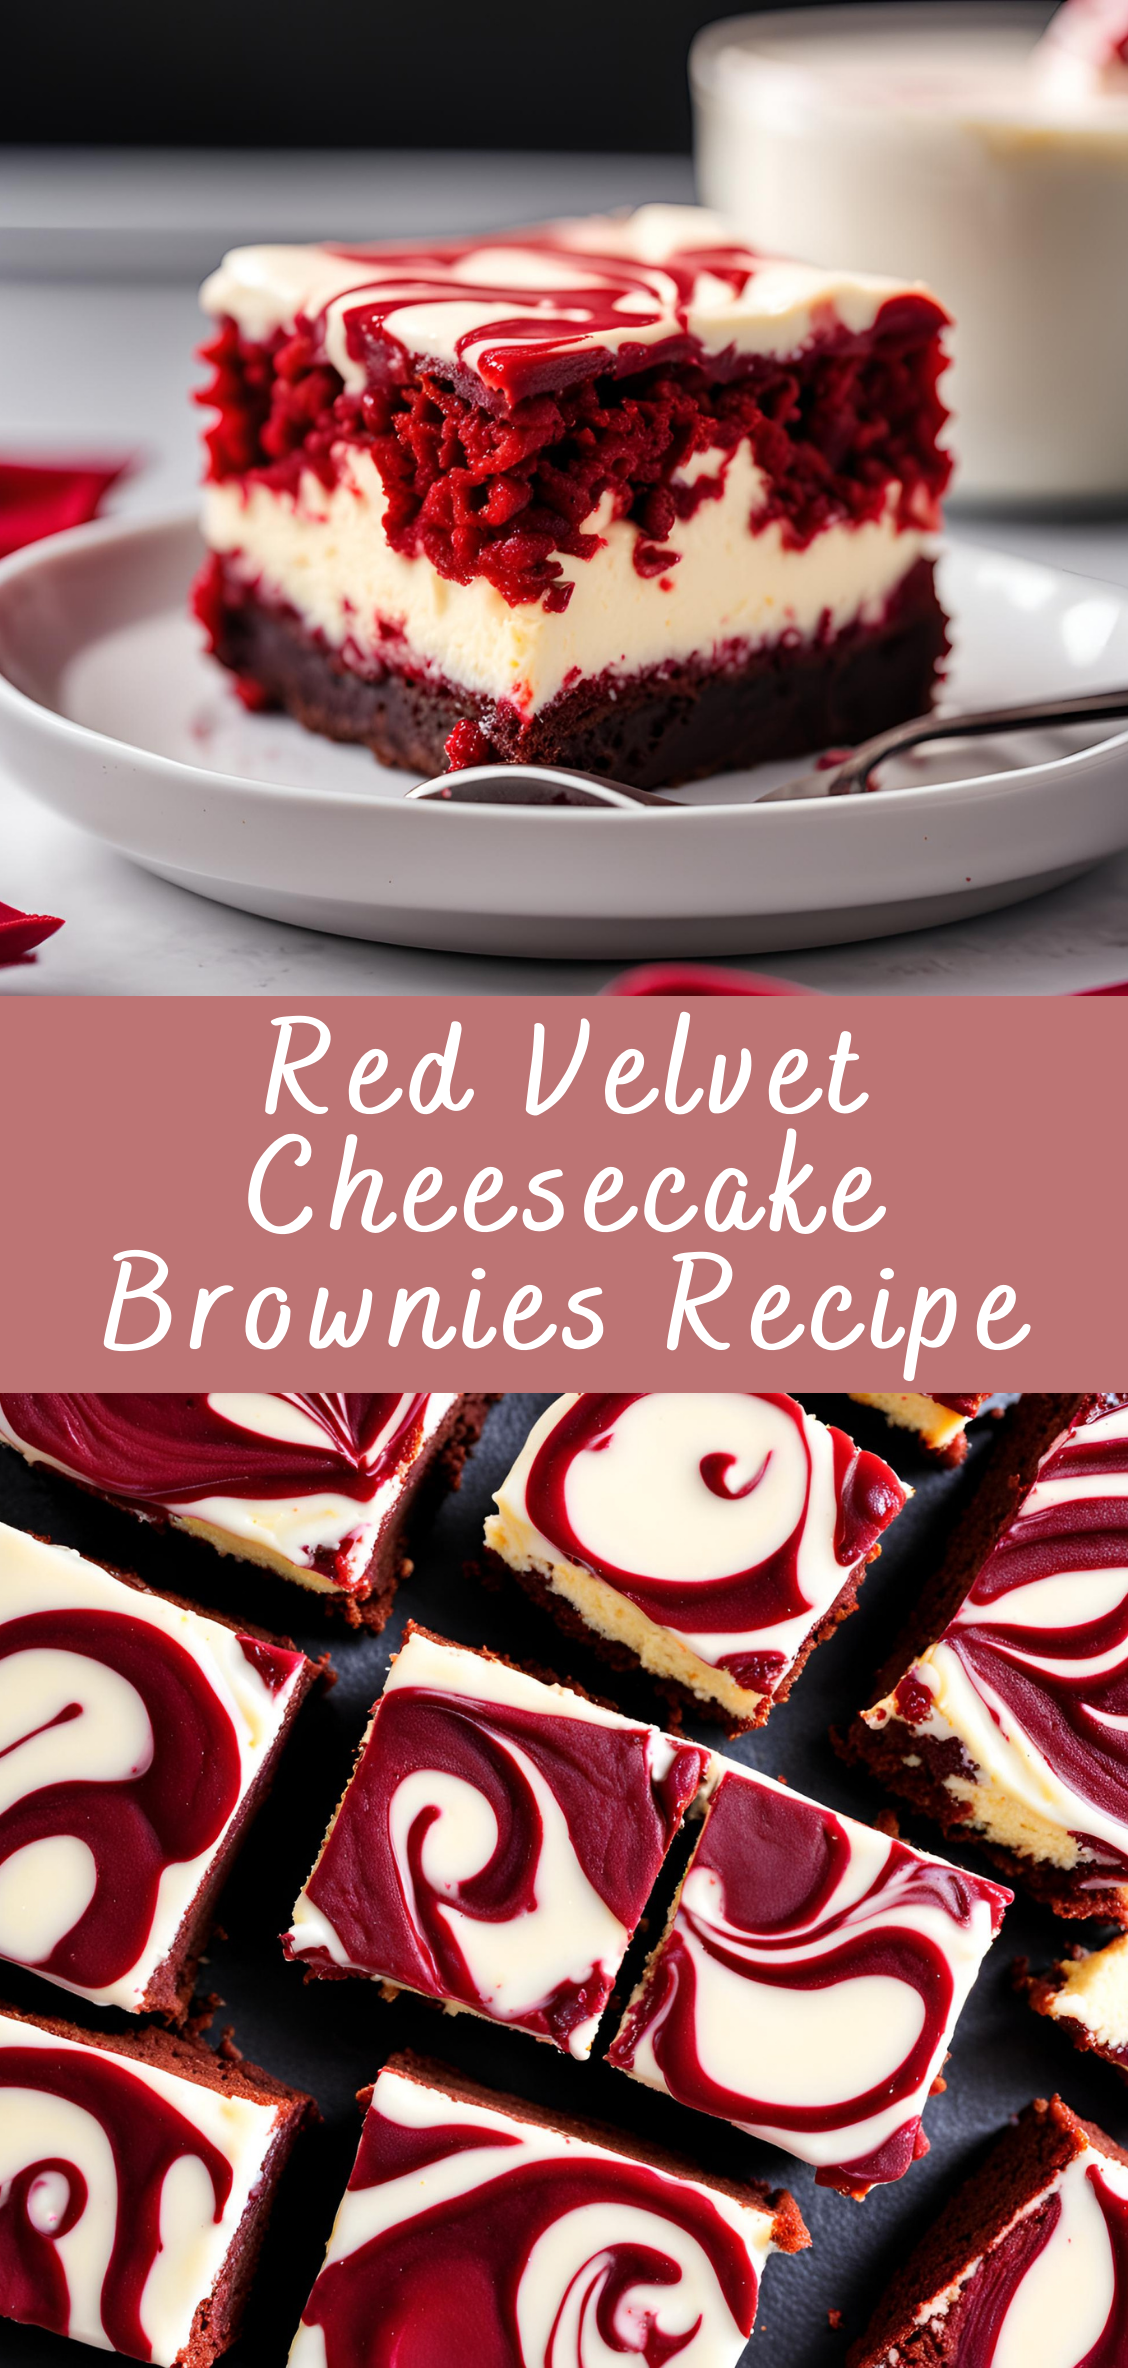
Red Velvet Cheesecake Brownies Recipe
Red Velvet Cheesecake Brownies are a decadent and visually stunning dessert, combining the rich chocolate flavor of red velvet brownies with the creamy tang of a cheesecake swirl. These brownies are perfect for holidays, parties, or simply indulging your sweet tooth with a unique twist on classic brownies.
1. Preheat the Oven:
- Begin by preheating your oven to 350°F (175°C). Grease an 8×8-inch baking pan or line it with parchment paper to make removing the brownies easier once baked.
2. Prepare the Red Velvet Brownie Batter:
- Melt the Butter: In a medium saucepan or microwave-safe bowl, melt the butter. Once melted, stir in the granulated sugar and cocoa powder until fully combined and smooth.
- Add Red Food Coloring and Vanilla: Add the red food coloring to the mixture, starting with one tablespoon. You can adjust the intensity of the red color by adding a bit more if needed. Stir in the vanilla extract and vinegar.
- Mix in Eggs and Flour: Add the eggs, one at a time, mixing well after each addition. Finally, fold in the flour until the batter is smooth and lump-free.
3. Prepare the Cheesecake Layer:
- Mix Cream Cheese and Sugar: In a separate mixing bowl, combine the softened cream cheese and 1/4 cup of sugar. Use a hand mixer or stand mixer to beat the mixture until it’s smooth and creamy.
- Add Egg and Vanilla: Beat in the egg and vanilla extract until everything is well incorporated and there are no lumps.
4. Assemble the Layers:
- Spread the Red Velvet Batter: Pour most of the red velvet brownie batter into the prepared baking pan, spreading it evenly to create a smooth base layer. Reserve about 1/4 cup of the brownie batter for swirling on top later.
- Add the Cheesecake Layer: Gently spread the cream cheese mixture over the red velvet layer, trying to cover as much of the brownie batter as possible. Use a spatula or the back of a spoon to smooth it out.
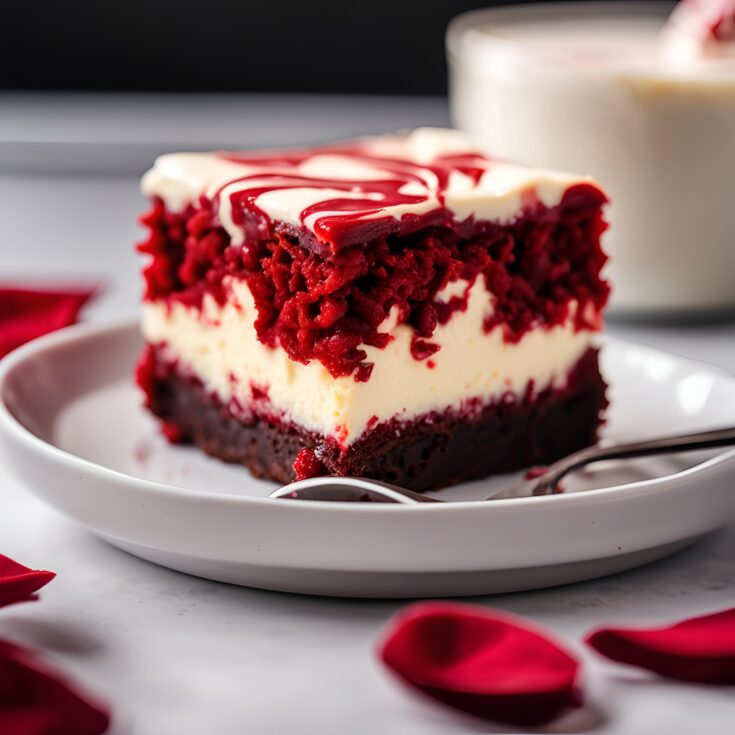
- Swirl the Top: Drop spoonfuls of the reserved red velvet batter on top of the cheesecake layer. Use a knife or toothpick to gently swirl the brownie batter through the cheesecake layer, creating a marbled effect. Be careful not to overmix—you want distinct swirls of red and white.
5. Bake:
- Bake in the preheated oven for 25-30 minutes, or until a toothpick inserted into the center comes out with only a few moist crumbs attached. Be careful not to overbake, as this can dry out the brownies.
6. Cool and Serve:
- Once done, remove the brownies from the oven and let them cool in the pan for about 10-15 minutes. Transfer them to a wire rack to cool completely before cutting into squares. If using parchment paper, you can easily lift the entire slab of brownies out of the pan for cutting.
Tips for Success:
- Room Temperature Ingredients: Make sure your cream cheese is fully softened before making the cheesecake layer. This ensures a smooth, lump-free texture.
- Food Coloring: If you want a natural red color, you can substitute artificial food coloring with beet powder or natural red food dyes. However, the intensity of the red may vary.
- Swirling Technique: For a beautiful marbled effect, try to swirl the brownie batter into the cheesecake layer without mixing too much. Use gentle, swirling motions for distinct patterns.
- Don’t Overbake: Red velvet brownies are meant to be fudgy. Keep an eye on the baking time, and check for doneness by inserting a toothpick into the center. A few moist crumbs indicate the brownies are ready, but if the toothpick comes out completely wet, they need a little more time.
Variations and Additions:
- Chocolate Chips: For an extra indulgent touch, stir in some chocolate chips into the red velvet batter before spreading it into the pan. You could use dark chocolate, milk chocolate, or even white chocolate chips.
- Raspberry Swirl: If you love fruit flavors, swirl in a few spoonfuls of raspberry or strawberry jam along with the cheesecake layer. The tangy fruit pairs beautifully with the sweetness of the cheesecake and brownies.
- Nut Toppings: Sprinkle chopped nuts, such as pecans or walnuts, on top of the cheesecake layer before baking for added crunch.
Storage:
- Room Temperature: These brownies can be stored at room temperature in an airtight container for up to 2 days.
- Refrigeration: If you want to keep them longer, store the brownies in the refrigerator for up to a week. The cheesecake layer stays fresher when chilled.
- Freezing: You can freeze red velvet cheesecake brownies for up to 3 months. Wrap individual slices tightly in plastic wrap, then place them in a freezer-safe bag or container. When ready to enjoy, simply thaw at room temperature or in the fridge.
FAQs:
- Can I make these gluten-free?
- Yes! You can substitute the all-purpose flour with a gluten-free baking blend. Just make sure the blend contains xanthan gum or another binding agent to maintain the texture.
- Can I double the recipe?
- Absolutely. If you’re serving a larger group or want to make more brownies, double the ingredients and bake them in a 9×13-inch pan. You may need to extend the baking time by about 5-10 minutes, so keep an eye on them.
- What’s the difference between red velvet and regular brownies?
- Red velvet brownies have a milder chocolate flavor compared to traditional brownies due to the addition of food coloring and sometimes a bit of vinegar, which also adds a slight tang. Their texture is still fudgy, but they have a unique flavor profile and a striking red color.
Conclusion:
Red Velvet Cheesecake Brownies are a delightful dessert that’s as beautiful as it is delicious. The vibrant red hue paired with the creamy white cheesecake swirl creates a stunning visual appeal, while the combination of flavors offers a perfect balance of sweet, tangy, and chocolaty richness. Whether you’re making these for a special occasion or simply as a treat for yourself, these brownies are sure to impress!
Red Velvet Cheesecake Brownies Recipe
Red Velvet Cheesecake Brownies are a decadent and visually stunning dessert, combining the rich chocolate flavor of red velvet brownies with the creamy tang of a cheesecake swirl. These brownies are perfect for holidays, parties, or simply indulging your sweet tooth with a unique twist on classic brownies.
Ingredients
- For the Red Velvet Brownies:
- 1/2 cup unsalted butter, melted
- 1 cup granulated sugar
- 2 large eggs
- 1 teaspoon vanilla extract
- 1 tablespoon red food coloring
- 1 tablespoon cocoa powder
- 3/4 cup all-purpose flour
- 1/4 teaspoon salt
- For the Cheesecake Layer:
- 8 oz cream cheese, softened
- 1/4 cup granulated sugar
- 1 large egg
- 1/2 teaspoon vanilla extract
Instructions
1. Preheat the Oven:
Preheat your oven to 350°F (175°C) and line an 8x8-inch baking pan with parchment paper, leaving some overhang for easy removal.
2. Prepare the Red Velvet Brownie Batter:
In a large mixing bowl, whisk together the melted butter and sugar until smooth. Add the eggs, vanilla extract, and red food coloring. Stir until well combined.
Sift in the cocoa powder, flour, and salt. Gently fold the dry ingredients into the wet ingredients until just combined. Be careful not to overmix.
3. Make the Cheesecake Layer:
In a separate bowl, beat the softened cream cheese and sugar together until smooth. Add the egg and vanilla extract, beating until the mixture is creamy and free of lumps.
4. Assemble the Brownies:
Pour about 3/4 of the red velvet brownie batter into the prepared baking pan, spreading it evenly.
Carefully pour the cheesecake layer over the brownie layer, spreading it gently to the edges.
Drop spoonfuls of the remaining red velvet batter on top of the cheesecake layer. Use a knife or toothpick to swirl the red velvet batter through the cheesecake to create a marbled effect.
5. Bake:
Bake for 30-35 minutes, or until the center is set and a toothpick inserted into the center comes out mostly clean (a few moist crumbs are okay).
6. Cool:
Let the brownies cool completely in the pan on a wire rack before removing them. For cleaner cuts, chill the brownies in the refrigerator for at least 30 minutes before slicing.
7. Serve:
Slice the brownies into squares and serve them as is, or with a dollop of whipped cream or a drizzle of chocolate sauce for extra indulgence.
Notes
- Storage: Store the brownies in an airtight container in the refrigerator for up to 5 days. These also freeze well for up to 3 months.
- Red Velvet Tip: If you prefer not to use food coloring, you can reduce the amount or omit it, though it won’t have the signature red velvet color.
- Add-ins: For an extra twist, stir in white chocolate chips or dark chocolate chunks into the red velvet batter before baking.

