Red velvet has long held a special place in the world of desserts. Its striking red hue paired with a tender, buttery crumb and subtle cocoa flavor makes it a visually captivating and deliciously indulgent treat. Traditionally associated with celebratory occasions—from birthdays and anniversaries to holidays and festive gatherings—red velvet has a history that blends culinary curiosity, cultural evolution, and a touch of mystique. While the origins of red velvet cake are often debated, most food historians trace its roots back to the early 20th century, with the name becoming popular in the United States during the 1920s. Originally, the rich, reddish-brown hue of the cake was achieved through the natural chemical reaction between cocoa powder and acidic ingredients like buttermilk and vinegar. Today, the vivid red color is usually enhanced with food coloring, creating the dramatic visual appeal that has made red velvet a favorite for generations.
The charm of red velvet lies not only in its appearance but in its flavor profile. Unlike traditional chocolate cake, red velvet is subtly chocolaty, with a delicate tang from the buttermilk or vinegar that balances the sweetness of the sugar. Its smooth, tender crumb creates the perfect canvas for a variety of frostings, most famously cream cheese frosting, whose slightly tangy richness complements the cake’s flavor beautifully. Over time, bakers and dessert enthusiasts have expanded the red velvet concept beyond the classic cake, experimenting with cupcakes, cookies, brownies, and bars. Among these innovations, red velvet cookie bars stand out as a particularly versatile and convenient iteration.
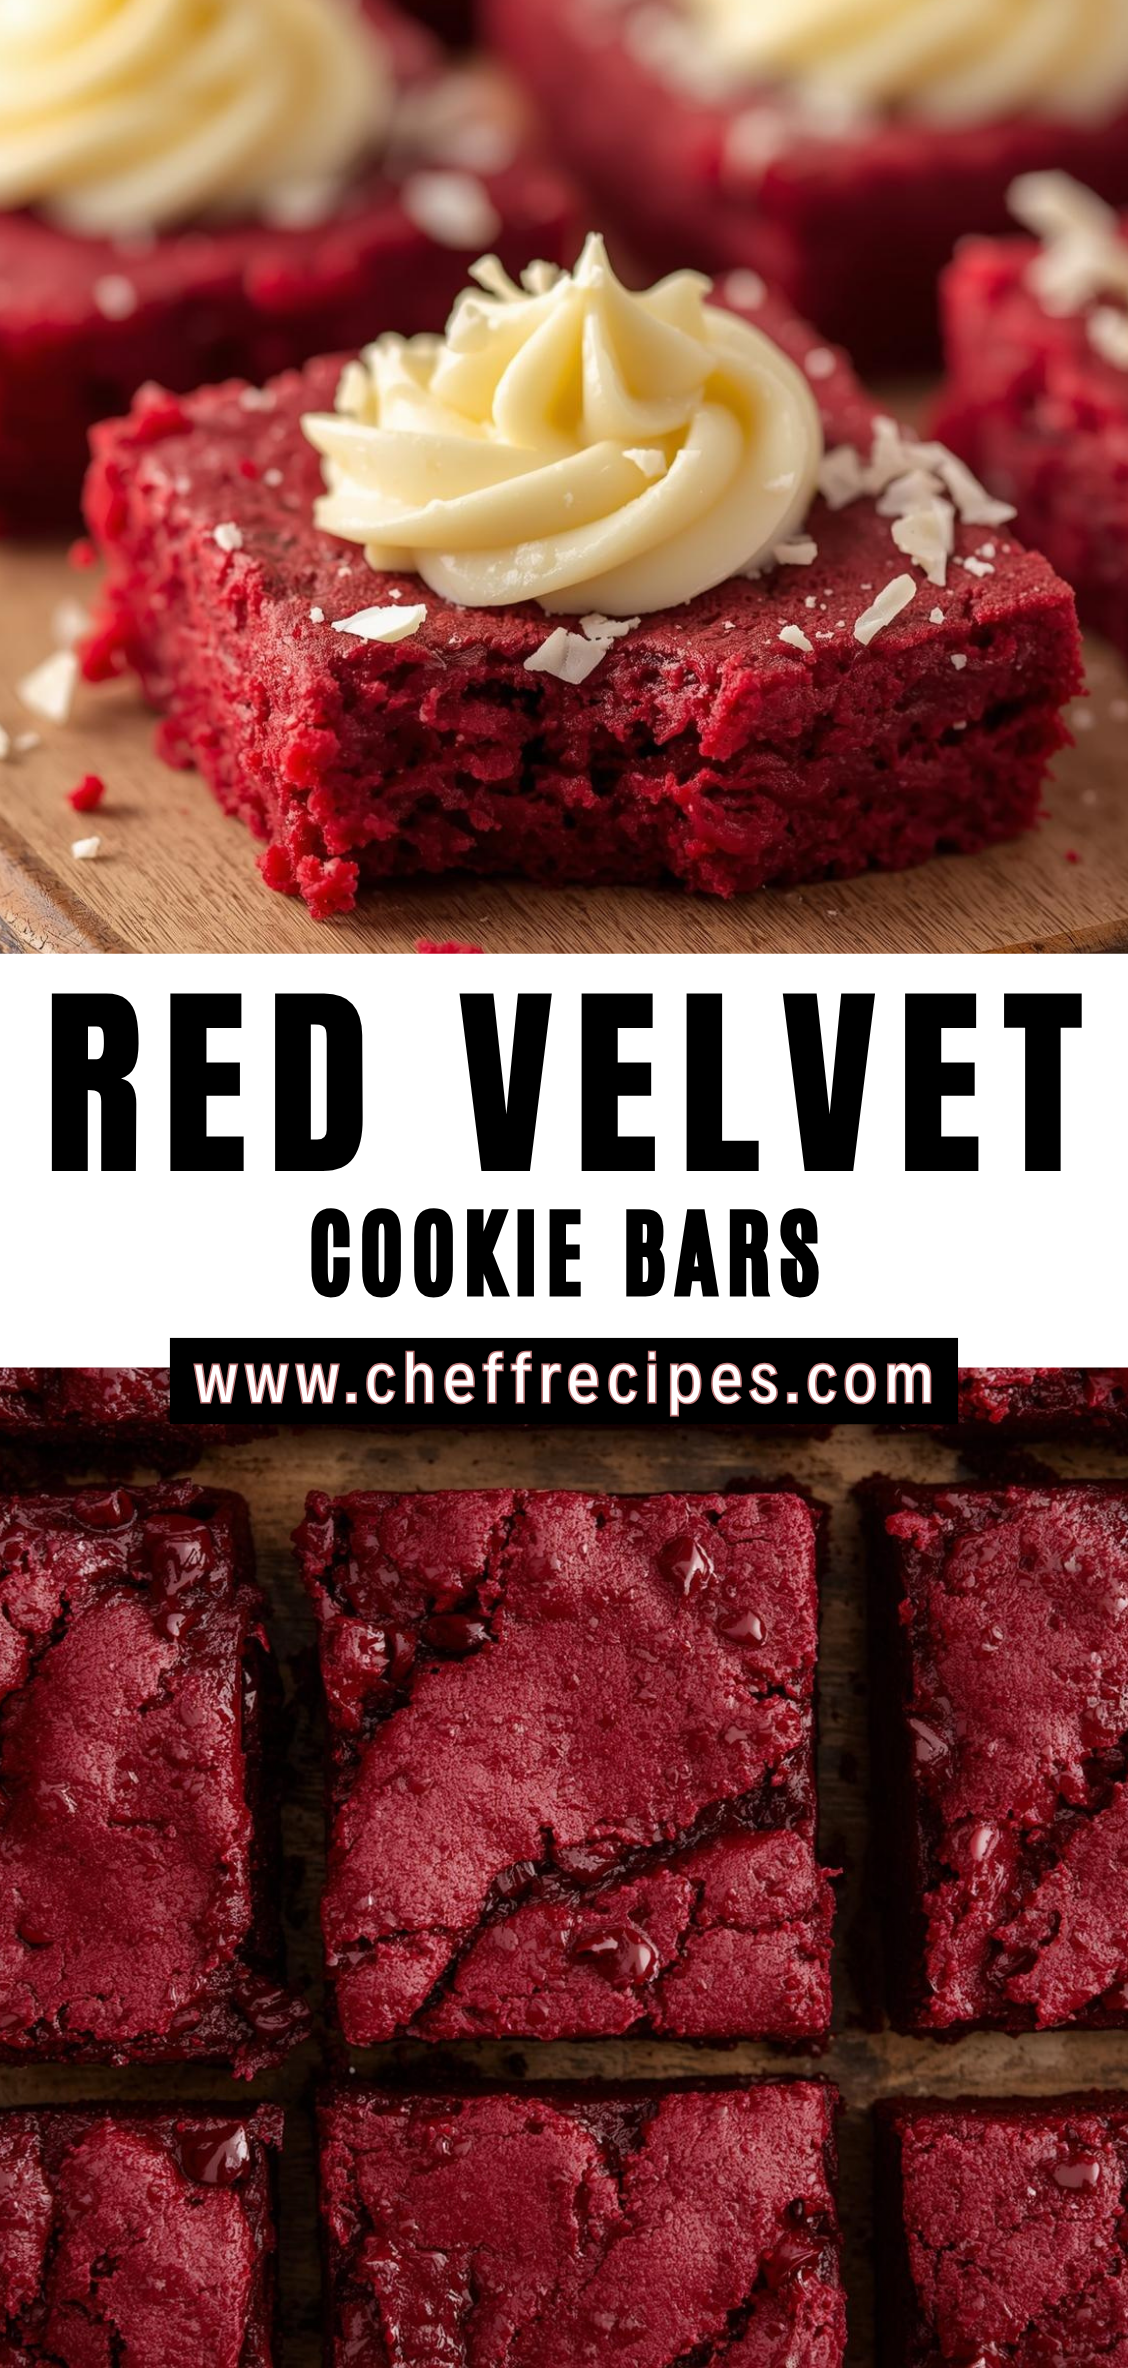
Red velvet cookie bars combine the soft, chewy texture of cookies with the ease of bar baking, eliminating the need for portioning and individual baking that traditional cookies require. The result is a dessert that is both visually striking and texturally satisfying, offering a tender, slightly fudgy interior with a crisp, golden edge. Bars are especially popular in modern baking because they are simple to make in large batches, portable, and ideal for sharing at parties, potlucks, or casual gatherings. They also lend themselves to creative adaptations, from incorporating chocolate chunks or white chocolate chips to adding nuts, swirls of cream cheese, or even a drizzle of chocolate ganache.
The process of making red velvet cookie bars is an opportunity to explore the science of baking at home. Achieving the perfect balance of tenderness, chewiness, and flavor requires attention to key ingredients and techniques. The fat content, typically sourced from butter or a combination of butter and oil, contributes to richness and moisture, while eggs provide structure and binding. Sugar, in its granulated and sometimes brown form, plays a role not only in sweetness but in texture, helping the bars achieve that delicate chewiness characteristic of a perfect cookie. Cocoa powder, even in modest amounts, introduces a subtle depth that defines red velvet’s flavor without overpowering its sweetness. The addition of buttermilk or a mild acidic component ensures a tender crumb while enhancing the bright red color, creating that classic red velvet appearance that is instantly recognizable.
Beyond ingredients, the technique used to mix and bake red velvet cookie bars is crucial to achieving an ideal texture. Overmixing the dough can result in dense, tough bars, while underbaking may lead to a gooey center that collapses when cut. Understanding how to test for doneness, whether through visual cues like a lightly set surface or tactile checks like a gentle press, ensures consistent results. Moreover, cooling the bars properly before slicing allows them to set without crumbling, preserving the aesthetic appeal of the finished dessert.
Red velvet cookie bars are also a canvas for flavor experimentation and personalization. While traditional recipes lean on the classic pairing of red velvet and cream cheese, modern bakers often introduce complementary flavors such as vanilla, almond, or espresso. Mix-ins such as white chocolate chips, macadamia nuts, or even a swirl of peanut butter can elevate the bars from a simple treat to a gourmet dessert. This adaptability makes red velvet cookie bars an appealing choice for bakers of all skill levels, from home enthusiasts seeking a family-friendly recipe to seasoned pastry chefs experimenting with new textures and flavors.
Culturally, red velvet has maintained a status as a dessert that conveys indulgence and care. It is often associated with celebrations not just because of its flavor but because of its visual appeal—the vibrant red coloring communicates festivity and attention to detail. Red velvet cookie bars, by translating this celebratory dessert into a convenient, shareable format, retain that sense of special occasion while making the dessert accessible for everyday enjoyment. They represent a fusion of tradition and practicality, offering both the nostalgia of classic red velvet and the simplicity of bar baking.
In addition, red velvet cookie bars can serve as a medium for creative presentation. They can be cut into uniform squares for formal gatherings or rustic, irregular shapes for casual occasions. Garnishes such as powdered sugar dusting, chocolate drizzle, or small dollops of cream cheese frosting elevate their visual appeal, turning a humble bar into a centerpiece-worthy dessert. Moreover, their portability and ease of storage make them ideal for gifting, lunchboxes, or on-the-go indulgences, expanding their functionality beyond a simple home-baked treat.
Ultimately, the appeal of red velvet cookie bars lies in their combination of flavor, texture, versatility, and visual charm. They offer a harmonious balance between the familiar comfort of homemade cookies and the indulgent, celebratory nature of red velvet. Whether prepared for a special occasion, shared with friends, or enjoyed as a personal treat, these bars encapsulate the essence of why red velvet has endured as a beloved dessert for over a century. Through careful attention to ingredients, mixing methods, and baking techniques, anyone can achieve a batch of red velvet cookie bars that are rich, tender, and irresistibly satisfying.
In the sections that follow, we will explore a detailed, step-by-step recipe for making perfect red velvet cookie bars. We will cover ingredient selection, preparation techniques, baking tips, and creative variations. By following these guidelines, even novice bakers can achieve consistent results, while experienced bakers can experiment with personalized touches to create a dessert that is uniquely their own. From understanding the science behind each ingredient to mastering the art of the perfect bake, this recipe aims to provide a comprehensive guide to making red velvet cookie bars that delight both the eye and the palate.
Step-by-Step Instructions for Red Velvet Cookie Bars
Creating red velvet cookie bars requires attention to detail, patience, and an understanding of how each ingredient and step influences the final texture and flavor. Unlike standard cookies, these bars demand careful handling to achieve a soft, tender interior with slightly crisp edges. Below, the instructions are broken down into meticulous steps to ensure success.
Step 1: Preheat the Oven and Prepare the Pan
Before mixing any ingredients, preheating the oven is essential. Set your oven to 350°F (175°C). This moderate temperature ensures that the cookie bars bake evenly without burning the edges or leaving the center undercooked.
While the oven heats, prepare your baking pan. For red velvet cookie bars, an 8×8-inch or 9×9-inch square pan works best, providing bars of a manageable thickness. Line the pan with parchment paper, leaving an overhang on two opposite sides. This makes removing the baked bars easier, preventing breakage. Lightly grease the pan or parchment with butter or nonstick spray to further prevent sticking.
Why this matters: Preheating ensures consistent baking from the moment the batter enters the oven, while proper pan preparation prevents frustration during removal and ensures clean, sharp edges on the bars.
Step 2: Gather and Measure Ingredients
Accurate measurement is crucial. Baking is a science, and small discrepancies can dramatically affect the final product. Gather the following ingredients:
-
1 cup (2 sticks) unsalted butter, softened – Provides richness and moisture. Softened butter creamed with sugar creates air pockets, contributing to a tender, slightly fluffy texture.
-
1 1/4 cups granulated sugar – Sweetens and helps with structure. Sugar also contributes to slight crispness on the edges.
-
2 large eggs, at room temperature – Bind the ingredients and add moisture. Room temperature eggs incorporate more easily into the butter-sugar mixture.
-
1 teaspoon vanilla extract – Enhances flavor complexity, complementing cocoa and red velvet’s characteristic tang.
-
2 tablespoons cocoa powder (unsweetened) – Provides the subtle chocolate flavor that defines red velvet. Cocoa also reacts with acidic ingredients to deepen color and flavor.
-
2 1/2 cups all-purpose flour – Provides structure. All-purpose flour balances tenderness and chewiness.
-
1 teaspoon baking powder – Helps leaven the bars slightly, preventing them from being too dense.
-
1/4 teaspoon baking soda – Reacts with acidic ingredients like buttermilk or vinegar to create a soft crumb.
-
1/2 teaspoon salt – Enhances all other flavors. Salt is essential even in sweet baked goods.
-
2 tablespoons buttermilk – Adds tang, moisture, and tenderness while interacting with baking soda for lift.
-
1–2 tablespoons red food coloring – Gives red velvet its signature color. Gel or liquid food coloring can be used, but gel provides a more vivid hue without altering batter consistency.
-
Optional mix-ins: White chocolate chips, macadamia nuts, or cream cheese chunks can be added for texture and flavor contrast.
Tip: Have all ingredients at room temperature unless specified. This ensures even mixing and prevents the batter from curdling.
Step 3: Cream the Butter and Sugar
In a large mixing bowl, beat the softened butter and granulated sugar together using a hand or stand mixer on medium speed. Beat for about 3–4 minutes, until the mixture becomes pale and fluffy.
Why this is important: Creaming butter and sugar incorporates air into the mixture. This contributes to a light, tender texture in the finished bars. Properly creamed butter and sugar are also crucial for the batter’s ability to hold structure during baking.
Step 4: Add Eggs and Vanilla
Once the butter-sugar mixture is fluffy, add the eggs one at a time, beating well after each addition. Follow with vanilla extract and mix until fully incorporated.
Tips:
-
Adding eggs one at a time prevents the mixture from curdling.
-
Beating too vigorously after adding eggs can introduce too much air, causing the bars to rise and collapse. Mix just until combined.
Step 5: Incorporate Cocoa, Red Coloring, and Buttermilk
Next, add unsweetened cocoa powder and the red food coloring. Mix on low speed to avoid splattering. Slowly add buttermilk, which adds moisture and helps achieve the soft, tender crumb typical of red velvet desserts.
Pro tip: If the batter looks slightly runny, that’s okay; it will thicken after the flour is added. The consistency should be thick but scoopable. The combination of cocoa, buttermilk, and coloring ensures the bars achieve the classic red velvet taste and appearance.
Step 6: Combine Dry Ingredients Separately
In a separate bowl, whisk together the flour, baking powder, baking soda, and salt. Whisking ensures that the leavening agents are evenly distributed, preventing uneven rising and pockets of salt in the bars.
Why it matters: Properly incorporating dry ingredients prevents dense, uneven bars and ensures uniform texture.
Step 7: Fold Dry Ingredients into Wet Mixture
Gradually add the dry ingredients to the wet mixture in small portions, folding gently with a spatula or mixing on low speed. Mix until just combined; overmixing can develop gluten in the flour, resulting in tough bars.
Optional step: At this stage, fold in any mix-ins like white chocolate chips or nuts. Even distribution ensures each bar has a consistent flavor and texture.
Step 8: Transfer Batter to Prepared Pan
Scrape the batter into the prepared pan, using a spatula to spread it evenly to the edges and corners. Smooth the top for an even bake.
Tip: Use an offset spatula for a perfectly smooth surface. This helps the bars bake evenly and allows for clean slicing after baking.
Step 9: Bake Until Set
Place the pan in the preheated oven. Bake for 28–32 minutes or until the top is slightly firm to the touch and a toothpick inserted into the center comes out with a few moist crumbs (not wet batter).
Baking notes:
-
Oven temperatures vary; check for doneness a few minutes before the minimum time.
-
Avoid overbaking, which can dry out the bars. The center should remain slightly soft and tender.
Step 10: Cool Completely Before Cutting
Once baked, remove the pan from the oven and let it cool on a wire rack for at least 20–30 minutes. Using the parchment overhang, gently lift the entire slab out of the pan.
Why cooling matters: Cutting the bars too soon can cause them to crumble or lose their structure. Cooling allows the bars to set, ensuring clean, uniform pieces.
Step 11: Slice into Bars
Using a sharp knife, slice the cooled slab into bars. For even edges, wipe the knife with a damp cloth between cuts. Typical sizes range from 2×2 inches for bite-sized treats to larger rectangles for more substantial portions.
Optional presentation tips: Dust with powdered sugar, drizzle with chocolate, or top with small dollops of cream cheese frosting for added flair.
Red Velvet Cookie Bars
Red velvet has long held a special place in the world of desserts. Its striking red hue paired with a tender, buttery crumb and subtle cocoa flavor makes it a visually captivating and deliciously indulgent treat. Traditionally associated with celebratory occasions—from birthdays and anniversaries to holidays and festive gatherings—red velvet has a history that blends culinary curiosity, cultural evolution, and a touch of mystique. While the origins of red velvet cake are often debated, most food historians trace its roots back to the early 20th century, with the name becoming popular in the United States during the 1920s. Originally, the rich, reddish-brown hue of the cake was achieved through the natural chemical reaction between cocoa powder and acidic ingredients like buttermilk and vinegar. Today, the vivid red color is usually enhanced with food coloring, creating the dramatic visual appeal that has made red velvet a favorite for generations.
Ingredients
- 1 cup (2 sticks) unsalted butter, melted
- 1 ½ cups granulated sugar
- 2 large eggs
- 2 tsp vanilla extract
- 2 ½ cups all-purpose flour
- 1 tsp baking powder
- 1 tsp cocoa powder
- ½ tsp salt
- 2 tbsp red food coloring
- ½ cup white chocolate chips or chunks (optional)
- ½ cup chopped nuts (optional)
Instructions
- Preheat oven: Preheat oven to 350°F (175°C). Line a 9×13-inch baking pan with parchment paper or grease it lightly.
- Mix wet ingredients: In a large bowl, whisk together melted butter, sugar, eggs, and vanilla until smooth.
- Combine dry ingredients: In a separate bowl, sift together flour, baking powder, cocoa powder, and salt.
- Combine wet and dry: Gradually add dry ingredients to the wet mixture, stirring until just combined. Add red food coloring and mix until the batter is evenly colored.
- Add mix-ins (optional): Fold in white chocolate chips and/or nuts if using.
- Bake: Spread the batter evenly in the prepared pan. Bake for 20–25 minutes, or until a toothpick inserted in the center comes out clean.
- Cool and cut: Let cool completely in the pan, then lift out using parchment paper and cut into bars.
Notes
- For extra richness, swirl cream cheese into the batter before baking.
- You can drizzle melted white chocolate over the cooled bars for a decorative touch.
- Avoid overmixing the batter to keep the bars soft and tender.

