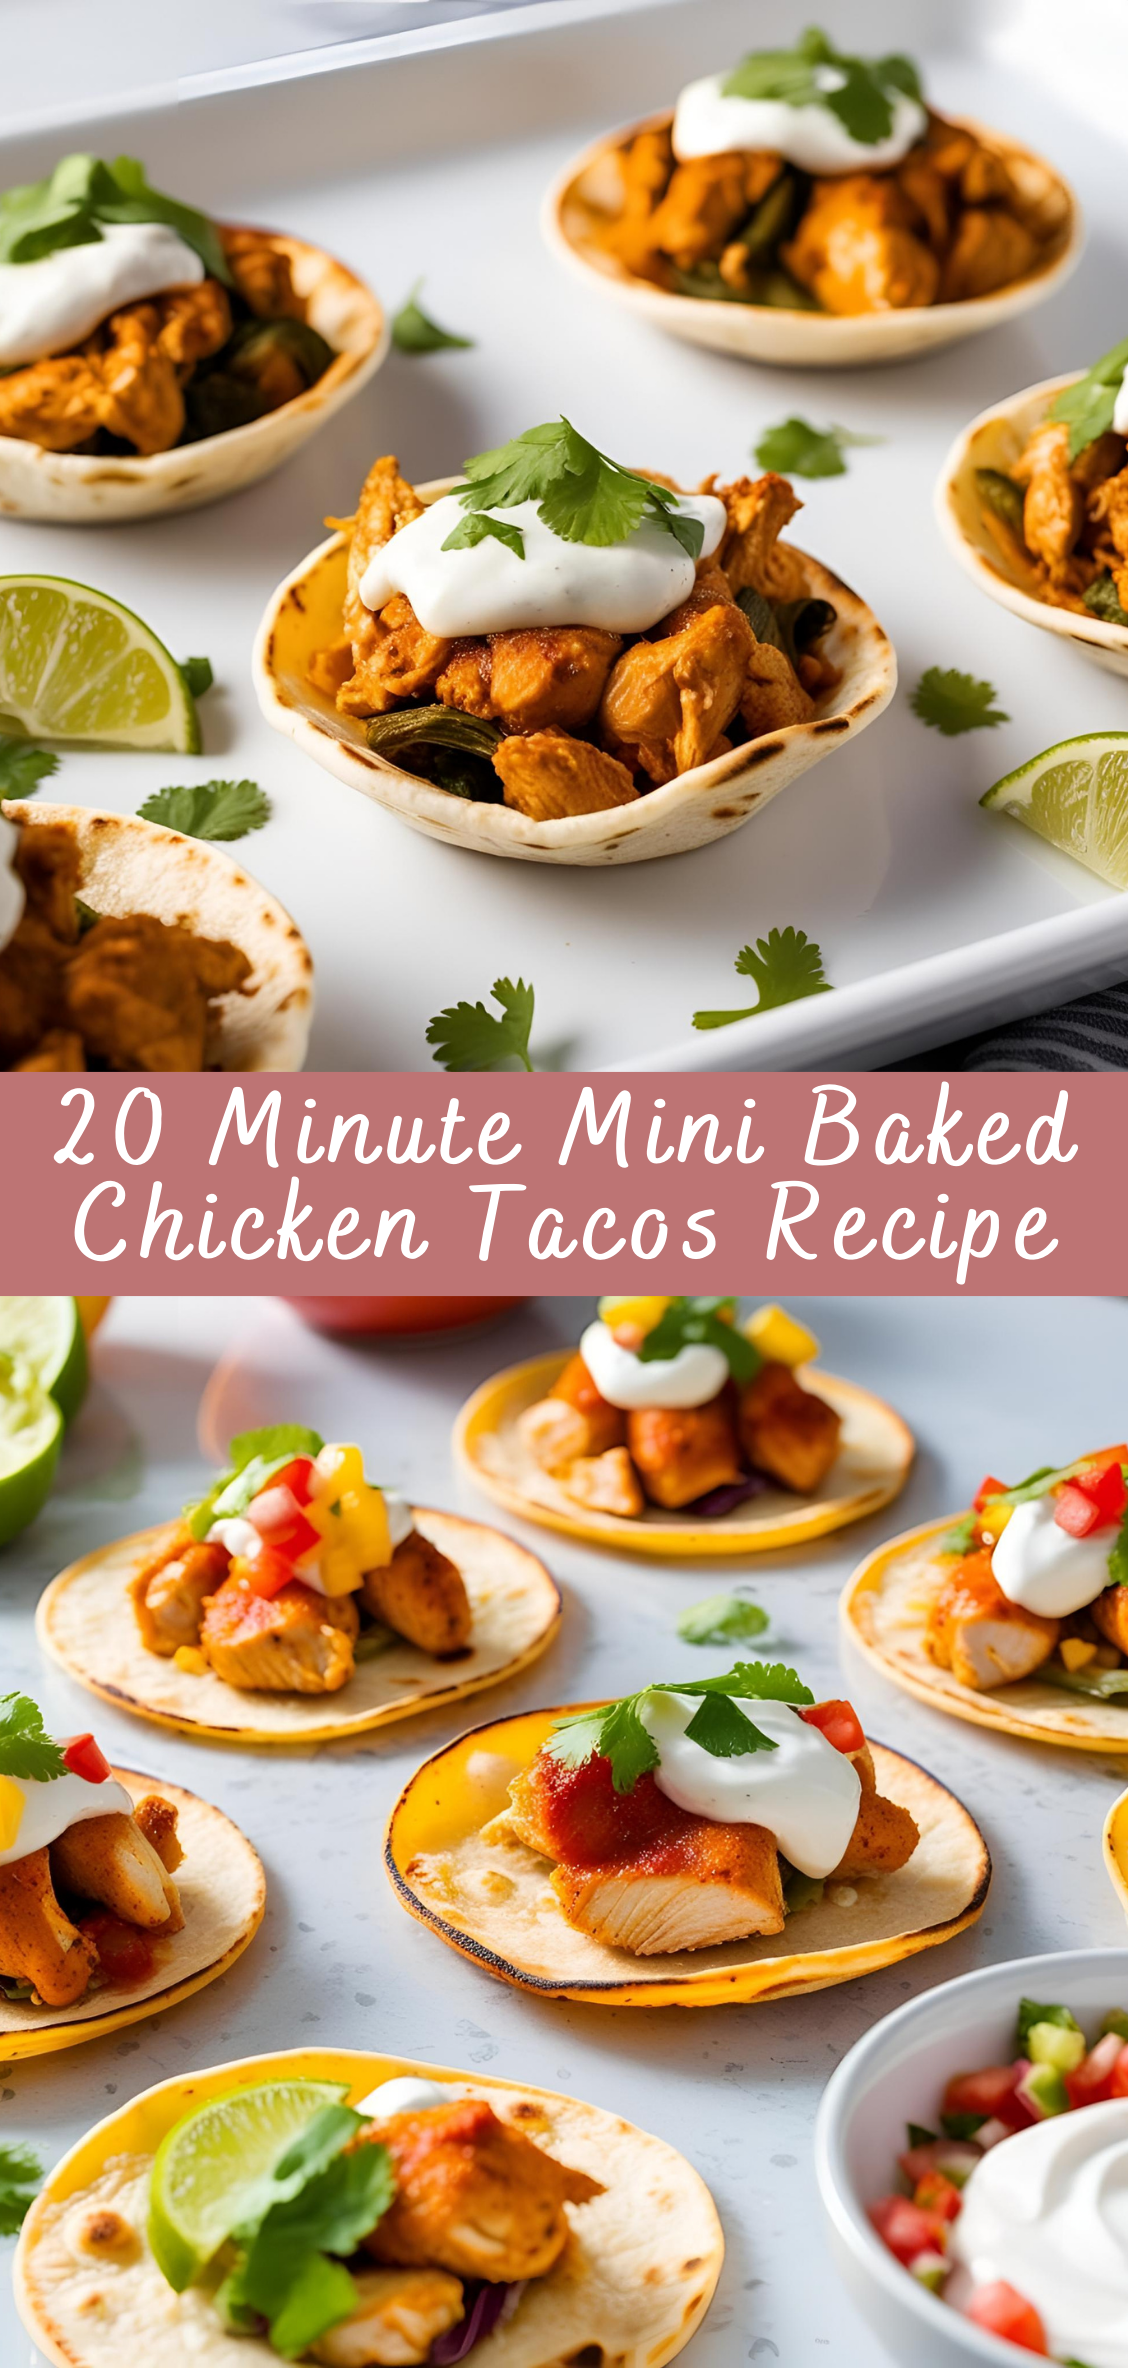
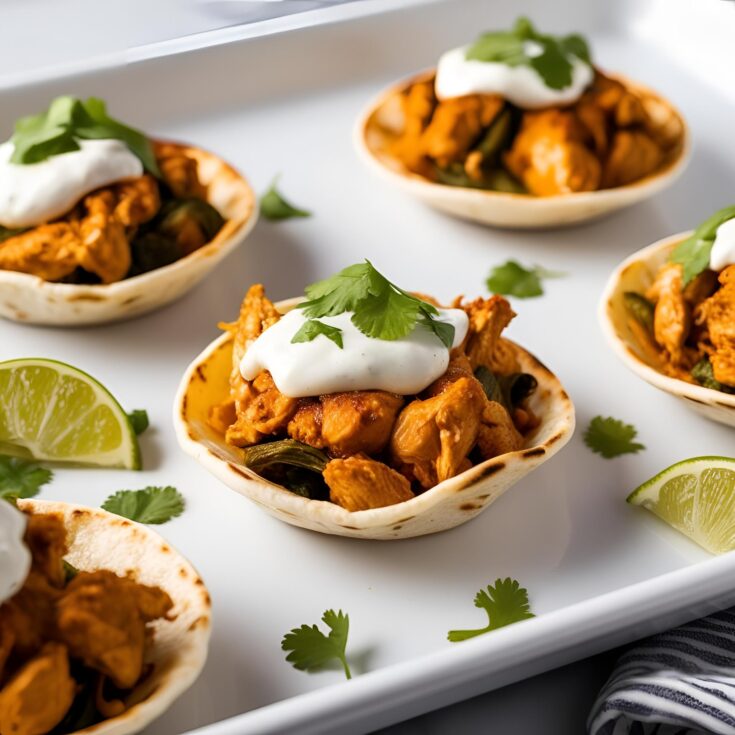
20 Minute Mini Baked Chicken Tacos Recipe
In today’s fast-paced world, sometimes the best meals are the ones that are simple to prepare yet full of flavor. The 20-Minute Mini Baked Chicken Tacos are a perfect example of this. These tacos combine the ease of preparation with the delight of crispy, cheesy, and flavorful chicken filling all wrapped up in bite-sized tortillas. Whether you’re serving them at a family dinner, a game night, or as a quick weeknight meal, these tacos are guaranteed to satisfy everyone at the table. The best part? You can make these from scratch in just 20 minutes, making them ideal for when you’re craving comfort food without the hassle.
The combination of seasoned, juicy chicken, melted cheese, fresh toppings, and crispy tortillas creates the perfect balance of flavors and textures. What’s even better is that this recipe can easily be customized to suit different tastes and dietary preferences.
Step-by-Step Instructions
Here’s the breakdown of how to make your 20-Minute Mini Baked Chicken Tacos.
Step 1: Prepare the Chicken
-
Cook the Chicken Breasts:
- Advertisement -- Heat a tablespoon of olive oil in a large skillet over medium heat. Add the chicken breasts (or thighs) and cook for about 6-7 minutes on each side, until the chicken is cooked through and golden brown on the outside. You’ll know the chicken is done when it reaches an internal temperature of 165°F (74°C), or if you slice it open and it’s no longer pink inside.
-
Shred the Chicken:
- Remove the chicken from the skillet and let it rest for a couple of minutes. Then, use two forks to shred the chicken into bite-sized pieces. Set aside.
Step 2: Sauté the Onion and Garlic
-
Sauté Onions and Garlic:
- In the same skillet, add another tablespoon of olive oil and heat it over medium. Add the diced onion and sauté for about 2-3 minutes until softened. Add the minced garlic and cook for another 30 seconds, just until fragrant.
-
Combine with Chicken Broth and Seasoning:
- Pour in the chicken broth and add your taco seasoning (either store-bought or homemade). Stir well to combine, and let the mixture simmer for about 1 minute, so the flavors meld together.
Step 3: Combine Chicken with Seasoned Mixture
-
Add the Shredded Chicken:
- Add your shredded chicken back into the skillet, stirring to coat the chicken with the seasoned broth and onion-garlic mixture. Cook for another 1-2 minutes, allowing the chicken to absorb all the flavors and the liquid to reduce slightly.
-
Add Fresh Lime Juice:
- Squeeze half a lime over the chicken mixture to add a burst of citrusy freshness that will enhance the taco flavor.
-
Taste and Adjust Seasoning:
- Taste the chicken and adjust the seasoning with salt, pepper, or more taco seasoning if desired. Once the chicken is perfectly seasoned, remove the skillet from the heat.
Step 4: Assemble the Mini Tacos
-
Prepare the Mini Taco Shells:
- Preheat your oven to 400°F (200°C). Arrange the mini taco shells on a baking sheet in a single layer. If you’re using flour tortillas, you can fold them into small taco shapes, or if you have pre-made mini taco shells, simply line them up on the tray.
-
Fill the Shells:
- Spoon a generous amount of the seasoned shredded chicken mixture into each mini taco shell. Be careful not to overstuff them, as they need to hold their shape while baking.
-
Top with Cheese:
- Sprinkle a small handful of shredded cheese on top of the chicken filling in each taco. The cheese will melt and create a delicious binding layer as it bakes.
Step 5: Bake the Mini Tacos
-
Bake in the Oven:
- Place the baking sheet in the oven and bake for 6-8 minutes, or until the cheese is melted and bubbly and the taco shells are golden and crispy around the edges. Keep a close eye on them to avoid burning.
-
Remove and Let Cool:
- Once baked, remove the mini tacos from the oven. Let them cool for a couple of minutes before serving.
Step 6: Add Toppings
- Garnish with Fresh Ingredients:
- Top the mini baked tacos with fresh toppings such as shredded lettuce, diced tomatoes, avocado slices, and cilantro. A drizzle of sour cream or a spoonful of guacamole will add extra creaminess. If you like heat, add some jalapeños or a spicy salsa.
Tips for Perfect Mini Baked Chicken Tacos
- Shredding the Chicken: For best results, use a pair of forks to shred the chicken after it’s cooked. If you want quicker shredding, a hand mixer or stand mixer can do the job in seconds.
- Make Ahead: You can prepare the chicken filling in advance and store it in the fridge for up to 3 days. When ready to bake, just fill the taco shells, top with cheese, and bake!
- Taco Seasoning: While store-bought taco seasoning is convenient, homemade taco seasoning is a great option for better flavor control. Try mixing chili powder, cumin, garlic powder, onion powder, smoked paprika, and cayenne pepper for a custom blend.
- Crispier Taco Shells: If you like extra crispy taco shells, brush them lightly with olive oil before baking to help them crisp up even more.
Variations on the Recipe
While Mini Baked Chicken Tacos are delicious as is, there are several ways to customize them to fit your tastes or dietary needs.
Vegetarian Version:
- Replace the chicken with seasoned black beans or roasted vegetables like zucchini, peppers, and sweet potatoes. This creates a hearty, satisfying vegetarian taco.
Spicy Chicken Tacos:
- For a spicier version, add a pinch of cayenne pepper to the taco seasoning or top the tacos with spicy salsa, jalapeños, or hot sauce.
Cheese Variations:
- Experiment with different cheeses, such as pepper jack for a spicy twist or a smoky cheddar for a deeper flavor profile. You can also mix in some cream cheese or goat cheese for extra creaminess.
Gluten-Free Option:
- Use gluten-free taco shells or corn tortillas if you’re following a gluten-free diet. Just ensure the taco seasoning and chicken broth are gluten-free.
Low-Carb/Keto:
- Opt for lettuce wraps instead of taco shells for a low-carb version. You can also skip the cheese to reduce carbs further if needed.
Conclusion
These 20-Minute Mini Baked Chicken Tacos are the ultimate quick and delicious meal for any occasion. Whether you’re cooking for yourself, your family, or a group of friends, this recipe is sure to impress with its combination of flavors, textures, and ease of preparation. The best part? You can make these tacos in under 30 minutes, giving you more time to enjoy and less time spent in the kitchen. The versatility of this dish allows you to customize the ingredients to suit your tastes or dietary preferences, so everyone can enjoy their own personalized taco creations.
From the savory chicken filling to the crispy taco shells and fresh toppings, these mini baked chicken tacos hit all the right notes for a satisfying meal. Plus, they’re fun to make and eat, making them perfect for gatherings, parties, or a cozy family dinner. Whether you’re enjoying them with a cold beverage or serving them as a crowd-pleasing appetizer, these tacos are sure to become a go-to in your recipe repertoire.
20 Minute Mini Baked Chicken Tacos Recipe
In today’s fast-paced world, sometimes the best meals are the ones that are simple to prepare yet full of flavor. The 20-Minute Mini Baked Chicken Tacos are a perfect example of this. These tacos combine the ease of preparation with the delight of crispy, cheesy, and flavorful chicken filling all wrapped up in bite-sized tortillas. Whether you're serving them at a family dinner, a game night, or as a quick weeknight meal, these tacos are guaranteed to satisfy everyone at the table. The best part? You can make these from scratch in just 20 minutes, making them ideal for when you’re craving comfort food without the hassle.
Ingredients
- 1 lb cooked chicken (shredded or rotisserie chicken works great)
- 12 mini soft taco shells (or small flour tortillas)
- 1 cup shredded cheddar cheese (or Mexican cheese blend)
- 1/2 cup salsa (mild, medium, or hot depending on preference)
- 1/2 cup sour cream (for topping)
- 1/2 cup guacamole (for topping)
- 1/4 cup chopped fresh cilantro (for garnish)
- 1/4 cup sliced black olives (optional)
- 1/4 cup diced red onion (optional)
- Salt and pepper to taste
- 1 tbsp olive oil (for greasing the baking tray)
Instructions
- Preheat the Oven:
Preheat the oven to 375°F (190°C). - Prepare the Chicken:
If using cooked chicken, shred it with two forks or chop it into small bite-sized pieces. Place the chicken in a bowl and mix in the salsa. Season with salt and pepper to taste. - Prepare the Mini Tacos:
Lightly grease a baking tray or muffin tin with olive oil. Place the mini soft taco shells or small flour tortillas in the tray, slightly folding them to fit if necessary. You can also use mini taco holders if you have them. - Assemble the Tacos:
Spoon a small amount of the seasoned chicken mixture into each taco shell. Top with a sprinkle of shredded cheese. - Bake:
Place the tray in the preheated oven and bake for 10-12 minutes, or until the cheese is melted and the edges of the taco shells are slightly crispy. - Serve:
Once baked, remove the mini tacos from the oven. Top each taco with a dollop of sour cream, a spoonful of guacamole, and optional toppings like cilantro, black olives, or red onions.
Notes
- Quick Tip: You can use rotisserie chicken or leftover chicken to save time.
- Customizable: Feel free to swap in other ingredients like lettuce, tomatoes, or jalapeños for extra flavor.
- Cheese Options: A blend of cheddar, Monterey Jack, or mozzarella works well for these tacos.
- For Extra Crunch: If you prefer a crunchier texture, you can bake the taco shells for a few minutes before adding the chicken and cheese.
- Make it Spicy: Add sliced jalapeños or a dash of hot sauce if you like things on the spicier side.

