Crispy and Juicy BBQ Baked Chicken Thighs: The Ultimate Guide to Flavorful Perfection
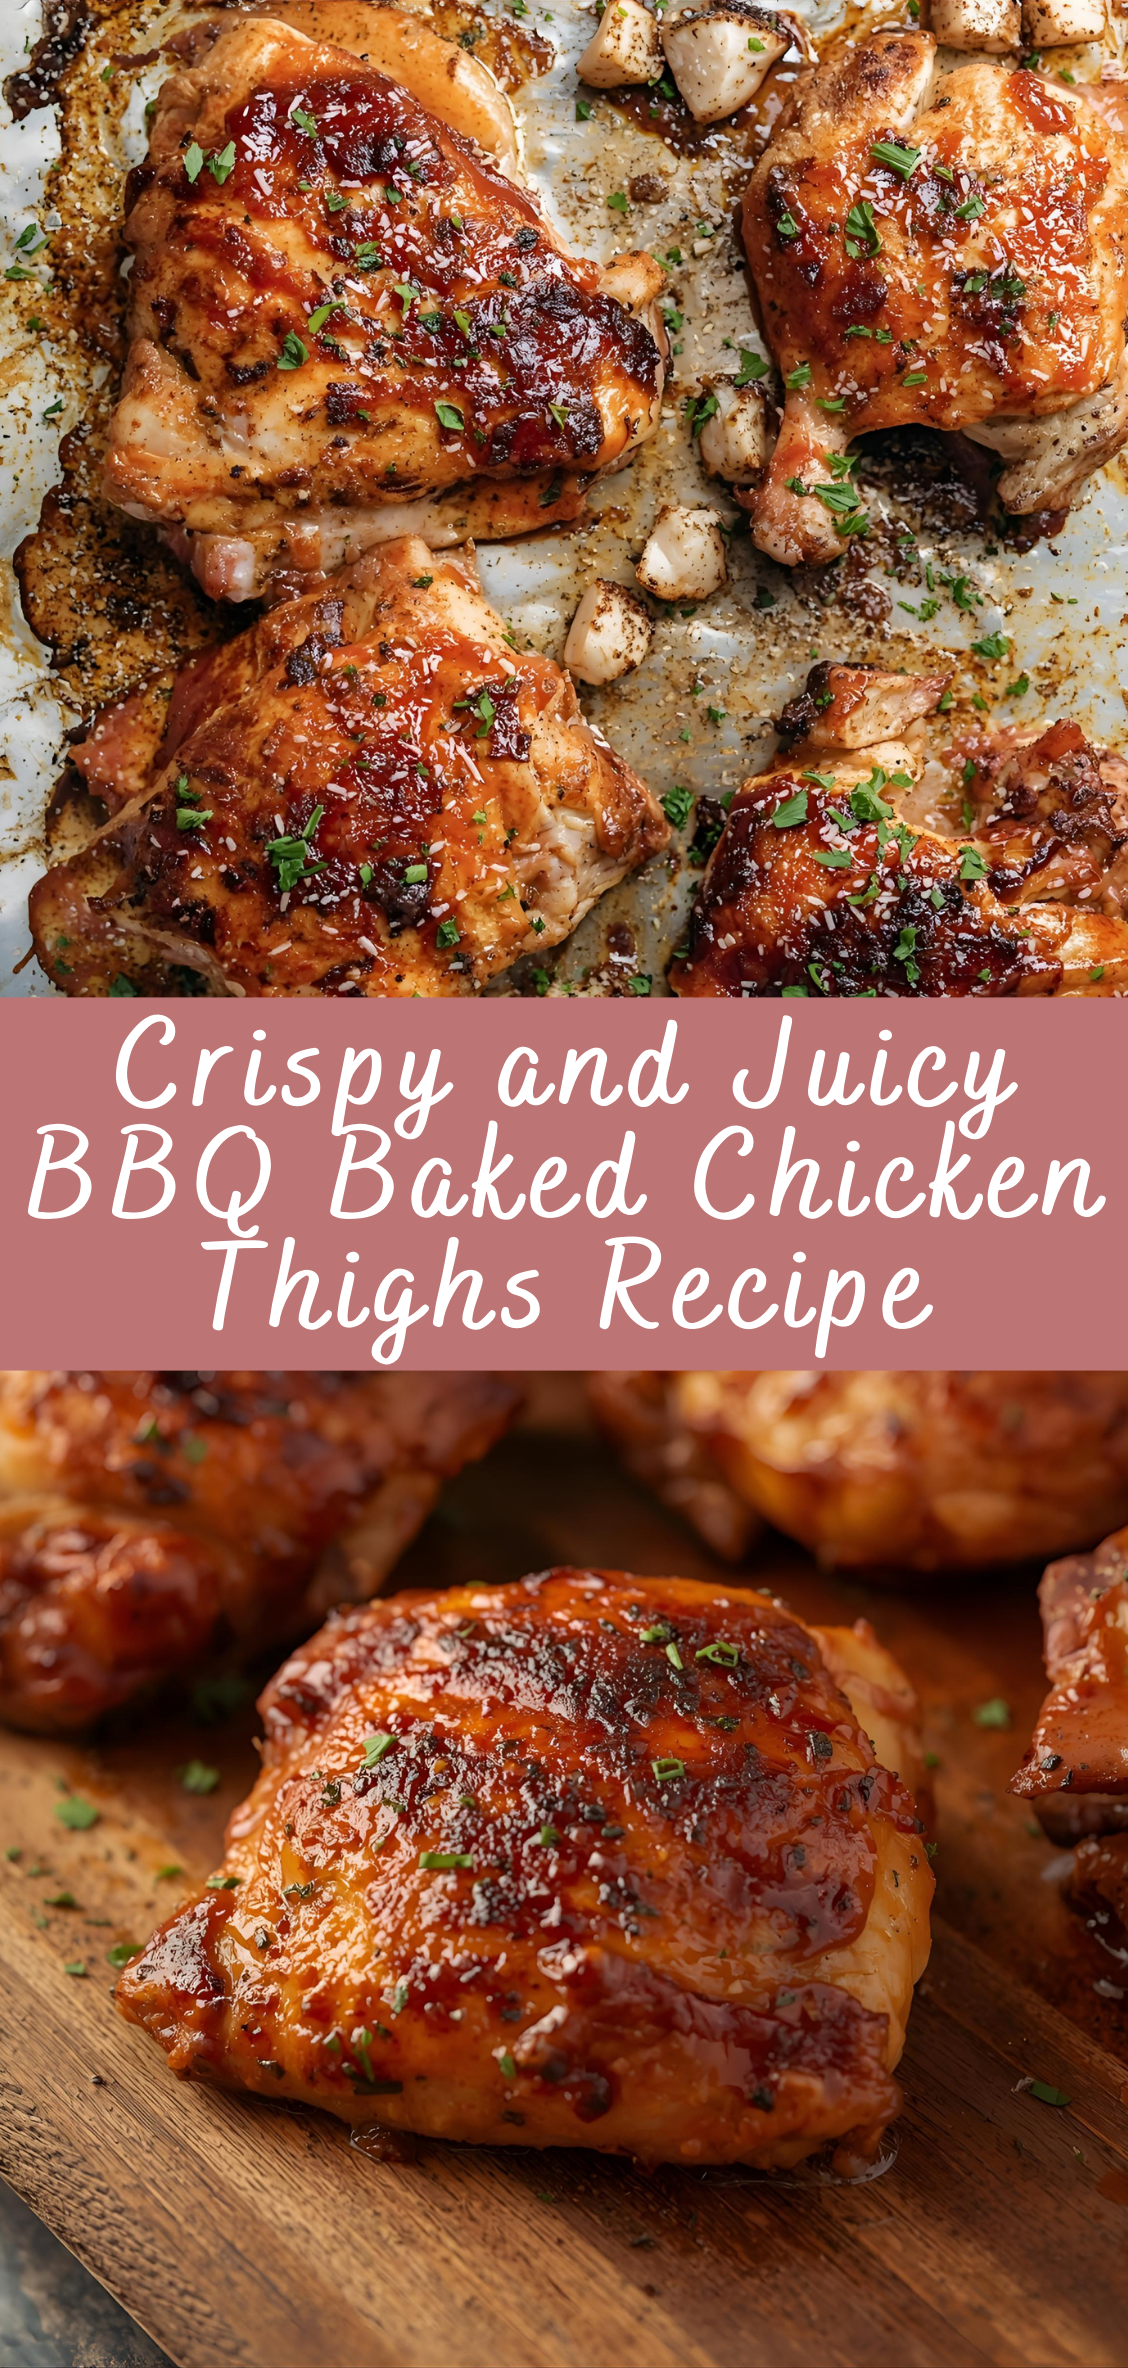
When it comes to comfort food that satisfies both the heart and the palate, few dishes can rival the irresistible appeal of BBQ baked chicken thighs. With their naturally rich flavor, tender meat, and the perfect balance of crisp skin and juicy interior, chicken thighs are the unsung heroes of the poultry world. This recipe is more than just a simple how-to—it’s a masterclass in crafting the ideal combination of smoky, sweet, tangy, and savory that defines great barbecue.
Whether you’re a seasoned home cook or just beginning your culinary journey, this guide will walk you through everything you need to know to make BBQ baked chicken thighs that are bursting with flavor and finished with a deliciously crisp skin—no grill required. From choosing the right cut and prepping the marinade, to mastering the baking technique and achieving that perfect caramelized glaze, we leave nothing to guesswork.
This dish is perfect for a weeknight dinner, a casual gathering, or even a main course at your next family cookout. By the end of this guide, you’ll not only have a foolproof recipe for making incredibly crispy and juicy BBQ baked chicken thighs, but also a deeper understanding of the techniques and ingredients that take this humble dish to new heights.
So preheat your oven, roll up your sleeves, and get ready to dive into the delicious world of oven-baked BBQ chicken thighs. This isn’t just another chicken recipe—it’s a game changer.
Ingredients and Equipment: What You’ll Need for BBQ Baked Chicken Thighs
Chicken Selection: Bone-In, Skin-On Thighs
The best results come from using bone-in, skin-on chicken thighs. Here’s why:
-
Bone-in helps retain moisture and adds flavor during cooking.
-
Skin-on allows for a deliciously crispy texture that holds up well to BBQ sauce.
Quantity: For this recipe, we’ll base everything on 8 medium chicken thighs, which typically serves 4–6 people.
Marinade and Dry Rub Ingredients
A flavorful chicken starts with a balanced marinade and a bold dry rub. These layers season the meat deeply and enhance the final BBQ flavor.
Marinade (optional but recommended for maximum juiciness)
-
1/2 cup buttermilk or plain yogurt (acts as a tenderizer)
-
2 tablespoons olive oil
-
1 tablespoon lemon juice or apple cider vinegar
-
1 teaspoon smoked paprika
-
1 teaspoon garlic powder
-
1/2 teaspoon onion powder
-
Salt and black pepper to taste
Note: You can marinate the chicken for 2–24 hours.
Dry Rub (for maximum flavor crust)
-
2 tablespoons brown sugar
-
1 tablespoon smoked paprika
-
1 teaspoon garlic powder
-
1 teaspoon onion powder
-
1 teaspoon kosher salt
-
1/2 teaspoon black pepper
-
1/2 teaspoon cayenne pepper (optional for heat)
-
1/2 teaspoon dried thyme
-
1/2 teaspoon ground mustard (optional)
Homemade BBQ Sauce (Optional but Recommended)
You can use store-bought BBQ sauce, but a homemade version elevates the dish. Here’s a quick, customizable recipe:
BBQ Sauce Ingredients:
-
1 cup ketchup
-
1/4 cup apple cider vinegar
-
1/4 cup brown sugar
-
1 tablespoon molasses or honey
-
1 tablespoon Worcestershire sauce
-
1 teaspoon smoked paprika
-
1/2 teaspoon garlic powder
-
1/2 teaspoon onion powder
-
Salt and pepper to taste
Cooking Tip: Simmer on low for 10–15 minutes until thickened. Taste and adjust sweetness, tanginess, or spice as needed.
Equipment You’ll Need
-
Large mixing bowl (for marinade or rub)
-
Sheet pan or baking tray with raised edges
-
Wire rack (optional but ideal for air circulation)
-
Aluminum foil or parchment paper (for easy cleanup)
-
Basting brush or spoon
-
Meat thermometer
-
Oven mitts
-
Tongs
Step-by-Step Instructions
We’ll break the cooking process into five key phases:
-
Marinate the Chicken (Optional but Recommended)
-
Apply the Dry Rub
-
Bake the Chicken (First Phase – Uncovered)
-
Add the BBQ Sauce and Finish Baking
-
Final Broil for Crisping and Caramelization
Step 1: Marinate the Chicken
This step adds tenderness and a subtle tang that enhances the meat’s flavor.
-
Prepare the marinade: In a large bowl, whisk together the buttermilk (or yogurt), olive oil, lemon juice or vinegar, smoked paprika, garlic powder, onion powder, and a generous pinch of salt and pepper.
-
Add the chicken thighs: Place the chicken thighs in the marinade, coating each piece thoroughly.
-
Refrigerate: Cover the bowl and let the chicken marinate in the refrigerator for at least 2 hours—overnight is ideal. If you’re short on time, even 30–60 minutes will help.
-
Remove and pat dry: Before baking, remove the chicken from the marinade and gently pat dry with paper towels. This helps the rub stick and ensures the skin crisps up during baking.
Step 2: Apply the Dry Rub
The dry rub forms the flavorful crust that sticks to the meat even beneath the sauce.
-
Mix the dry rub: In a small bowl, combine all dry rub ingredients and mix thoroughly.
-
Rub generously: Using your hands or a spoon, coat each chicken thigh with the rub on all sides. Be sure to rub it under the skin slightly as well for extra flavor.
-
Let it sit: After applying the rub, let the chicken rest at room temperature for about 20–30 minutes. This helps bring the meat closer to room temperature, ensuring even cooking.
Step 3: Bake the Chicken (First Phase)
Now it’s time to start cooking.
-
Preheat your oven to 400°F (200°C). If using a convection oven, 375°F (190°C) is sufficient.
-
Prepare the baking tray: Line a baking tray with aluminum foil or parchment paper for easy cleanup. Place a wire rack on top to allow air circulation under the chicken. This helps with crisping the skin.
-
Arrange the thighs: Place the chicken thighs skin-side up on the rack or tray. Leave space between each piece for even cooking.
-
Bake uncovered for 30–35 minutes. This allows the skin to render its fat and start becoming crispy.
-
Check internal temperature: At this stage, the thighs should be around 140–145°F (60–63°C) internally. They are not done yet but getting close.
Step 4: Glaze with BBQ Sauce and Finish Baking
Now that your chicken has developed a flavorful crust and the internal temperature is getting close to fully cooked, it’s time to introduce the BBQ sauce and build that signature sticky, smoky-sweet layer.
How to Properly Sauce BBQ Chicken in the Oven
Saucing too early leads to burnt sugars; saucing too late misses the chance to integrate flavor. This is the sweet spot.
Instructions:
-
Remove the tray from the oven after the initial 30–35 minutes of baking.
-
Use a basting brush or spoon to generously coat each chicken thigh with your BBQ sauce. Cover the top and sides thoroughly, but avoid drenching them to the point of dripping.
-
Return to the oven, still at 400°F (200°C), and continue baking for 10–15 more minutes, depending on the size of your thighs.
-
Check doneness:
-
Internal temperature should now read 165°F (74°C) when inserted into the thickest part, avoiding the bone.
-
The sauce should be sticky, glossy, and starting to caramelize.
-
Optional: If you like extra saucy chicken, repeat this step and add a second layer of BBQ sauce 5 minutes before finishing.
Step 5: Final Broil for Caramelization and Crispiness
The broiler is the secret to achieving that slightly charred, caramelized crust that mimics the effect of a grill.
Instructions:
-
Turn your oven to BROIL on high (typically around 500°F / 260°C).
-
Move the tray to the top rack of the oven, about 6 inches from the broiler element.
-
Broil for 2–5 minutes, watching very closely. Do not walk away. The sugars in BBQ sauce can go from caramelized to burnt in seconds.
-
Look for these signs of perfection:
-
The sauce bubbles gently and begins to darken in spots.
-
The skin is crackling and glossy.
-
A few dark brown (not black) areas add that BBQ-style char.
-
Note: If you’re using parchment paper, remove it before broiling—it can catch fire under high heat. Foil is safe.
Step 6: Let the Chicken Rest
Resting your chicken is the final, often overlooked step that separates a good dish from a great one. During resting, the juices redistribute throughout the meat instead of spilling out when cut.
Instructions:
-
Remove the chicken from the oven and transfer to a clean plate or tray.
-
Tent loosely with foil and allow to rest for 5–10 minutes.
-
Don’t stack the thighs—they’ll steam and soften the crispy skin. Let them rest in a single layer.
Serving Suggestions and Perfect Pairings
BBQ chicken thighs are incredibly versatile and can fit a wide range of meals, from backyard picnics to casual dinners or even meal prep for the week. To round out the dish, here are a variety of sides, sauces, and serving ideas that pair beautifully with the smoky, tangy flavors of baked BBQ chicken.
1. Classic Comfort Sides
These are the go-to companions that never fail:
-
Creamy Coleslaw
The tangy crunch of slaw cuts through the richness of the chicken. Try a vinegar-based slaw for a lighter twist. -
Macaroni and Cheese
Creamy, cheesy, and indulgent, mac and cheese balances the bold BBQ flavors with smooth richness. -
Baked Beans
Sweet, smoky baked beans echo the barbecue theme and add depth to your plate. -
Cornbread or Biscuits
Perfect for soaking up extra sauce and juices. Try adding a touch of honey to your cornbread for a sweet contrast.
2. Lighter & Healthier Sides
Looking for something fresh to lighten the plate?
-
Grilled or Roasted Vegetables
Asparagus, zucchini, bell peppers, and carrots roast well and bring colorful balance. -
Garden Salad with Vinaigrette
A fresh salad with mixed greens, tomatoes, and a simple lemon vinaigrette adds a bright contrast. -
Quinoa or Brown Rice
Whole grains complement BBQ chicken and can turn the meal into a hearty, healthy bowl.
3. Southern-Inspired Pairings
Elevate the soul food vibe:
-
Fried Okra
Crispy and lightly seasoned, okra is a Southern staple that adds texture. -
Collard Greens
Braised with garlic and a hint of vinegar, collards provide earthiness that rounds out the meal. -
Pickles or Pickled Veggies
The acid in pickles cuts through BBQ’s sweetness and fattiness.
4. Serving Style Ideas
-
Plated Dinner
Serve two thighs with two sides on a dinner plate for a formal presentation. -
BBQ Chicken Sliders
Shred the chicken and serve it on soft slider buns with pickles and a drizzle of extra sauce. -
BBQ Chicken Bowls
Build bowls with a grain base, roasted veggies, a dollop of slaw, and sliced chicken thighs. -
Picnic-Style
Wrap each thigh in foil, toss them in a cooler, and take them on the road for a ready-to-eat meal.
Tips for Success: How to Nail This Recipe Every Time
Even a simple dish like BBQ baked chicken has its tricks. These expert-level tips help guarantee success no matter your experience level.
1. Start with Evenly-Sized Thighs
Uniform size ensures even cooking. If some are much larger than others, they may need extra time or need to be separated during baking.
2. Use a Wire Rack
A rack helps heat circulate around the chicken, allowing the bottom skin to render and crisp up rather than steam.
3. Pat the Skin Dry
Before applying the rub or baking, always pat the skin dry with paper towels. Moisture is the enemy of crispiness.
4. Don’t Skip the Resting Step
Resting lets the juices redistribute. If you cut into the chicken immediately, you risk losing moisture.
5. Use a Meat Thermometer
Don’t guess. Insert a thermometer into the thickest part of the thigh (without touching bone). You’re aiming for 165°F (74°C).
6. Broil Cautiously
Broiling adds char and crispness, but keep your eyes on it at all times. BBQ sauce burns quickly.
Flavor Variations and Sauce Alternatives
Want to make this dish your own? Try changing up the rub or BBQ sauce for a totally new spin.
Alternative Rubs:
-
Southwestern Style: Add cumin, chili powder, and lime zest to your dry rub.
-
Asian-Inspired: Try five-spice powder, garlic, and a touch of soy sauce in the rub.
-
Herb-Forward: Use rosemary, thyme, and sage with lemon zest for a fresh, bright take.
Sauce Variations:
-
Spicy Chipotle BBQ Sauce
Blend chipotle peppers in adobo with your BBQ base for smoky heat. -
Mustard-Based Carolina Gold
A tangy, golden sauce made with yellow mustard, vinegar, and brown sugar. -
Honey Garlic BBQ
Add honey and fresh garlic to your sauce for a sweeter, more aromatic finish. -
Alabama White Sauce
For a tangy twist, serve with this mayo and vinegar-based sauce.
Crispy and Juicy BBQ Baked Chicken Thighs Recipe
When it comes to comfort food that satisfies both the heart and the palate, few dishes can rival the irresistible appeal of BBQ baked chicken thighs. With their naturally rich flavor, tender meat, and the perfect balance of crisp skin and juicy interior, chicken thighs are the unsung heroes of the poultry world. This recipe is more than just a simple how-to—it’s a masterclass in crafting the ideal combination of smoky, sweet, tangy, and savory that defines great barbecue.
Ingredients
- 8 bone-in, skin-on chicken thighs (about 2.5–3 lbs)
- 2 tbsp olive oil
- 1 tsp salt
- ½ tsp black pepper
- 1 tsp garlic powder
- 1 tsp onion powder
- 1 tsp smoked paprika
- ½ tsp chili powder (optional for kick)
- 1 cup BBQ sauce (your favorite brand or homemade)
Instructions
- Preheat Oven:
Preheat your oven to 425°F (220°C). Line a baking sheet with foil and place a wire rack on top. (This helps render fat and keeps the skin crispy.) - Prep Chicken:
Pat chicken thighs very dry with paper towels (crucial for crispiness).
Place them in a large bowl. Drizzle with olive oil and toss to coat.
In a small bowl, mix salt, pepper, garlic powder, onion powder, smoked paprika, and chili powder. Sprinkle evenly over chicken and rub in. - Bake – Round 1:
Arrange chicken thighs skin-side up on the wire rack.
Bake for 35 minutes, or until internal temp reaches 160°F (71°C). - Brush with BBQ Sauce:
Remove from oven. Generously brush BBQ sauce over the tops of the chicken. - Bake – Round 2 (Caramelization):
Return to oven and bake for 10–15 more minutes, until the sauce thickens and starts to caramelize. The internal temp should now be at least 175°F (80°C) for tender, juicy thighs. - Rest & Serve:
Let rest for 5 minutes before serving. Serve with extra BBQ sauce if desired.
Notes
- Crispier Skin Tip: Broil for 2–3 minutes at the end (watch carefully!) to crisp the skin even more.
- Make it spicier: Add cayenne pepper or use a spicy BBQ sauce.
- Boneless Option: Use boneless thighs, reduce cooking time to 25–30 minutes total.

