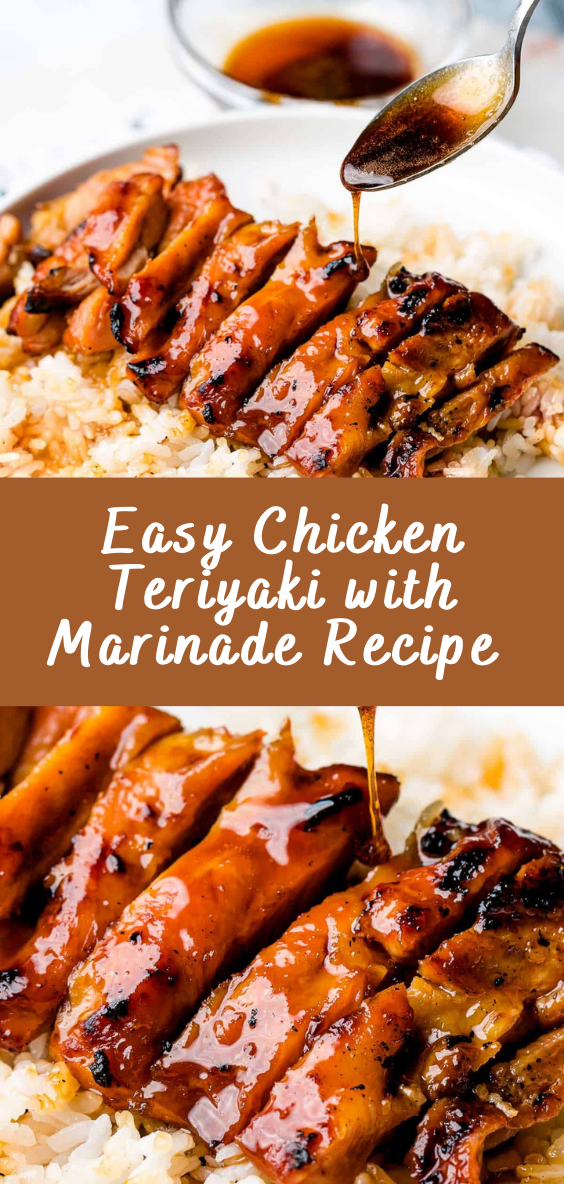
Irresistibly Easy Chicken Teriyaki with Flavorful Homemade Marinade
Chicken teriyaki is a beloved classic in the realm of Asian cuisine, capturing hearts with its harmonious blend of sweet and savory flavors. This easy chicken teriyaki recipe takes this traditional favorite and elevates it to new heights, making it accessible to both novice and seasoned chefs alike. With a meticulously crafted marinade that infuses the chicken with an explosion of tastes, this dish promises a delightful culinary experience that you can easily recreate in the comfort of your own kitchen.

Marinating Magic: Crafting the Perfect Teriyaki Marinade
At the heart of this chicken teriyaki recipe is the delectable marinade, a symphony of ingredients that come together to create an unforgettable flavor profile. The foundation of this marinade is soy sauce, a staple in Asian cooking that lends the dish its signature umami depth. But this recipe goes beyond the basics, incorporating a combination of mirin and sake, two traditional Japanese rice wines that contribute a delicate sweetness and a subtle complexity to the marinade.
To balance out the sweetness, a touch of honey or brown sugar is added, bringing a caramelized richness that plays harmoniously against the soy-based elements. Freshly grated ginger and minced garlic introduce a zing of heat and aromatic depth, infusing the marinade with an irresistible fragrance that will have your senses tingling in anticipation.
The Art of Marination: Enhancing Flavor and Tenderness
A crucial step in creating the perfect chicken teriyaki is marination. As the chicken breasts luxuriate in the marinade, they absorb the exquisite blend of flavors, transforming into tender, succulent delights. While a short 30-minute marination is sufficient, allowing the chicken to bask in the marinade for a longer period – anywhere from 1 to 4 hours, or even overnight – intensifies the taste experience, making each bite a journey of taste sensations.
Seared to Perfection: The Chicken Teriyaki Transformation
With the chicken sufficiently marinated and infused with flavor, it’s time to bring the magic to life on the stovetop. As you remove the chicken from the marinade, a tantalizing aroma fills the air, whetting your appetite for what’s to come. The reserved marinade isn’t discarded; instead, it forms the base for a rich and velvety teriyaki sauce that will elevate the dish to its peak.
A hot skillet coated with a touch of vegetable oil becomes your canvas for culinary creativity. The chicken breasts sizzle as they meet the heat, a symphony of sound that signifies the transformation underway. After about 6-7 minutes on each side, the chicken emerges golden-brown, cooked to perfection. The internal temperature reaches 165°F (75°C), ensuring that every bite is not only delicious but also safe to enjoy.
Saucy Sensations: The Teriyaki Glaze
The homemade teriyaki sauce takes the dish to another level. Simmering the reserved marinade in a saucepan allows its flavors to concentrate and its texture to thicken, resulting in a sauce that clings enticingly to the chicken. As you brush or drizzle this sauce over the cooked chicken, it’s absorbed like a savory embrace, infusing the dish with an intensified layer of flavor.
A Feast for the Senses: Presentation and Garnishes
Finally, the masterpiece is complete, ready to be plated and savored. The sliced chicken, now tender and succulent, rests atop a canvas of your choice – steamed rice, noodles, or a bed of vibrant vegetables. A final drizzle of the luscious teriyaki sauce ensures each bite bursts with the flavors you’ve carefully orchestrated.
For an extra touch of elegance, garnish the dish with sesame seeds, adding a satisfying crunch, and sliced green onions, imparting a burst of freshness. The visuals are as important as the flavors, and this garnish provides an inviting visual cue that enhances the overall dining experience.
Conclusion: An Uncomplicated Culinary Triumph
In just a few simple steps, you’ve crafted an easy chicken teriyaki that transcends the ordinary and delivers an extraordinary flavor adventure. The harmonious marriage of the soy-based marinade, the skillful searing of the chicken, and the velvety teriyaki glaze culminate in a dish that beckons with its aromatic allure and satisfies with each succulent bite.
Whether you’re a beginner looking to embark on your culinary journey or an experienced cook seeking a fuss-free yet delectable meal, this easy chicken teriyaki recipe is your ticket to a taste sensation that’s sure to become a household favorite. So, gather your ingredients, channel your inner chef, and embark on a culinary adventure that will leave your taste buds singing with delight.
Source: drivemehungry.com
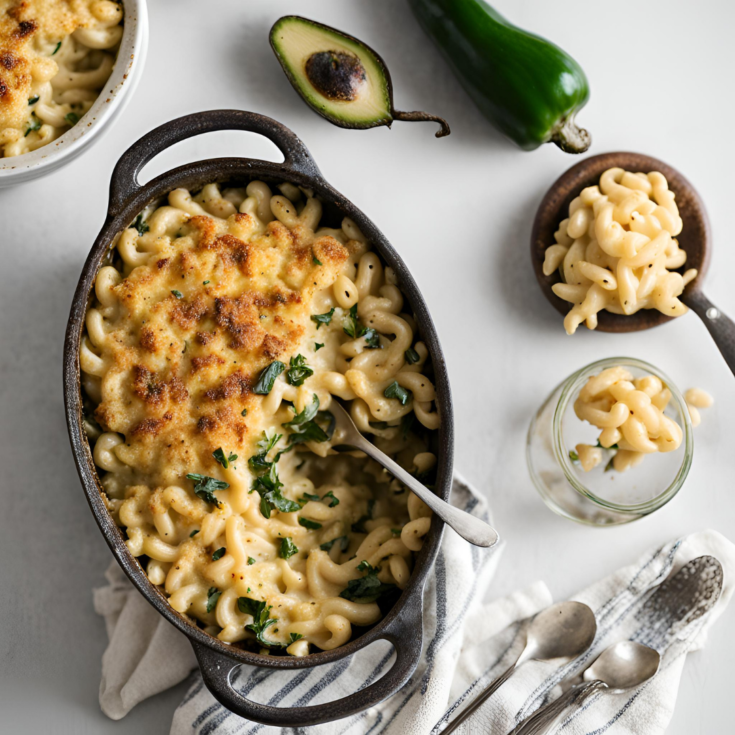
Roasted Poblano and Smoked Gouda Mac and Cheese

There’s something undeniably magical about comfort food, and at the pinnacle of this culinary category sits mac and cheese. It’s a dish that evokes memories of cozy family dinners, casual get-togethers, and pure, unadulterated joy. But today, we’re taking this beloved classic and giving it a gourmet twist with roasted Poblano peppers and Smoked Gouda. This isn’t just any mac and cheese – it’s a flavor-packed, creamy, and smoky masterpiece that’s bound to become your new favorite.
Ingredients
- 4 cups dry small pasta (macaroni elbow noodles, cavatelli, small shells, or other preferred pasta shape)
- 4 poblano peppers
- 6 tablespoon unsalted butter
- ¼ cup all purpose flour
- 2 ¼ cups heavy cream
- 2 teaspoon mustard powder
- ¼ cup mascarpone cheese
- ⅓ cup smoked gouda cheese
- ⅓ cup aged white cheddar cheese
- ⅓ cup sharp cheddar cheese
- 1 teaspoon Cajun seasoning (find our homemade version in the linked post)
- ½ teaspoon cayenne
- ½ teaspoon smoked paprika
- ½ teaspoon black pepper
- ½ teaspoon kosher salt
- ¼ cup panko bread crumbs
Instructions
ROASTED POBLANOS
- Cut poblanos into 1 inch wide strips, discarding seeds and stem and place strips skin side up on a baking sheet. Broil on high in the oven for 6-10 minutes or until the skins are mostly black. Check every 2 minutes to make sure the skins don't get too dark. Remove from oven and let cool for 2 minutes, then place the strips in a ziplock bag for 5 minutes.
- Once cool, remove skins and finely chop. Set aside.
COOK PASTA
- Bring a large pot of water to a boil. Add 2 tablespoon salt to boiling water then reduce heat slightly so that the water is barely boiling. Add pasta to pot and cook for 75% of the total time stated on the package (the pasta will cook through in the oven). Remove to a strainer. If your pasta begins to stick together, drizzle with a teaspoon of olive oil. Set aside.
CHEESE SAUCE and ASSEMBLY
- Preheat your oven to 350°
- In a large pot, begin by making a béchamel sauce as follows: Melt butter over medium heat, then slowly add the flour while whisking constantly. Cook until smooth and mixture begins to smell nutty and slightly colors. Turn down heat as needed to prevent the mixture from gaining too much color. The goal is to make a blonde roux here.
- Reduce heat to low and slowly add the cream and continue to whisk constantly until all cream has been added and the mixture is smooth. Then whisk in mustard powder.
- Cook for approximately 5 minutes or until the béchamel has thickened to a paste-like consistency. If your béchamel becomes too thick, you can add a little water to thin it out, but it should be fairly thick yet still creamy. You can always add water later in the process after the cheese is added. Keep béchamel warm on low heat.
- Add mascarpone and the 3 grated cheeses. Stir until melted completely and combined. Turn heat up to medium to assist in melting the cheese if needed. If you notice that the mixture is not creamy at this point, add a small amount of water to thin it out. You should have a very creamy, thick sauce at this point.
- Add all remaining seasonings and roasted chopped poblanos. Taste and add additional seasonings or salt to taste if needed.
- Add cooked pasta to cheese sauce, and stir to combine. Transfer to a large baking dish (we use a 7'x11' rectangular dish or a 9'x9' square dish), then sprinkle the top with bread crumbs.
Bake the Mac and Cheese
- Bake for 15-20 minutes or until the sauce just begins to bubble on the sides. Be careful not to bake for too long or the sauce could separate.
- Finally, move the dish to the top rack of the oven and broil on high for 1 minute or until the bread crumbs look golden brown and nicely toasted.
- Once done, remove from oven and let sit for 5 minutes before serving.
Notes
If using Homemade Pasta made fresh for this recipe, no need to pre-cook pasta. Simply add pasta to cheese sauce, combine and place in the oven. Fresh pasta will cook during the 15-20 minutes baking time
Nutrition Information:
Amount Per Serving: Calories: 413