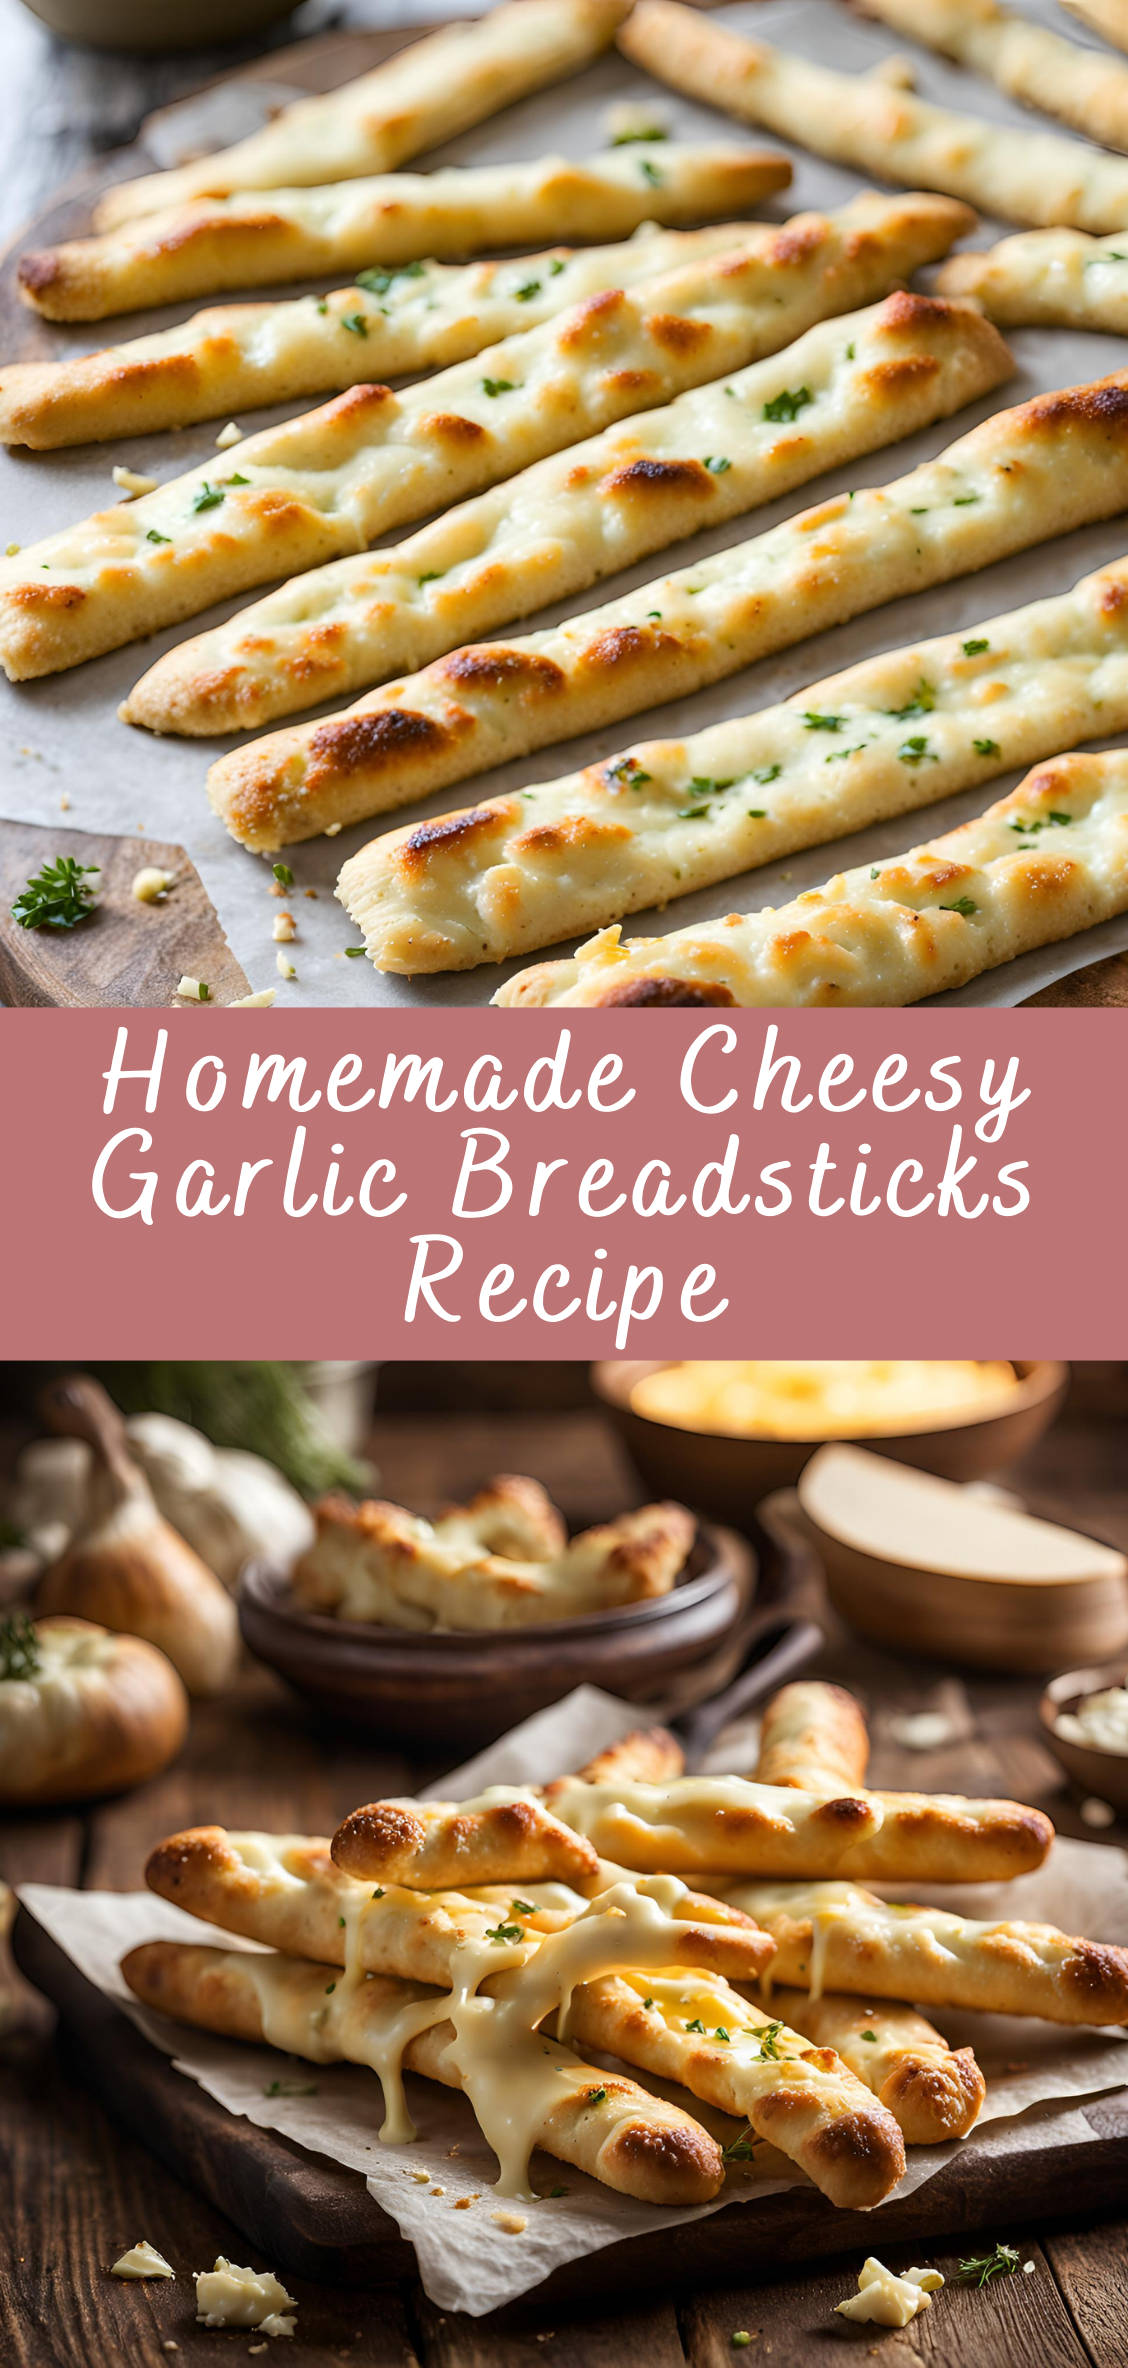
Homemade Cheesy Garlic Breadsticks Recipe
Cheesy garlic breadsticks are a fan favorite—whether served as an appetizer, side dish, or even a meal on their own. The combination of soft, buttery dough topped with a garlic-infused sauce, melted cheese, and seasonings is a universal comfort food that pairs perfectly with pasta, soups, or salads. Making these cheesy garlic breadsticks from scratch takes a little time, but the result is completely worth it—especially when they’re fresh out of the oven, warm, and gooey. Plus, they’re perfect for customizing with your favorite toppings!
This detailed recipe will guide you through every step, from making the dough to baking the breadsticks and serving them with your favorite dips. Let’s get started!
Step-by-Step Instructions
Step 1: Prepare the Dough
- Activate the Yeast:
In a small bowl, combine the warm water and sugar. Stir until the sugar dissolves, then add the active dry yeast. Let it sit for 5-10 minutes until the mixture becomes frothy. This step ensures that the yeast is active and will make the dough rise properly. - Mix the Dough Ingredients:
In a large mixing bowl, combine the flour, salt, and garlic powder. Create a well in the center and pour in the yeast mixture along with 2 tablespoons of olive oil. Stir with a spoon or spatula until the dough begins to come together. - Knead the Dough:
Once the dough has started to form, transfer it to a lightly floured surface. Knead the dough for about 6-8 minutes until it becomes smooth and elastic. If the dough is too sticky, sprinkle in a little extra flour as needed. Conversely, if it’s too dry, add a few drops of water. - First Rise:
Lightly grease the bowl with a bit of olive oil and place the dough inside. Cover the bowl with a clean kitchen towel or plastic wrap. Allow the dough to rise in a warm, draft-free area for 1 to 1.5 hours or until it has doubled in size. This is an essential step, as the dough needs time to develop air pockets, which will give your breadsticks a soft and airy texture.
Step 2: Prepare the Garlic Butter Sauce
- Melt the Butter:
In a small saucepan, melt the butter over medium heat. Add the minced garlic (or garlic powder if you prefer) to the melted butter and sauté for 1-2 minutes until fragrant. Be careful not to burn the garlic. - Season the Sauce:
Add the dried oregano, dried basil, and red pepper flakes (if using) to the garlic butter. Stir well to combine, and let the mixture simmer for another 2-3 minutes. Taste and adjust the seasoning with salt and pepper as needed. - Set Aside:
Once the garlic butter sauce is ready, remove it from the heat and set it aside to cool slightly while you shape and bake the breadsticks.
Step 3: Shape the Breadsticks
- Preheat the Oven:
Preheat your oven to 400°F (200°C) while you prepare the dough for shaping. - Roll Out the Dough:
Once the dough has risen, punch it down to release any air bubbles. Transfer it to a floured surface and roll it out into a rectangle or square shape. Aim for a thickness of about ½ inch (1.25 cm). You can make the breadsticks as long or short as you like, depending on your preference. - Cut the Dough:
Using a sharp knife or pizza cutter, cut the dough into strips. You can cut them into long, narrow strips (about 1 inch wide) for traditional breadsticks, or you can cut them into larger pieces for a thicker breadstick. The size is entirely up to you—feel free to make them smaller for an appetizer or larger for a more filling snack. - Transfer to Baking Sheet:
Line a baking sheet with parchment paper (optional for easy cleanup) and transfer the dough strips onto the sheet. If you prefer a more rustic look, you can twist or slightly curl the breadsticks for a unique shape.
Step 4: Bake the Breadsticks
- Brush with Garlic Butter:
Use a pastry brush or spoon to generously brush the garlic butter sauce over the top of the dough strips. Be sure to coat the breadsticks evenly, ensuring each one is fully covered in the buttery goodness. Reserve some of the garlic butter sauce for brushing on the breadsticks after they come out of the oven. - Bake:
Place the baking sheet in the preheated oven and bake the breadsticks for 12-15 minutes, or until they are golden brown and crispy on the edges. The breadsticks should puff up slightly and develop a deliciously golden hue. If you like your breadsticks extra crispy, you can bake them for a couple of extra minutes. - Add the Cheese:
Five minutes before the breadsticks are done baking, remove them from the oven (if you want cheese on top) and sprinkle the shredded mozzarella cheese evenly over the breadsticks. Return the breadsticks to the oven for the last few minutes of baking to allow the cheese to melt and become bubbly.
Step 5: Finish and Serve
- Final Garlic Butter Brush:
Once the breadsticks are baked and golden, remove them from the oven and immediately brush them with the remaining garlic butter sauce for an extra burst of flavor. - Add Parmesan:
Sprinkle the breadsticks with grated Parmesan cheese for added flavor and a touch of elegance. You can also sprinkle some fresh chopped parsley on top for a pop of color. - Cut and Serve:
Slice the breadsticks if you haven’t already, and serve them warm with a side of marinara sauce, ranch dressing, or any dipping sauce of your choice.
Tips for Success
- Temperature of Water:
Make sure the water you use to activate the yeast is warm but not hot. If it’s too hot, it can kill the yeast, and if it’s too cold, the yeast won’t activate. The ideal temperature is around 110°F (43°C). - Let the Dough Rise Properly:
Ensure the dough has enough time to rise and double in size. Don’t rush this process. The yeast needs time to do its job and create air pockets for fluffy, soft breadsticks. - Customize the Toppings:
Feel free to get creative with your cheesy garlic breadsticks! You can add different types of cheese (like cheddar or provolone), fresh herbs (such as thyme or rosemary), or even crushed red pepper flakes for a bit of heat. - Make It Vegan:
To make this recipe vegan, substitute the butter for plant-based butter or olive oil, and use dairy-free cheese options like vegan mozzarella or cheddar.
Serving Suggestions
- With Pasta:
Serve the cheesy garlic breadsticks alongside a pasta dish, such as spaghetti, lasagna, or fettuccine alfredo. They’re perfect for mopping up sauce! - As a Snack:
These breadsticks are perfect as a snack on their own or served with your favorite dipping sauces, like marinara, ranch, or a spicy buffalo sauce. - For Parties:
Homemade cheesy garlic breadsticks are a great addition to any party or gathering. You can even slice them into smaller pieces for easy sharing. - With Soup:
Pair these breadsticks with a hot bowl of soup, like tomato basil, minestrone, or creamy potato leek. They’re perfect for dipping!
Freezing:
If you want to save some breadsticks for later, freeze them! Allow the baked breadsticks to cool completely, then place them in a freezer-safe bag or container. When you’re ready to eat them, bake from frozen at 375°F (190°C) for 10-12 minutes.
Reheating:
To reheat leftover breadsticks, place them in a 350°F (175°C) oven for 5-7 minutes or until they’re warmed through. If you want them crispy again, bake them for a little longer.
Variations and Customization
One of the best things about these cheesy garlic breadsticks is their versatility. Here are some variations and ideas for tailoring the recipe to suit your taste preferences or dietary restrictions:
1. Add Different Cheeses
While mozzarella and Parmesan are classic cheese options for breadsticks, you can get creative by adding different types of cheese for unique flavors:
- Cheddar: Add sharp cheddar cheese for a rich, tangy flavor.
- Provolone: This cheese has a smooth, slightly smoky taste that pairs wonderfully with garlic and butter.
- Fontina or Gruyère: These cheeses melt beautifully and add a nutty, creamy taste to the breadsticks.
- Vegan Cheese: For a dairy-free version, substitute mozzarella with vegan cheese. There are plenty of options available now that melt just as well as regular cheese.
2. Add Fresh Herbs and Spices
If you love fresh, vibrant flavors, consider adding some fresh herbs to the dough or topping the breadsticks with extra herbs before baking:
- Fresh Basil or Oregano: Sprinkle freshly chopped basil or oregano over the cheese before baking.
- Rosemary: Rosemary adds a woodsy, aromatic touch. It pairs particularly well with the garlic butter.
- Thyme: A subtle, earthy herb that complements the garlic flavor well.
- Garlic Parmesan Herb Breadsticks: Mix garlic powder, fresh parsley, and grated Parmesan into the dough for an extra punch of flavor.
3. Spicy Breadsticks
If you love a bit of heat, these garlic breadsticks can be made spicy:
- Cayenne Pepper: Add cayenne pepper to the garlic butter for an extra spicy kick. Just a pinch will do.
- Crushed Red Pepper Flakes: Sprinkle some crushed red pepper flakes over the cheese or into the garlic butter sauce.
- Jalapeños: Finely chop fresh jalapeños and add them to the garlic butter sauce for a bold, spicy touch.
4. Gluten-Free Option
For those following a gluten-free diet, making these cheesy garlic breadsticks is still possible:
- Gluten-Free Flour: Replace the all-purpose flour with a 1:1 gluten-free flour blend (ensure it’s one that’s suitable for baking). Some blends require xanthan gum for structure, so check the label and follow any instructions.
- Gluten-Free Pizza Dough: You can also substitute the homemade dough with a store-bought gluten-free pizza dough for a quicker option.
- Cheese Substitution: Many vegan cheese options exist if you’re looking to make this recipe dairy-free as well.
5. Pesto or Tomato Variations
If you want to add an Italian flair to your breadsticks, you could:
- Pesto Breadsticks: Drizzle some pesto over the breadsticks before baking or after they come out of the oven. The combination of garlic, cheese, and basil pesto is simply divine.
- Tomato and Basil Breadsticks: Add some chopped fresh tomatoes and fresh basil after the breadsticks are baked. You can even sprinkle them with a little balsamic glaze for a sophisticated touch.
6. Sweet and Savory Option
For a sweet and savory twist, try a drizzle of honey or maple syrup over the breadsticks once they come out of the oven. This would work particularly well with a sharp, tangy cheese like cheddar.
Creative Ways to Serve Cheesy Garlic Breadsticks
Cheesy garlic breadsticks can be served in many ways. Here are some fun and creative ideas for pairing them with other dishes or making them a part of a complete meal:
1. Breadstick Pizza Sticks
Turn your cheesy garlic breadsticks into a pizza-inspired dish:
- Mini Pizza Style: Before baking, spread a thin layer of pizza sauce on the dough and top with your favorite pizza toppings (like pepperoni, olives, mushrooms, or bell peppers) in addition to the cheese. Bake as directed and serve with a side of marinara sauce for dipping.
- Margherita Style: Add fresh mozzarella, sliced tomatoes, and basil after baking, and drizzle with balsamic glaze.
2. Serve with Pasta or Salad
Cheesy garlic breadsticks are often paired with Italian-style meals, and for good reason:
- With Pasta: Serve your cheesy garlic breadsticks alongside spaghetti, lasagna, or a creamy fettuccine Alfredo. The breadsticks are perfect for sopping up extra sauce.
- With Salad: Pair the breadsticks with a light, crisp salad, such as Caesar salad, Greek salad, or a simple arugula and cherry tomato salad with a balsamic vinaigrette.
3. Dip It
Cheesy garlic breadsticks are excellent for dipping, and you can get creative with your dipping sauces:
- Marinara Sauce: This classic Italian dipping sauce is always a hit with cheesy breadsticks.
- Ranch Dressing: For a creamy and tangy dip, ranch dressing pairs beautifully with the garlicky breadsticks.
- Buffalo Sauce: For a spicy kick, serve the breadsticks with buffalo sauce, or mix ranch and buffalo sauce together for a creamy, spicy dip.
- Cheese Sauce: A rich, melted cheese dip is perfect for those who want even more cheese in their lives.
4. Make a Breadstick “Sandwich”
You can even turn the breadsticks into a sandwich:
- Garlic Breadstick Sandwich: Slice the breadsticks open and fill them with your favorite sandwich fillings, such as roasted vegetables, grilled tofu, vegan deli slices, or a variety of cheeses. Toast the sandwich in the oven for a crispy finish.
- Breakfast Sandwich: Slice a breadstick, add a scrambled egg, vegan bacon, and avocado, and make a delicious breakfast sandwich.
Meal Prep and Storage Tips
Making a large batch of cheesy garlic breadsticks ahead of time can save you time throughout the week. Here are some tips for meal prep and storing leftovers:
1. Make Ahead
- Dough: The breadstick dough can be prepared in advance. After the first rise, cover the dough tightly with plastic wrap and refrigerate for up to 24 hours. When you’re ready to bake, simply let the dough come to room temperature before rolling it out and proceeding with the recipe.
- Freezing the Breadsticks: You can freeze both the unbaked dough and the baked breadsticks. To freeze the dough, portion it into balls and wrap tightly in plastic wrap or place it in a freezer-safe bag. Thaw overnight in the fridge and proceed with the recipe when ready.
- Freezing Baked Breadsticks: If you have leftovers, let the breadsticks cool completely, then freeze them in a single layer on a baking sheet before transferring them to a freezer-safe bag. To reheat, bake them at 375°F (190°C) for 10-12 minutes, or until crispy.
2. Storing Leftovers
- Room Temperature: If you plan on eating the leftovers within 1-2 days, store the breadsticks in an airtight container at room temperature. This will help keep them soft and fresh.
- Refrigeration: For longer storage, you can refrigerate the breadsticks. Wrap them in foil or place them in a sealed container to keep them from drying out. Reheat in the oven or microwave for a warm and comforting snack.
- Reheating: To bring back the crispy texture, reheat the breadsticks in the oven at 350°F (175°C) for about 5-7 minutes. If using a microwave, cover the breadsticks with a damp paper towel to prevent them from becoming too hard.
Conclusion
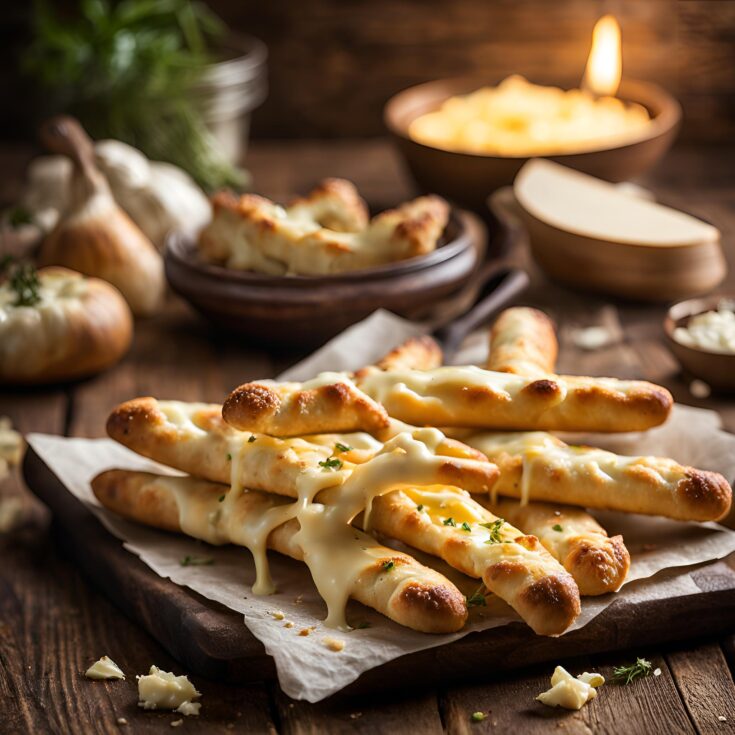
Homemade Cheesy Garlic Breadsticks are the ultimate comfort food—crispy on the outside, soft on the inside, and loaded with savory garlic and gooey cheese. They’re perfect for any occasion, whether as a side dish, appetizer, or a snack. Making them from scratch ensures they’re fresh, warm, and full of flavor, and this detailed recipe gives you everything you need to create the perfect breadsticks every time.
Experiment with different toppings and variations, and don’t forget to serve them with your favorite dipping sauce. Your friends and family will be asking for seconds (or thirds)!
Homemade Cheesy Garlic Breadsticks are a timeless and delicious dish that can easily become a staple in your kitchen. Whether served as an appetizer, a side, or even as part of a complete meal, these breadsticks are sure to satisfy your cravings for something cheesy, garlicky, and comforting. This recipe gives you the freedom to customize it in countless ways, whether you prefer adding extra herbs, using different types of cheese, or turning it into a spicier dish.
From meal prep to serving ideas, there’s no wrong way to enjoy these cheesy garlic breadsticks. They’re great for family dinners, parties, or even just a simple snack. And with these tips, tricks, and variations, you’ll be able to recreate them in a way that suits your personal tastes and dietary preferences.
So, gather your ingredients, fire up the oven, and enjoy a batch of homemade, cheesy, garlicky goodness that’s sure to be a hit every time!
Homemade Cheesy Garlic Breadsticks Recipe
Cheesy garlic breadsticks are a fan favorite—whether served as an appetizer, side dish, or even a meal on their own. The combination of soft, buttery dough topped with a garlic-infused sauce, melted cheese, and seasonings is a universal comfort food that pairs perfectly with pasta, soups, or salads. Making these cheesy garlic breadsticks from scratch takes a little time, but the result is completely worth it—especially when they’re fresh out of the oven, warm, and gooey. Plus, they’re perfect for customizing with your favorite toppings!
Ingredients
- For the dough:
- 1 cup warm water (about 110°F/43°C)
- 2 teaspoons active dry yeast
- 1 tablespoon sugar
- 2 1/2 cups all-purpose flour
- 2 tablespoons olive oil (plus extra for brushing)
- 1 teaspoon salt
- 1/2 teaspoon garlic powder (optional, for extra flavor)
- For the garlic butter topping:
- 3 tablespoons unsalted butter, melted
- 3 cloves garlic, minced (or 1 1/2 teaspoons garlic powder)
- 1/4 teaspoon salt
- 1/4 teaspoon dried oregano (optional)
- For the cheesy topping:
- 1 1/2 cups shredded mozzarella cheese
- 1/2 cup grated Parmesan cheese (optional, for extra flavor)
Instructions
- Activate the Yeast:
In a small bowl, combine the warm water, sugar, and yeast. Stir gently and let it sit for 5-10 minutes until it becomes frothy. - Make the Dough:
In a large mixing bowl, combine the flour, olive oil, salt, and garlic powder (if using). Pour in the yeast mixture and stir until a dough starts to form.
Knead the dough on a floured surface for about 5-7 minutes until it’s smooth and elastic. Add a little flour as needed if the dough is too sticky. - Let the Dough Rise:
Lightly oil the bowl, place the dough inside, and cover with a damp towel or plastic wrap. Let it rise in a warm place for about 1 hour, or until it has doubled in size. - Preheat the Oven:
Preheat your oven to 400°F (200°C). Lightly grease or line a baking sheet with parchment paper. - Shape the Breadsticks:
After the dough has risen, punch it down and transfer it to the prepared baking sheet. Roll the dough out into a rectangle or square shape, about 1/2 inch thick. - Prepare the Garlic Butter Topping:
In a small bowl, mix the melted butter, minced garlic, salt, and oregano (if using).
Brush the garlic butter mixture over the top of the dough, making sure to coat it evenly. - Add Cheese:
Sprinkle the shredded mozzarella cheese and Parmesan cheese (if using) generously over the dough. - Bake the Breadsticks:
Bake in the preheated oven for 15-20 minutes, or until the breadsticks are golden brown and the cheese is melted and bubbly. - Cut and Serve:
Remove from the oven and allow the breadsticks to cool for a few minutes before cutting them into strips with a pizza cutter or sharp knife.
Serve warm, optionally with marinara or ranch dipping sauce.
Notes
- Cheese Choices:
Feel free to experiment with different cheeses. You can use mozzarella, cheddar, provolone, or even a combination for a richer flavor. If you prefer a dairy-free version, you can substitute with vegan cheese options. - Garlic Butter Sauce:
If you want extra garlic flavor, you can increase the number of garlic cloves or use roasted garlic for a sweeter, milder taste.
Adjust the amount of red pepper flakes depending on how spicy you like it. - Flour Alternatives:
If you need a gluten-free version, swap the all-purpose flour for a gluten-free flour blend. Be sure to follow the instructions on the blend package to ensure proper texture and rise. - Make-Ahead Tips:
Dough: You can make the dough ahead of time and store it in the refrigerator for up to 24 hours after the first rise. When ready, allow it to come to room temperature before continuing with the recipe.
Frozen Breadsticks: You can freeze both the dough and the baked breadsticks. Freeze unbaked breadsticks on a baking sheet and then transfer to a bag or container. When you’re ready to bake, just follow the recipe instructions from frozen, adding a few extra minutes to the cook time. - Baking Variations:
For crispier breadsticks, place them on a baking sheet with plenty of space between each stick to allow airflow and even baking.
If you want to add more texture, sprinkle some sesame seeds or poppy seeds on top before baking.

