Red Velvet Cookie Cake Recipe
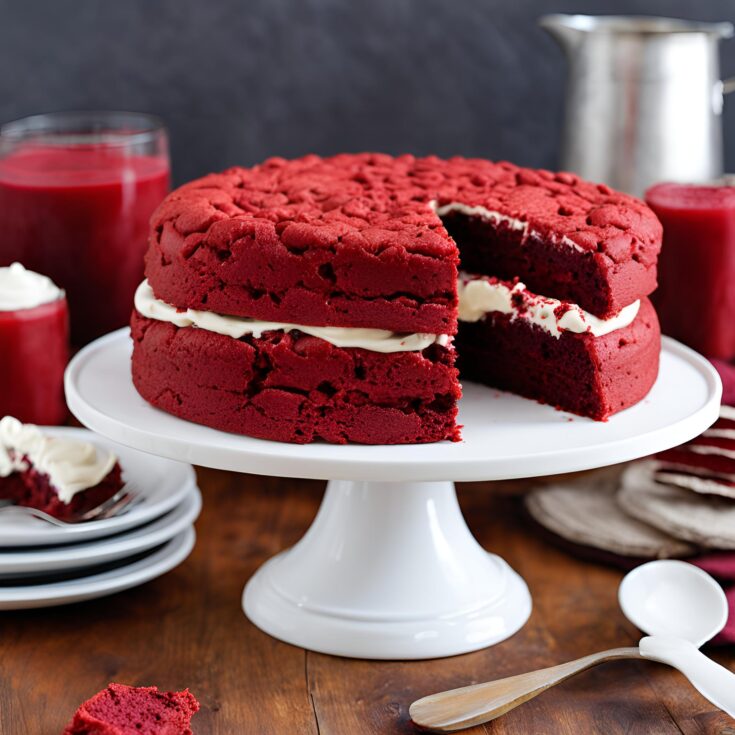
Red velvet cake is beloved for its vibrant red color and delicious, slightly tangy flavor, often paired with rich cream cheese frosting. But what if we took the best parts of red velvet cake—its flavor, color, and texture—and transformed them into a giant, gooey cookie? The result is a Red Velvet Cookie Cake: a soft, chewy cookie cake with the signature flavor and color of red velvet cake, topped with a luscious cream cheese frosting that complements it perfectly.

Whether you’re celebrating a birthday, an anniversary, or just craving something indulgent, this red velvet cookie cake is sure to impress. It’s perfect for those who love the texture of cookies but want the richness of cake, combining the best of both worlds into a single, glorious dessert.
Step-by-Step Instructions
Step 1: Preheat the Oven and Prepare the Pan
- Preheat your oven to 350°F (175°C). This will ensure the oven is at the right temperature when you’re ready to bake the cookie cake.
- Prepare your baking pan: Lightly grease a 9-inch round cake pan (or a 9-inch springform pan for easy removal) with butter or nonstick spray. You can also line the pan with parchment paper for easier removal later. If you prefer a thicker cookie cake, you can opt for an 8-inch pan.
Step 2: Mix the Dry Ingredients
- Combine dry ingredients: In a medium-sized bowl, whisk together the all-purpose flour, baking soda, salt, and cocoa powder. These ingredients will provide the base for the cake’s structure and color.
- Set the dry ingredients aside while you prepare the wet ingredients.
Step 3: Make the Cookie Cake Batter
- Cream the butter and sugar: In a large mixing bowl, beat the softened butter and granulated sugar together using a hand mixer or stand mixer on medium speed for 2-3 minutes. This step is crucial for incorporating air into the batter and creating a light texture in the cookie cake.
- Add the egg: Add the egg to the butter-sugar mixture and beat until combined. The egg helps bind the ingredients together and provides richness to the batter.
- Incorporate vanilla extract: Mix in the vanilla extract, which will enhance the flavor of the cookie cake.
- Add the red food coloring: Pour in the red food coloring and stir until the batter is uniformly red. This is the signature feature of the red velvet cookie cake—its vibrant color!
- Add the vinegar and buttermilk: Add the vinegar and buttermilk (or your homemade sour milk) and mix well. The vinegar helps activate the baking soda, ensuring the cookie cake rises properly, and the buttermilk adds a slight tanginess, characteristic of red velvet cake.
Step 4: Combine Wet and Dry Ingredients
- Gradually add the dry ingredients into the wet mixture, mixing just until combined. Be careful not to overmix, as overmixing can make the cake dense. You should end up with a thick, cookie dough-like batter.
Step 5: Bake the Cookie Cake
- Transfer the batter to the pan: Pour the prepared batter into the greased cake pan and use a spatula to spread it evenly.
- Bake: Place the pan in the preheated oven and bake for 20-25 minutes, or until the top is set and a toothpick inserted into the center comes out clean or with only a few moist crumbs attached. The cookie cake should be soft and slightly chewy, but not underbaked.
- Cool the cake: Once baked, remove the cookie cake from the oven and let it cool in the pan for 10-15 minutes before transferring it to a wire rack to cool completely.
Step 6: Prepare the Cream Cheese Frosting
- Beat the cream cheese and butter: In a separate bowl, beat the softened cream cheese and unsalted butter together until smooth and creamy. This will form the base of your frosting.
- Add powdered sugar: Gradually add the powdered sugar, 1 cup at a time, until you achieve a thick, spreadable frosting. Beat the mixture for 2-3 minutes to ensure everything is well combined.
- Incorporate vanilla extract and milk: Add the vanilla extract and mix it in. If the frosting is too thick, add 1-2 tablespoons of milk to reach your desired consistency. The frosting should be creamy and easy to spread.
Step 7: Decorate the Cookie Cake
- Frost the cooled cookie cake: Once the cookie cake has completely cooled, spread a generous layer of cream cheese frosting over the top using a spatula or butter knife. You can choose to spread the frosting all the way to the edges or leave a small border for a decorative touch.
- Add optional decorations: If you’d like to make your cookie cake even more festive, sprinkle some red velvet cake crumbs around the edges of the frosting or add red and white sprinkles on top. You can also pipe additional frosting around the edges for a more polished look.
Serving Suggestions
- Slice and Serve: Once decorated, slice the red velvet cookie cake into wedges like you would a pie or cake. Serve immediately or refrigerate until ready to enjoy.
- Pair with Ice Cream: For an indulgent treat, serve the red velvet cookie cake with a scoop of vanilla or cream cheese ice cream.
- Personalize: Add other toppings to suit your taste, such as chopped nuts, chocolate chips, or even a drizzle of caramel sauce.
Tips for Success
- Use Gel Food Coloring: Gel food coloring will give you a richer, more vibrant red without adding extra liquid to the batter. Liquid food coloring works as well, but you may need to use a little more to achieve the desired shade.
- Don’t Overmix: Be careful not to overmix the dough once the flour is added. Overmixing can lead to a denser texture. Mix until everything is just incorporated.
- Let the Cookie Cake Cool: It’s important to let the cookie cake cool completely before frosting it. If the cake is too warm, the frosting may melt and become runny.
Variations and Customizations
- Red Velvet Cookie Bars: For an easy, portable version, spread the dough into a 9×13-inch baking pan and bake it as you would a cookie bar. Frost and cut into squares for a fun twist.
- Mini Red Velvet Cookie Cakes: Instead of one large cake, you can make individual mini cookie cakes using muffin tins or small cake pans. These make for adorable, personalized servings.
- Chocolate Chip Red Velvet Cookie Cake: If you love a little extra sweetness, add a handful of white or dark chocolate chips to the dough before baking.
- Add Nuts: For texture and a bit of crunch, consider adding chopped pecans or walnuts into the batter.
Serving the Red Velvet Cookie Cake
A Red Velvet Cookie Cake is incredibly versatile in how you can present and serve it. Below are a few ideas for creating an unforgettable dessert experience.
1. Individual Portions
If you prefer to serve individual portions or want to make this dessert more shareable, cut the cookie cake into smaller, bite-sized pieces. A cookie cake bar is easy to grab and enjoy, making it ideal for parties, gatherings, or casual get-togethers. You can even place each portion in a small dessert cup for a more festive presentation.
2. Layered Cake
For an elegant touch, you can turn your cookie cake into a layered dessert:
- Layer 1: Bake two or more smaller cookie cakes in 9-inch round pans.
- Layer 2: Frost each layer with the cream cheese frosting in between and on top.
- Layer 3: Garnish the top with red velvet crumbs, sprinkles, or edible gold leaf for a stunning finish.
3. Serving with Drinks
This dessert pairs wonderfully with different beverages:
- Milk: A tall glass of cold milk is the classic pairing for any cookie dessert, and it balances the sweetness and richness of the red velvet cake beautifully.
- Coffee or Espresso: The slight bitterness of coffee pairs wonderfully with the tangy cream cheese frosting and the sweetness of the red velvet cookie cake. You can also serve it with a flavored latte or cappuccino.
- Hot Chocolate: For colder days or special occasions, a hot cup of cocoa, possibly topped with whipped cream, can complement the flavor profile of the cake.
- Sweet Wine or Dessert Wines: Pair the dessert with a sweet wine like a late-harvest Riesling or a dessert wine like Moscato. The fruity notes in these wines pair well with the tangy cream cheese frosting.
4. A Birthday Cake Alternative
The Red Velvet Cookie Cake is a perfect alternative to the traditional birthday cake. Instead of cutting it into slices, you can decorate it with birthday candles and add a personalized birthday message with piping frosting.
Frequently Asked Questions (FAQs)
1. Can I use regular food coloring instead of gel?
Yes, you can use liquid food coloring, but gel food coloring tends to give a more vibrant, concentrated color without altering the consistency of the batter. If you’re using liquid food coloring, you may need to use more than the recipe calls for, but it’s still an option if that’s all you have.
2. What if I don’t have buttermilk?
If you don’t have buttermilk on hand, it’s easy to make a substitute. Simply add 1 tablespoon of lemon juice or vinegar to a measuring cup and fill it with regular milk to make ¾ cup. Stir it and let it sit for 5-10 minutes to allow it to curdle before using in the recipe.
3. Can I freeze the red velvet cookie cake?
Yes! You can freeze the baked and cooled cookie cake. Wrap it tightly in plastic wrap, then aluminum foil, and freeze for up to 3 months. When you’re ready to eat it, allow it to thaw at room temperature, then frost and serve. If you prefer, you can freeze the unfrosted cookie cake and frost it after thawing.
4. How should I store the leftover cookie cake?
If you have leftover cookie cake, store it in an airtight container. You can keep it at room temperature for up to 3 days. If you want to store it longer, refrigerate it for up to a week. Just be sure to bring it to room temperature before serving, as it tastes best when it’s not cold.
5. Can I make this into a cookie pizza?
Yes! You can shape the dough into a large cookie “pizza” and decorate it with toppings like whipped cream, fruit, or chocolate shavings after frosting it. This version can be served as a fun and interactive dessert for kids or themed parties.
Tips for Perfecting the Red Velvet Cookie Cake
- Use Room Temperature Ingredients: Always use softened butter, eggs, and cream cheese for frosting. Cold ingredients won’t mix as well, which can affect the final texture of your cake and frosting.
- Check Your Oven’s Temperature: Oven temperatures can vary, so consider investing in an oven thermometer. If your oven runs hot, reduce the baking time slightly to avoid overbaking the cookie cake. If your oven is cooler, you may need to add a few extra minutes to the baking time.
- Don’t Overmix the Batter: Overmixing the cookie dough can result in a tough cake. Once the flour is added, mix only until the ingredients are incorporated. The less you handle the dough, the softer and chewier the cookie cake will be.
- Use a Cooling Rack: After baking, allow the cookie cake to cool completely on a wire rack to prevent it from becoming soggy at the bottom. This will help it maintain its texture and make it easier to frost.
- Frosting Consistency: If your frosting is too thick to spread, add a tablespoon of milk at a time to loosen it up. Conversely, if it’s too thin, add powdered sugar until it reaches a spreadable consistency.
- Experiment with Mix-ins: If you like chocolate or nuts, feel free to fold in mini chocolate chips or chopped walnuts or pecans into the batter before baking. They’ll add a delightful texture contrast to the soft cookie.
- Decorate Your Cookie Cake: Get creative with your decorations! Consider using edible flowers, colored sugar crystals, or custom-designed icing piping to make the cookie cake a visual centerpiece.
Additional Creative Ideas
If you’re feeling adventurous and want to take your Red Velvet Cookie Cake to the next level, here are a few creative twists:
1. Red Velvet Ice Cream Sandwiches
- Bake two Red Velvet Cookie Cakes in smaller circles (using a cookie cutter or a smaller cake pan), then allow them to cool completely. Add a scoop of vanilla ice cream or cream cheese ice cream between the two layers to create a delicious red velvet ice cream sandwich.
2. Red Velvet Cookie Cake Trifle
- Layer pieces of the cookie cake with whipped cream, berries (such as strawberries or raspberries), and extra frosting to create a fun trifle dessert. This would work beautifully in a large glass bowl for a showstopping presentation.
3. Red Velvet Cookie Cake Bars
- For a fun variation, turn the red velvet cookie cake into cookie bars. Spread the batter into a 9×13-inch baking pan, then bake it for a little longer (around 25-30 minutes). Once cooled, cut into squares for easy serving at parties or as a snack.
4. Red Velvet Cookie Cake Cupcakes
- Instead of baking one large cookie cake, bake the batter into muffin tins or cupcake liners. This would give you mini individual servings of the red velvet cookie cake, perfect for gift boxes or as a grab-and-go treat.
5. Red Velvet Cookie Cake Brownies
- For a fudgy twist, try making a Red Velvet Cookie Cake brownie by using slightly less flour and a bit more butter. This creates a dense, chewy, and soft texture that’s reminiscent of a brownie.
Conclusion
This Red Velvet Cookie Cake is a decadent and visually stunning dessert that combines the rich flavors of red velvet cake with the chewy, comforting texture of a cookie. With its creamy cream cheese frosting and vibrant color, it’s perfect for any celebration, whether you’re baking for a birthday, Valentine’s Day, or just a fun family treat.
The recipe is straightforward but yields a cake that’s sure to impress. From the deep, velvety color to the tangy cream cheese frosting, every bite is a satisfying combination of flavors. Plus, with the option to customize, you can make it your own and add personal touches, whether through different toppings, mix-ins, or variations.
Now that you have all the details, it’s time to start baking! Whether you’re an experienced baker or a beginner, this recipe is designed to guide you step by step, ensuring you get the perfect red velvet cookie cake every time.
The Red Velvet Cookie Cake is a delightful, indulgent treat that combines the best elements of both cookies and cake. With its vibrant color, decadent cream cheese frosting, and a soft, chewy texture, it’s a crowd-pleaser that’s perfect for any occasion. Whether you’re baking it for a special event or just treating yourself and your loved ones, this dessert is sure to become a favorite.
From serving suggestions and decorating ideas to storage tips and fun variations, you now have all the tools to make the most amazing red velvet cookie cake possible. The recipe itself is straightforward, but the possibilities for customization and creativity are endless. With a few tweaks and a bit of flair, you can truly make this dessert your own.
Now it’s time to gather your ingredients, get baking, and enjoy a slice (or two) of this delicious red velvet cookie cake. And remember, the best part of baking is sharing the joy with others—so don’t forget to share this delicious creation with those you care about!
Red Velvet Cookie Cake Recipe
Red velvet cake is beloved for its vibrant red color and delicious, slightly tangy flavor, often paired with rich cream cheese frosting. But what if we took the best parts of red velvet cake—its flavor, color, and texture—and transformed them into a giant, gooey cookie? The result is a Red Velvet Cookie Cake: a soft, chewy cookie cake with the signature flavor and color of red velvet cake, topped with a luscious cream cheese frosting that complements it perfectly.
Ingredients
- 1 1/2 cups all-purpose flour
- 1 teaspoon cornstarch
- 1 teaspoon baking soda
- 1/2 teaspoon salt
- 1/2 cup unsalted butter, softened
- 3/4 cup granulated sugar
- 1/2 cup brown sugar, packed
- 1 large egg
- 2 teaspoons vanilla extract
- 2 tablespoons buttermilk (or substitute with regular milk)
- 2 teaspoons red gel food coloring (or 2 tablespoons liquid)
- 1 tablespoon cocoa powder (unsweetened)
- 1/2 cup white chocolate chips (optional for extra richness)
- For the cream cheese frosting:
- 8 oz cream cheese, softened
- 1/4 cup unsalted butter, softened
- 2 cups powdered sugar
- 1 teaspoon vanilla extract
- Pinch of salt
Instructions
- Preheat the Oven:
Preheat your oven to 350°F (175°C). Grease and flour a 9-inch round cake pan or line it with parchment paper. - Make the Cookie Dough:
In a medium bowl, whisk together the flour, cornstarch, baking soda, salt, and cocoa powder.
In a separate large bowl, beat the softened butter, granulated sugar, and brown sugar together until creamy and smooth, about 2-3 minutes.
Add the egg, vanilla extract, buttermilk, and red food coloring. Mix until combined.
Gradually add the dry ingredients into the wet ingredients, stirring until just combined. If you're adding white chocolate chips, fold them into the dough now. - Bake the Cookie Cake:
Press the cookie dough into the prepared cake pan, spreading it evenly to cover the bottom.
Bake in the preheated oven for 20-25 minutes, or until the cookie cake is set and slightly golden around the edges. You can test doneness by inserting a toothpick into the center—it should come out clean or with just a few moist crumbs.
Allow the cookie cake to cool in the pan for about 10 minutes, then transfer it to a wire rack to cool completely. - Make the Cream Cheese Frosting:
While the cookie cake cools, beat together the softened cream cheese and butter in a bowl until smooth and creamy.
Gradually add the powdered sugar, vanilla extract, and salt, beating until the frosting is light and fluffy. - Decorate the Cookie Cake:
Once the cookie cake has cooled, spread the cream cheese frosting over the top with a spatula. You can pipe it for a more decorative look or spread it evenly for a more rustic finish. - Serve:
Slice the red velvet cookie cake into wedges and enjoy!
Notes
- Food Coloring:
Gel food coloring gives the best results for vibrant color. Liquid food coloring can work too, but you may need to use more to achieve the desired red hue. - Buttermilk Substitute:
If you don't have buttermilk, you can make your own by adding 1 tablespoon of vinegar or lemon juice to ¾ cup of milk and letting it sit for 5 minutes. - Customization:
Add-ins like chocolate chips, chopped nuts (such as pecans or walnuts), or even a drizzle of white chocolate over the top can add extra flavor and texture to your cookie cake. - Frosting Consistency:
If your cream cheese frosting is too thick, add a tablespoon of milk at a time until you achieve your desired spreadable consistency. If it’s too runny, add more powdered sugar. - Baking Pan Size:
If you prefer a thicker or thinner cookie cake, you can use a smaller or larger pan. Just keep an eye on the baking time, as a thicker cake will require a longer bake time, and a thinner cake may bake faster. - Decoration:
Decorate the top with sprinkles, red velvet cake crumbs, or edible glitter for extra visual appeal, especially for celebrations.

