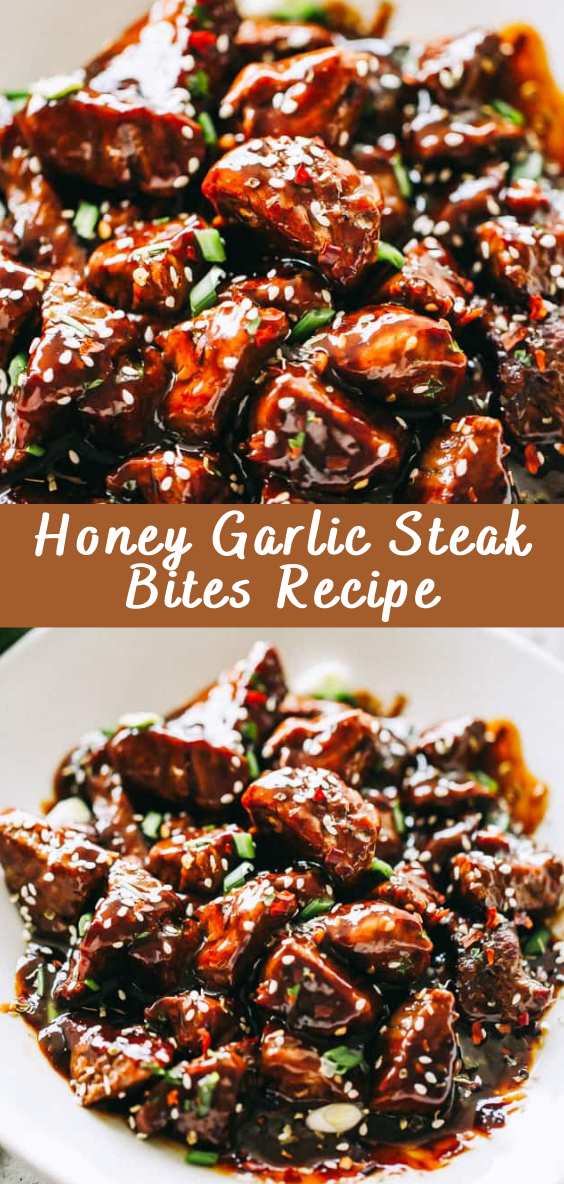
Honey Garlic Steak Bites Recipe: A Sweet and Savory Delight
If you’re in the mood for a mouthwatering dish that combines the richness of steak with the sweetness of honey and the depth of garlic, then this Honey Garlic Steak Bites recipe is a must-try. With tender bites of seared steak coated in a luscious honey garlic sauce, this recipe offers a perfect balance of flavors that will tantalize your taste buds. Whether you’re cooking for a special occasion or just craving a delectable treat, these steak bites are sure to satisfy.

Table of Contents
- Introduction
- Ingredients You’ll Need
- Step-by-Step Cooking Instructions
- Tips for Perfectly Seared Steak Bites
- Customizing Your Honey Garlic Sauce
- Serving Suggestions
- Conclusion
- FAQs
Introduction
The combination of honey and garlic is a culinary match made in heaven. When paired with succulent steak bites, this flavor duo takes your taste buds on an exquisite journey. The sweetness of honey complements the savory richness of the steak, while the garlic adds depth and a touch of pungency. The result? A dish that’s both comforting and gourmet.
Ingredients You’ll Need
To create these delectable Honey Garlic Steak Bites, gather the following ingredients:
- 1 pound of steak (such as sirloin, ribeye, or New York strip), cut into bite-sized pieces
- 3 tablespoons of honey
- 4 cloves of garlic, minced
- 2 tablespoons of soy sauce
- 1 tablespoon of olive oil
- Salt and black pepper to taste
- Chopped fresh parsley for garnish
Step-by-Step Cooking Instructions
- Prepare the Steak: Pat the steak pieces dry with paper towels to remove excess moisture. Season them with salt and black pepper, ensuring even coverage.
- Sear the Steak Bites: Heat a skillet over medium-high heat and add the olive oil. Once the oil is hot, add the steak bites in a single layer. Sear for 2-3 minutes on each side, or until they develop a golden-brown crust. Remove the steak from the skillet and set aside.
- Prepare the Honey Garlic Sauce: In the same skillet, add the minced garlic. Sauté for about 1 minute until fragrant. Add the honey and soy sauce, stirring to combine. Allow the sauce to simmer for 1-2 minutes, until it thickens slightly.
- Combine the Steak and Sauce: Return the seared steak bites to the skillet. Toss them in the honey garlic sauce until they are well-coated and heated through.
- Garnish and Serve: Remove the skillet from heat. Sprinkle the chopped fresh parsley over the steak bites for a burst of color and freshness.
- Serve Immediately: Plate the Honey Garlic Steak Bites and serve them hot. These bites are perfect as an appetizer, a main dish, or even as a topping for salads or rice.
Tips for Perfectly Seared Steak Bites
- Use a Hot Skillet: A hot skillet ensures a good sear on the steak, creating that coveted caramelized crust.
- Don’t Overcrowd the Pan: Cook the steak bites in batches if necessary to avoid overcrowding, which can lead to steaming instead of searing.
- Let the Steak Rest: After searing, allow the steak bites to rest for a few minutes before tossing them in the sauce. This helps the juices redistribute, keeping the steak juicy and tender.
Customizing Your Honey Garlic Sauce
Feel free to customize the honey garlic sauce to your taste. If you prefer a spicier kick, add a pinch of red pepper flakes. For an Asian-inspired twist, include a dash of sesame oil or grated ginger.
Serving Suggestions
Serve your Honey Garlic Steak Bites with a side of steamed vegetables, roasted potatoes, or fluffy rice. You can also create a delightful appetizer spread by pairing them with toasted baguette slices and a selection of dipping sauces.
Conclusion
With its sweet and savory combination, the Honey Garlic Steak Bites recipe is a delightful way to elevate your steak experience. The tender and flavorful bites, coated in a luscious honey garlic sauce, make for a memorable dish that’s perfect for any occasion. Whether you’re cooking for a gathering or simply treating yourself, these steak bites are bound to become a favorite in your culinary repertoire.
FAQs
Can I use a different type of meat for this recipe?
While steak is traditionally used, you can experiment with other meats like chicken or pork if you prefer.
Can I make the honey garlic sauce in advance?
Yes, you can prepare the sauce ahead of time and reheat it when you’re ready to toss it with the seared steak bites.
What’s the best way to store leftover Honey Garlic Steak Bites?
Store them in an airtight container in the refrigerator. To reheat, gently warm them in a skillet over low heat.
Can I use a different type of sweetener instead of honey?
Absolutely, you can substitute honey with maple syrup, agave nectar, or any other sweetener of your choice.
What sides go well with these steak bites?
These steak bites pair well with steamed vegetables, mashed potatoes, quinoa, or even a fresh garden salad.
Source: diethood.com
S'mores Cake recipe

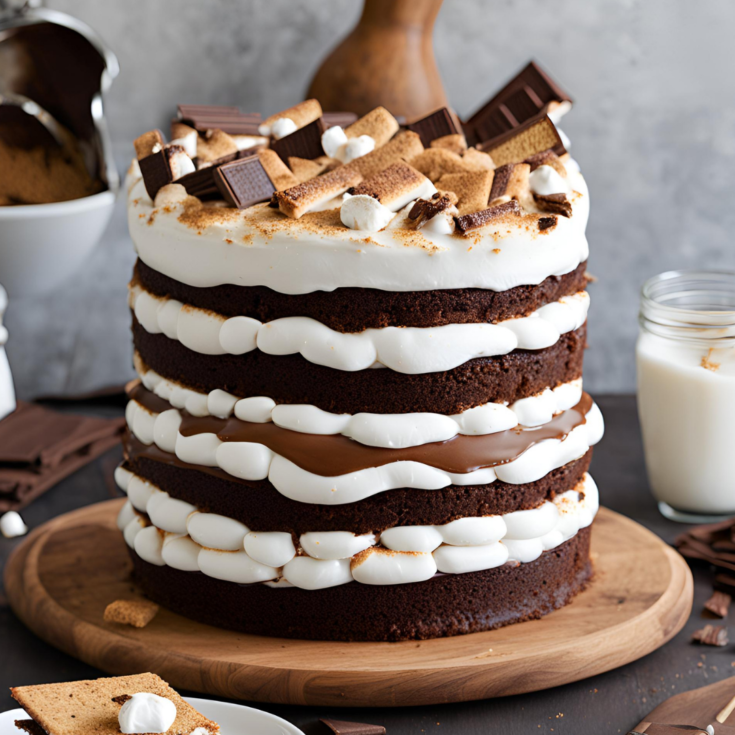
S'mores bring back fond memories of campfires and gooey marshmallow goodness. This S'mores Cake captures all that nostalgic charm in a show-stopping dessert. Imagine layers of graham cracker crust, rich chocolate cake, and marshmallow filling, all topped with a decadent chocolate ganache and toasted marshmallow topping. This cake is perfect for any occasion and is sure to impress your family and friends.
Ingredients
- Chocolate Cake
- 2 cups (260g) flour
- 2 cups (414g) sugar
- 3/4 cup (85g) natural unsweetened cocoa powder
- 2 tsp baking soda
- 1 tsp salt
- 2 large eggs
- 1 cup (240ml) milk
- 1 cup (240ml) vegetable oil
- 1 1/2 tsp vanilla
- 1 cup (240ml) hot water
- Graham Cracker Crunchies
- 3/4 cups (100g) graham cracker crumbs (about 6 full sheet graham crackers)
- 1 1/2 tbsp (20g) sugar
- 1/4 cup (56g) unsalted butter, melted
- Toasted Marshmallow Frosting
- 1 3/4 cups (392g) unsalted butter, room temperature
- 3 1/4 cups marshmallow fluff*
- 6 cups (690) powdered sugar
- 1 1/2 cups mini marshmallows
- Chocolate Ganache
- 9 oz (1 1/2 cups) semi-sweet chocolate chips
- 3/4 cup (180ml) heavy whipping cream
- Vanilla frosting
- 3/4 cup (168g) unsalted butter, room temperature
- 3 cups (345g) powdered sugar
- 1 tsp vanilla extract
- 1 tbsp milk or cream
Instructions
To make the chocolate cake:
1. Prepare three 8 inch cake pans with parchment paper circles in the bottom, and grease the sides. Preheat oven to 300°F (148°C).2. Add all dry ingredients to a large bowl and whisk together.3. Add eggs, milk and vegetable oil to the dry ingredients and mix well.4. Add vanilla to boiling water and add to mixture. Mix well. The batter will be very thin.5. Divide batter evenly between cakes pans and bake for 30-33 minutes, or until a toothpick comes out with a few crumbs.6. Remove cakes from oven and allow to cool for about 5 minutes, then remove to cooling racks to cool completely.
To make the graham cracker crunchies:
7. When the cakes are cooled and you’re ready to build the cake, preheat oven to 350°F. Line a cookie sheet with parchment paper or a silicone baking mat and set aside.8. Combine the graham cracker crumbs, sugar and melted butter and stir until well combined. Spread the crumbs evenly onto the prepared cookie sheet.9. Bake for 8-10 minutes, then allow to cool. Set aside.
To make the toasted marshmallow frosting:
10. To make the frosting, toast the marshmallows under the broiler for about 1 minute, or until toasted. Remove from the oven and set aside to allow them to cool completely.11. Add the butter to a large mixer bowl and beat until smooth.12. Add the marshmallow fluff to the butter and beat until well combined.13. Add about half of the powdered sugar to the butter mixture and mix until well combined and smooth.14. Add the remaining powdered sugar and mix until well combined and smooth.15. Add the cooled toasted marshmallows and mix until well combined. If the marshmallows are quite sticky, break them apart into smaller pieces before adding them to the frosting. Set aside.
To make the chocolate ganache:
16. Add the chocolate chips to a medium sized bowl.17. Heat the heavy whipping cream until it just begins to boil, then pour it over the chocolate chips.18. Allow the chocolate and cream and to sit for 3-5 minutes, then whisk together until smooth. Set aside.
To make the vanilla frosting:
19. Add the butter to a large mixer bowl and beat until smooth.20. Add about half of the powdered sugar and mix until well combined and smooth.21. Add the vanilla extract and cream and mix until well combined.22. Add the remaining powdered sugar and mix until well combined and smooth.
To build the cake:
23. Remove cake domes from the tops of the cake with a large serrated knife. See my tips on how to level a cake and how to stack a cake.24. Place the first layer of cake on a cake plate or cardboard cake circle. Pipe a dam of vanilla frosting around the outer edge of the cake. This dam will help keep all of the filling in place so that nothing seeps out or doesn’t stay in place.25. Add about 6 tablespoons of chocolate ganache to the top of the cake and spread it into an even layer.26. Add one cup of marshmallow frosting to the top of the ganache and spread into an even layer.27. Add 1/2 a cup of graham cracker crunchies to the top of the frosting and spread evenly.28. Add the second layer of cake, another dam of vanilla frosting, then another layer of ganache, marshmallow frosting and graham cracker crunchies.29. Top the cake with the final layer of chocolate cake. Refrigerate the cake for about 30 minutes or so to make sure everything is stable.30. Use the remainder of the marshmallow frosting to frost the outside of the cake. Feel free to use my tutorial for frosting a smooth cake.31. Press the remaining graham cracker crunchies into the bottom part of the cake.32. Use the remainder of the chocolate ganache to add the chocolate drip to the cake. See my tutorial for how to make a chocolate drip cake. It will have cooled off by now, so you’ll want to carefully heat it back up in the microwave.33. Add some mini marshmallows to the top of the cake and use a kitchen torch to toast them.34. Refrigerate cake until ready to serve. Cake is best when stored in an air tight container. Serve cool, but not cold and finish leftovers within 3-4 days.